
This story initially appeared throughout the Winter 2021 Topic of This Outdated House Journal.
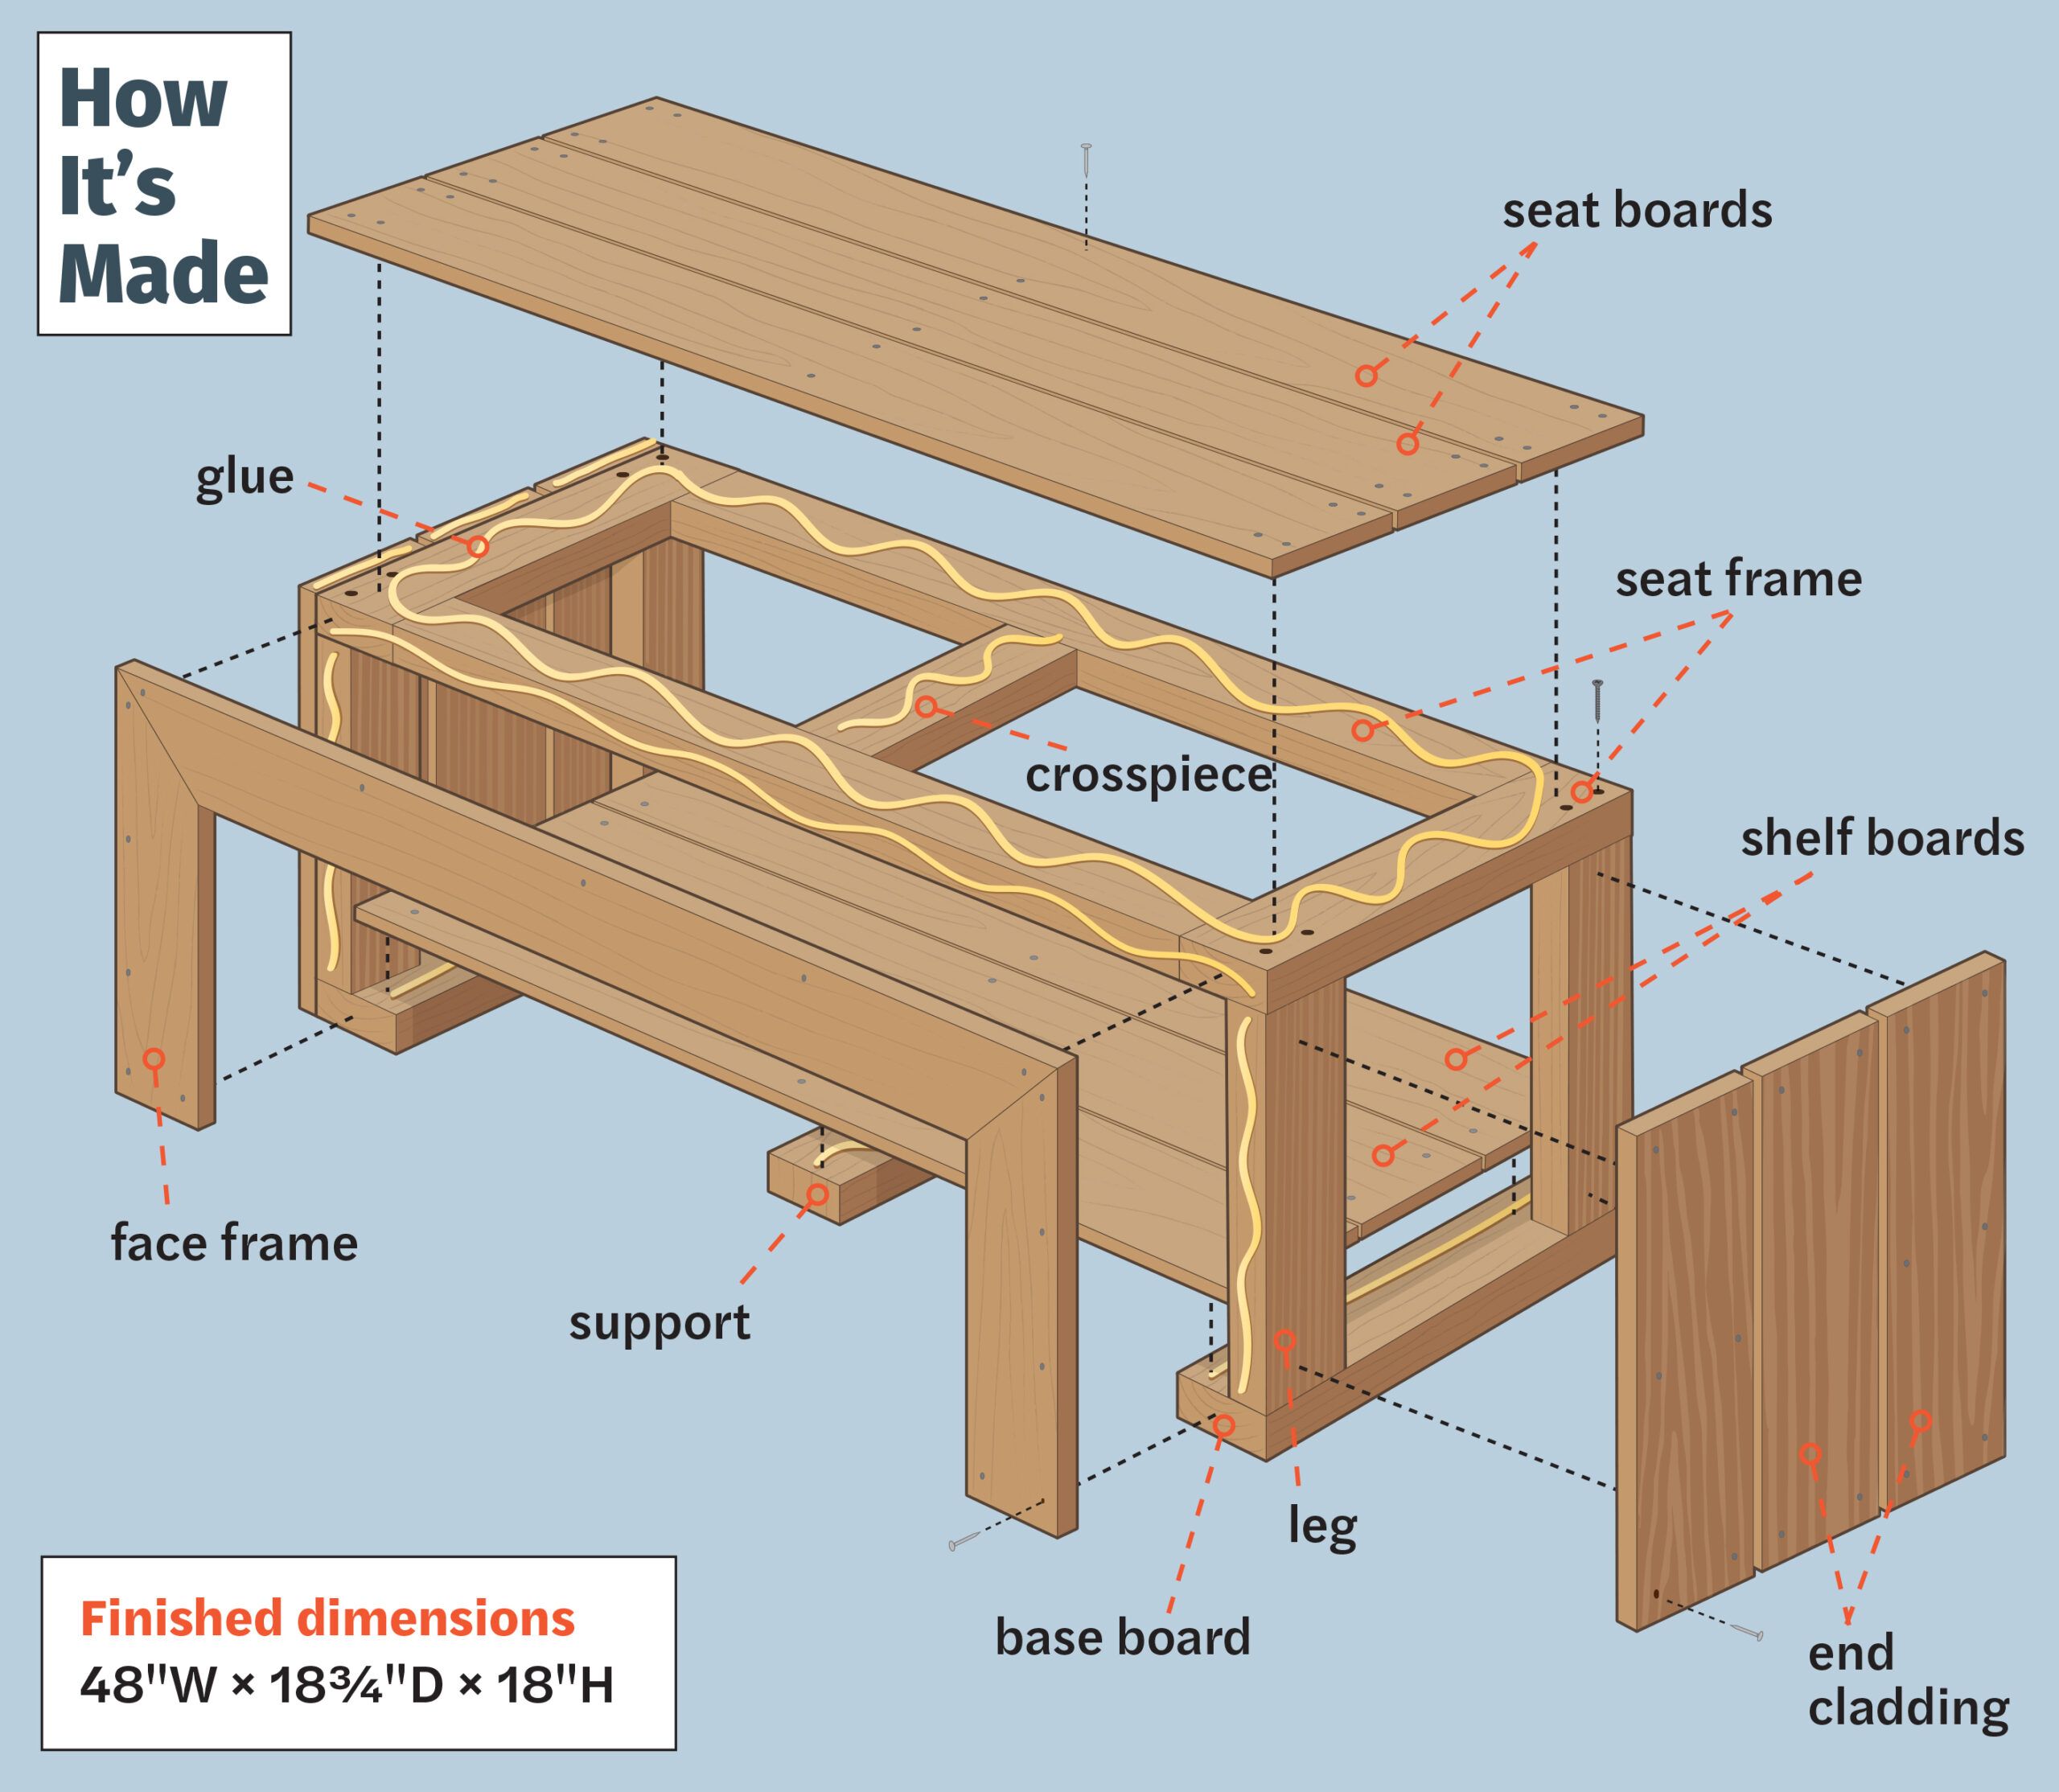
A picket hearth is a comfortable addition to any home, nonetheless regularly going exterior to get logs can dampen the mood. Developing a firewood storage bench solves this disadvantage by defending dry picket shut whereas providing a useful seat for eradicating your boots. Inside the video above, Jenn Largesse from House One demonstrates learn how to assemble a recent cedar bench with an open shelf for firewood storage. The design makes use of a mix of 2-by-4 boards for a sturdy physique and 1-by-6 boards for a beautiful exterior finish.
Provides and Devices Needed To Assemble a Firewood Storage Bench
Sooner than starting this endeavor, gather the following provides and devices:
Provides:
- 1 1/2-inch 18-gauge nails
- 2 1/2-inch stainless-steel pocket-hole screws
- 3-inch No. 10 stainless-steel deck screws
- Exterior picket glue
- 5 8-foot prolonged 1×6 cedar boards
- Three 8-foot prolonged 2×4 cedar boards
Devices:
- 6-inch square-drive bit
- 7/64-inch drill bit
- 18-gauge nailer
- Drill/driver
- Miter seen
- Orbital sander
- Pocket-hole jig
- Rafter sq.
Decrease Guidelines
- 1×6 legs (exterior): six @ 17 1/4 inches
- 1×6 excessive: three @ 48 inches
- 1×6 shelf: three @ 43 1/2 inches
- 2×4 physique (excessive and bottom): 4 @ 18 inches
- 2×4 seat physique help: two @ 39 1/2 inches
- 2×4 seat physique help: one @ 11 inches
- 2×4 physique (sides): 4 @ 14 1/4 inches
- 2×4 shelf help: one @ 15 inches
Cedar is an effective various on account of it’s naturally proof against rot, bugs, and local weather hurt. Nonetheless, it’s a clean picket and can current indicators of injury over time as firewood is loaded and unloaded.
Getting ready the Picket

Sooner than assembly, decrease the entire picket gadgets to the right sizes. This preparation leads to a clear setting up course of and a well-fitted final product.
- Use a miter seen to cut the cedar 2x4s and 1x6s in response to the decrease guidelines.
- Put apart an 8-foot 1×6 for the face physique.
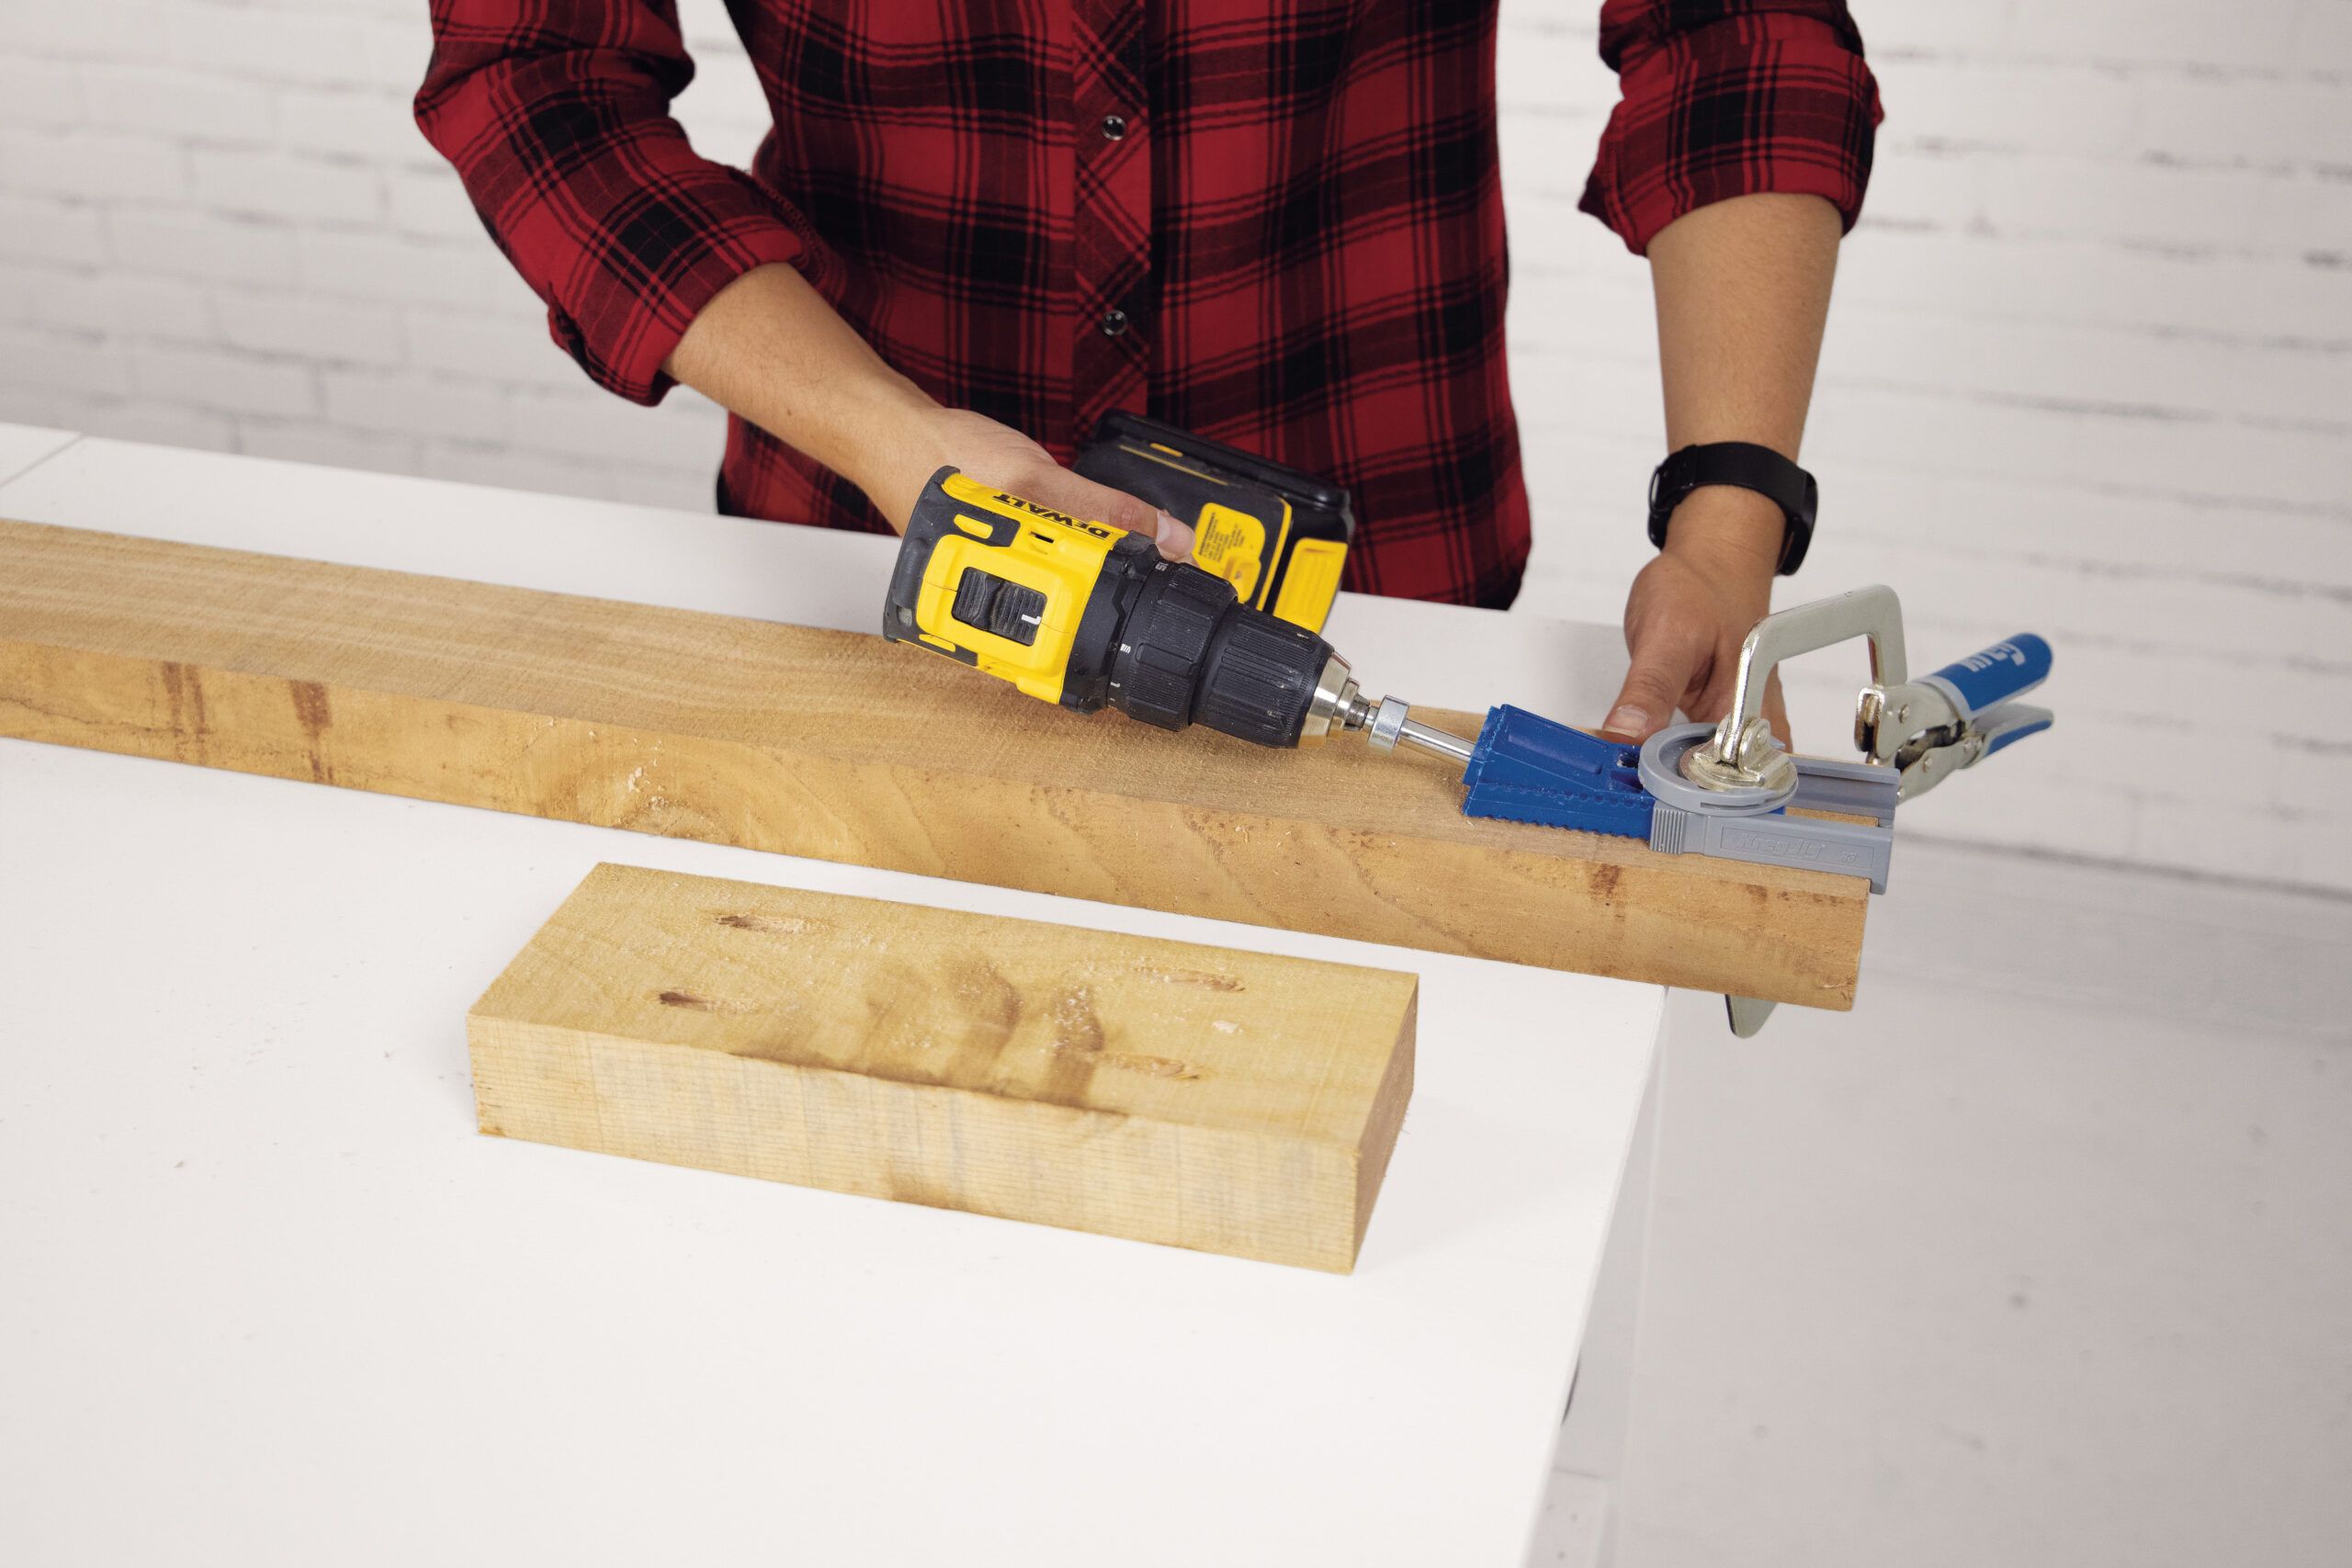
- Use a pocket-hole jig to drill two pocket holes into each end of the prolonged 2×4 seat-frame gadgets and the crosspiece.
Scroll down for an inventory of devices and provides for this endeavor.
Assembling the Physique
The physique varieties the backbone of your firewood storage bench, providing stability and building. Observe these steps for correct assembly:
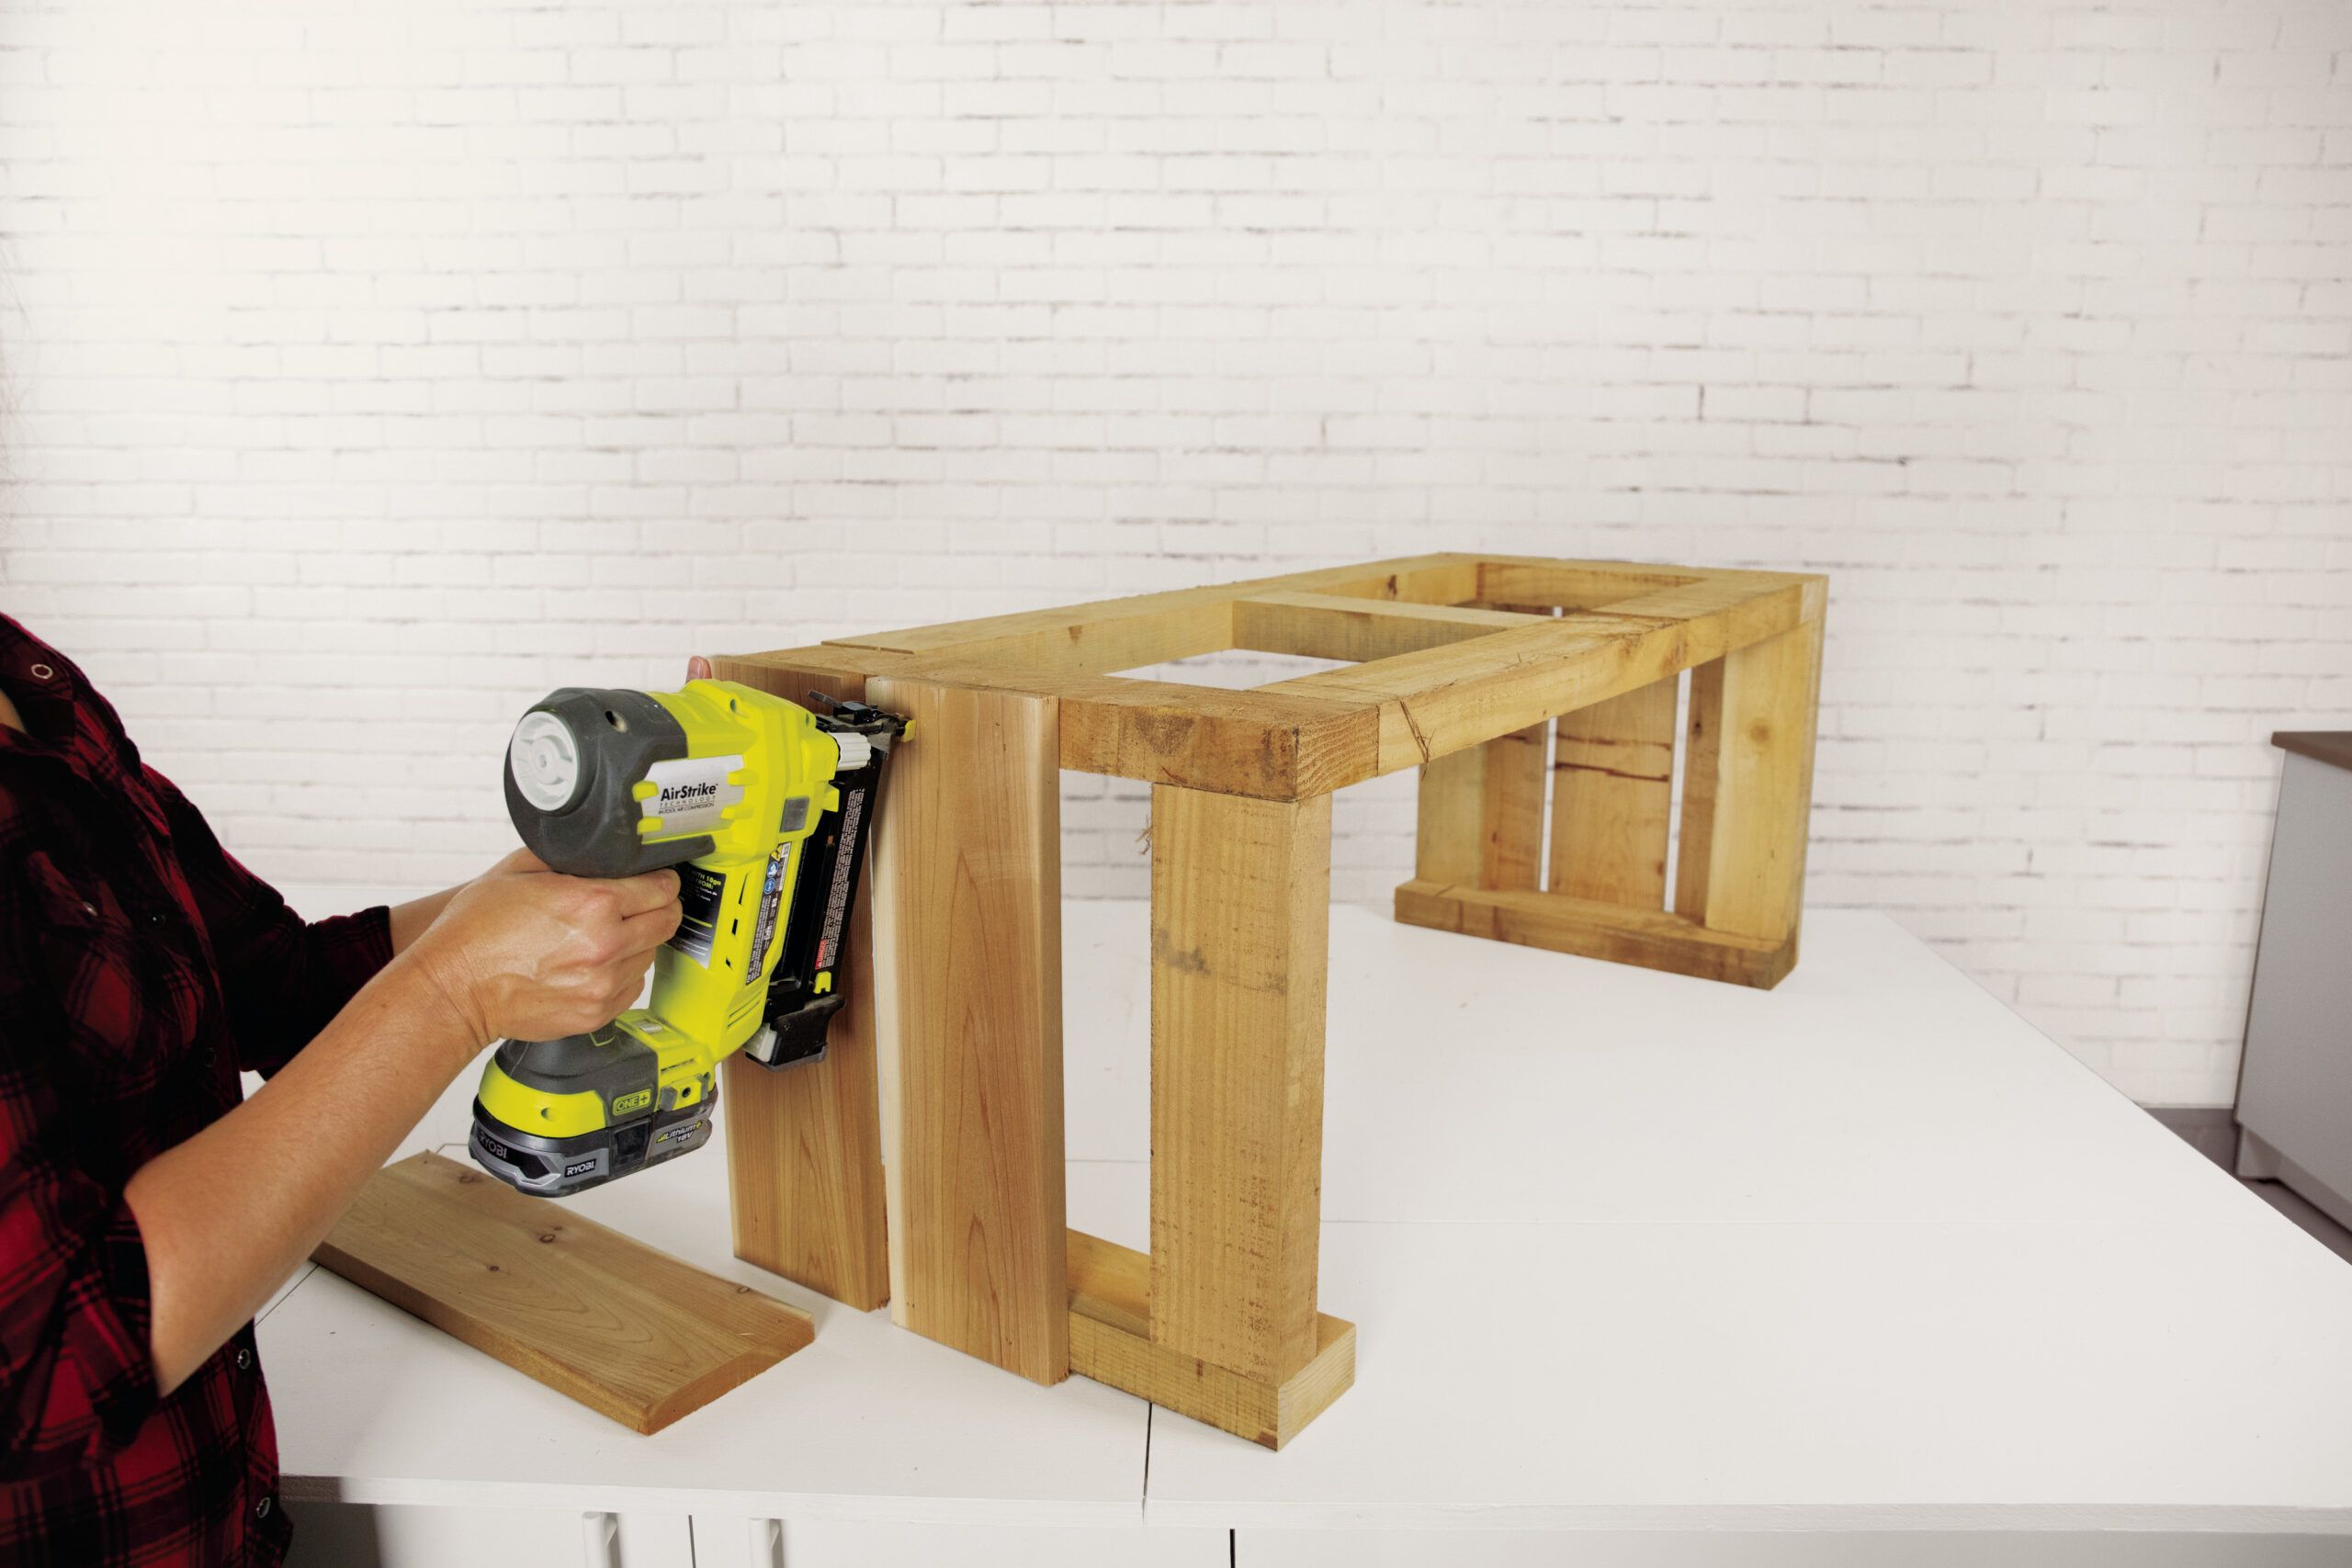
Developing the Legs
- Set a 2×4 base board on its edge and place two leg gadgets in opposition to it, facedown and aligned with the board’s ends.
- Apply glue to the legs’ ends, and drill two pilot holes by the underside and into the legs.
- Drive 3-inch deck screws into the pilot holes.
- Use a rafter sq. to look at that the elements are perpendicular.
- Repeat the strategy to assemble the second leg.

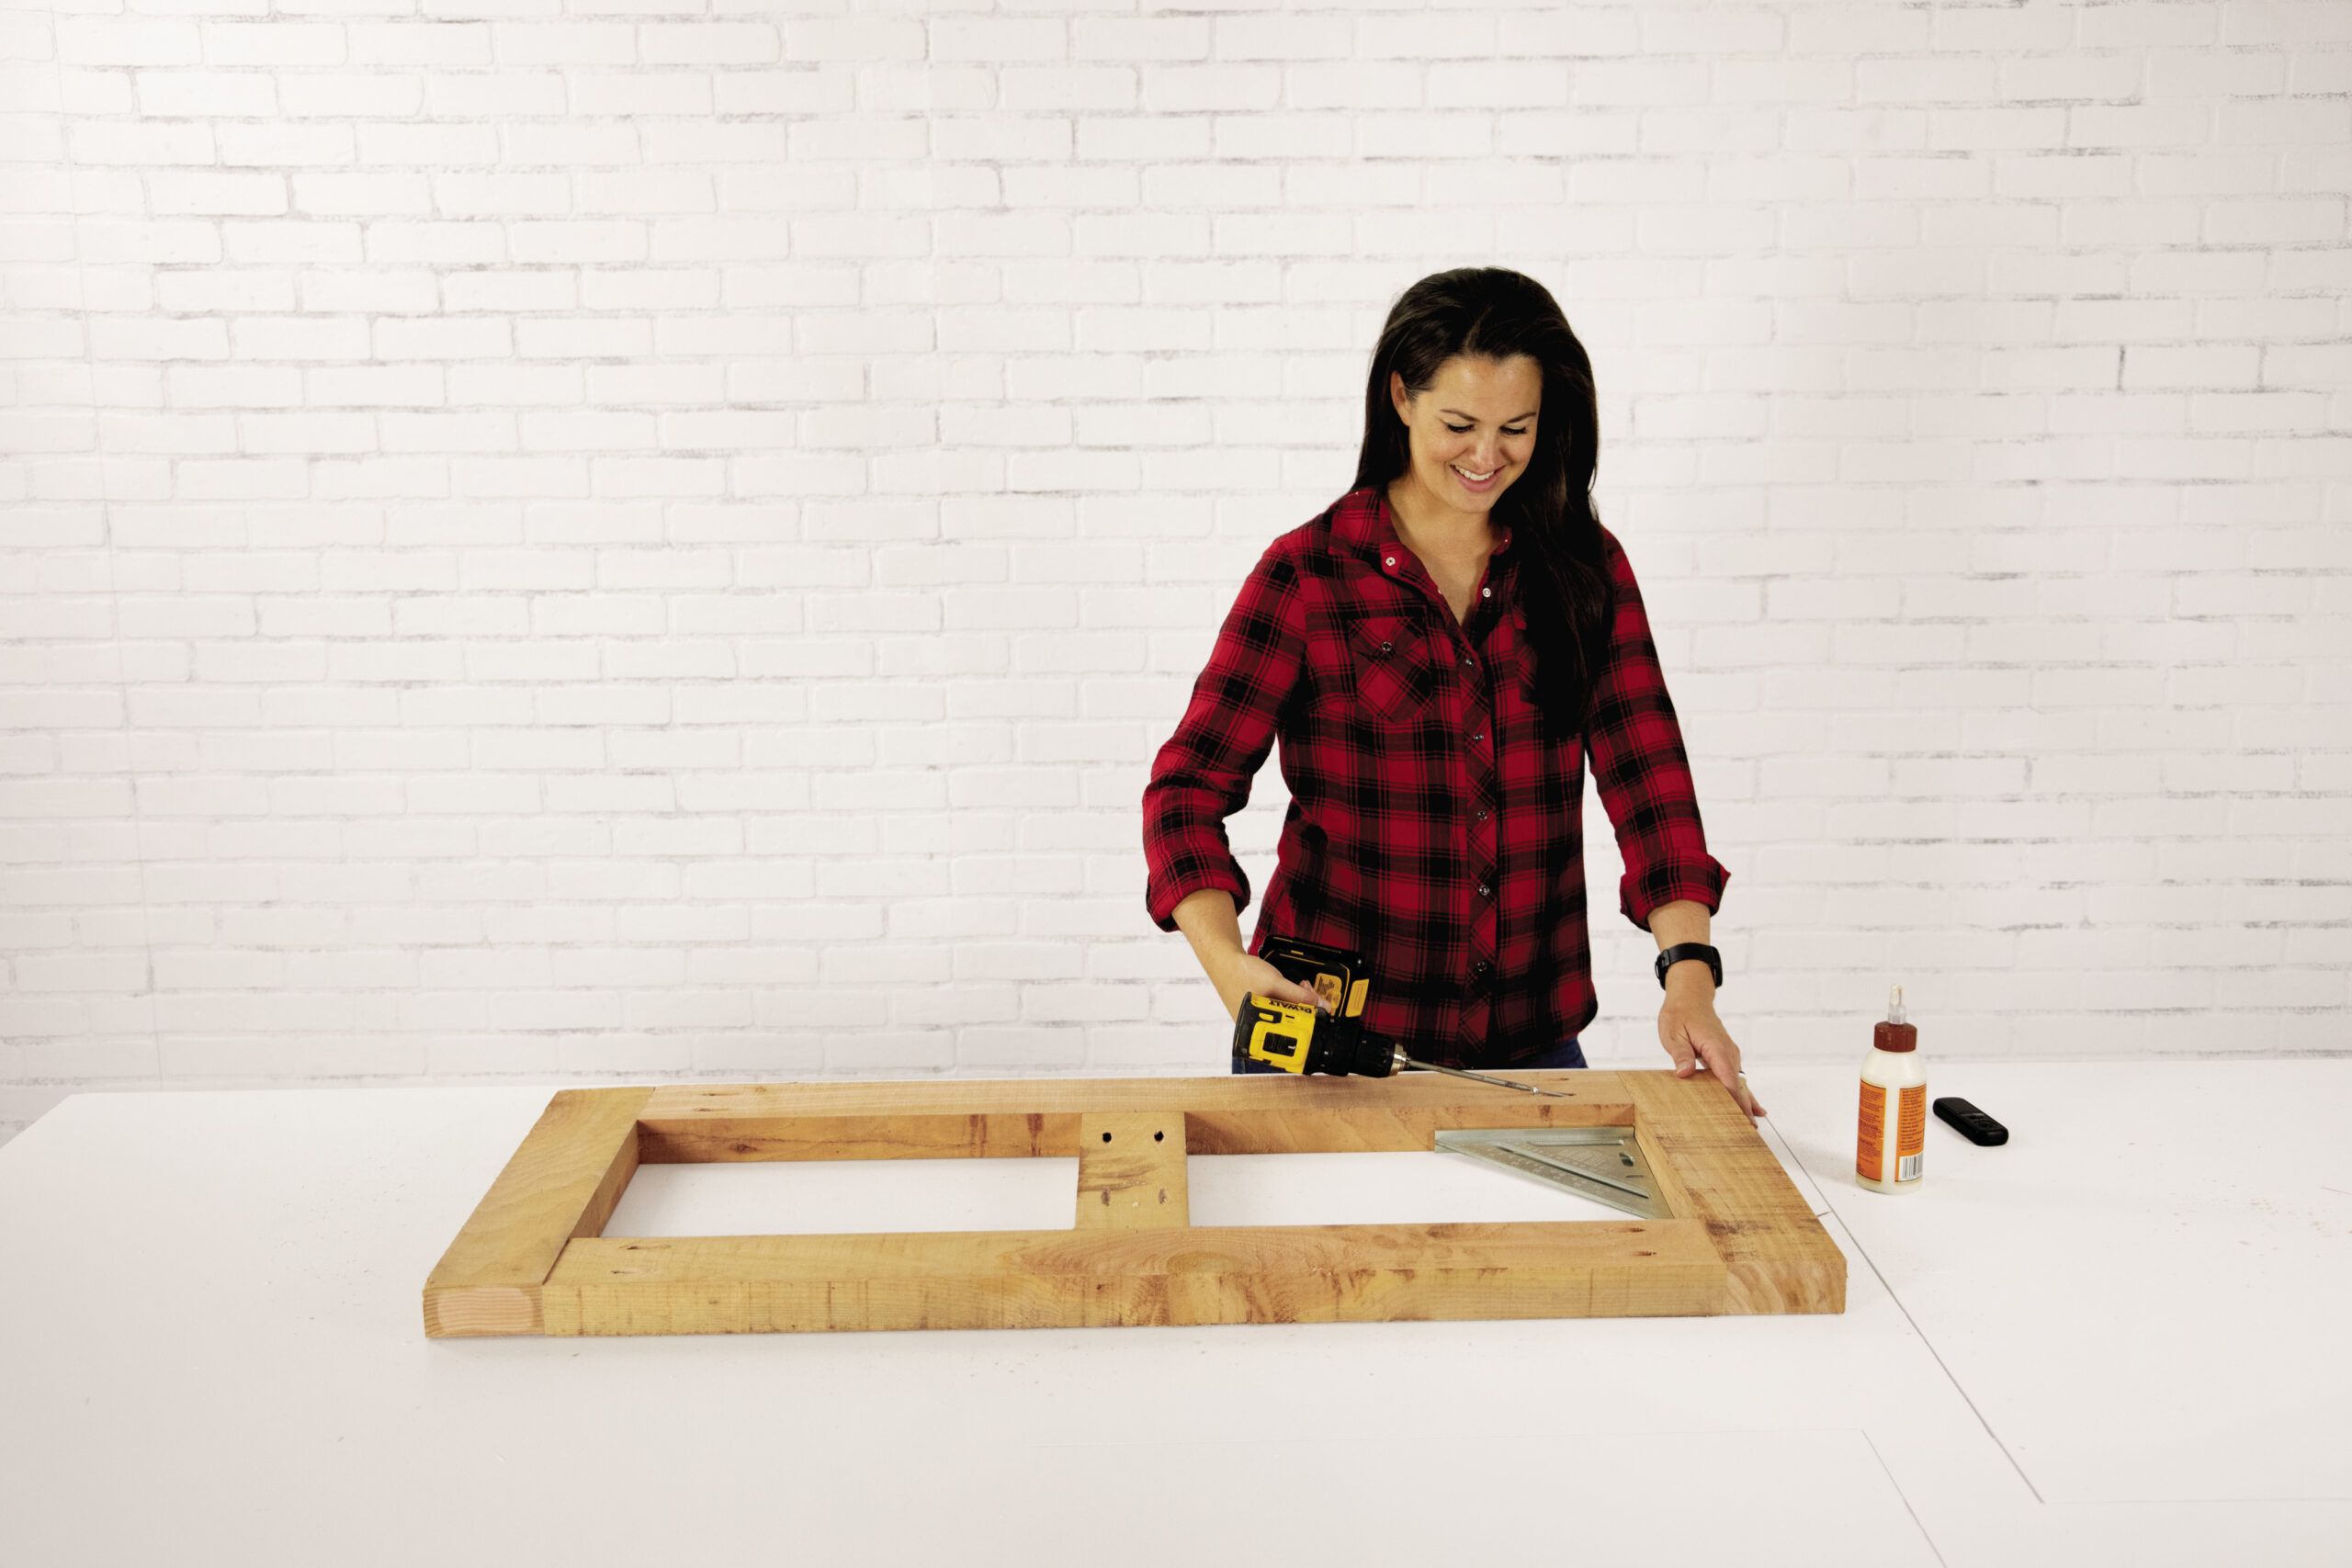
Organising the Prime Physique
- With the pocket holes coping with up, align and glue collectively the ends of the 2×4 seat-frame gadgets.
- Maintain them perpendicular with a rafter sq. and drive pocket-hole screws by the ends of the prolonged boards and into the highest boards.
- Center the 2×4 crosspiece and arrange it using glue and pocket-hole screws.
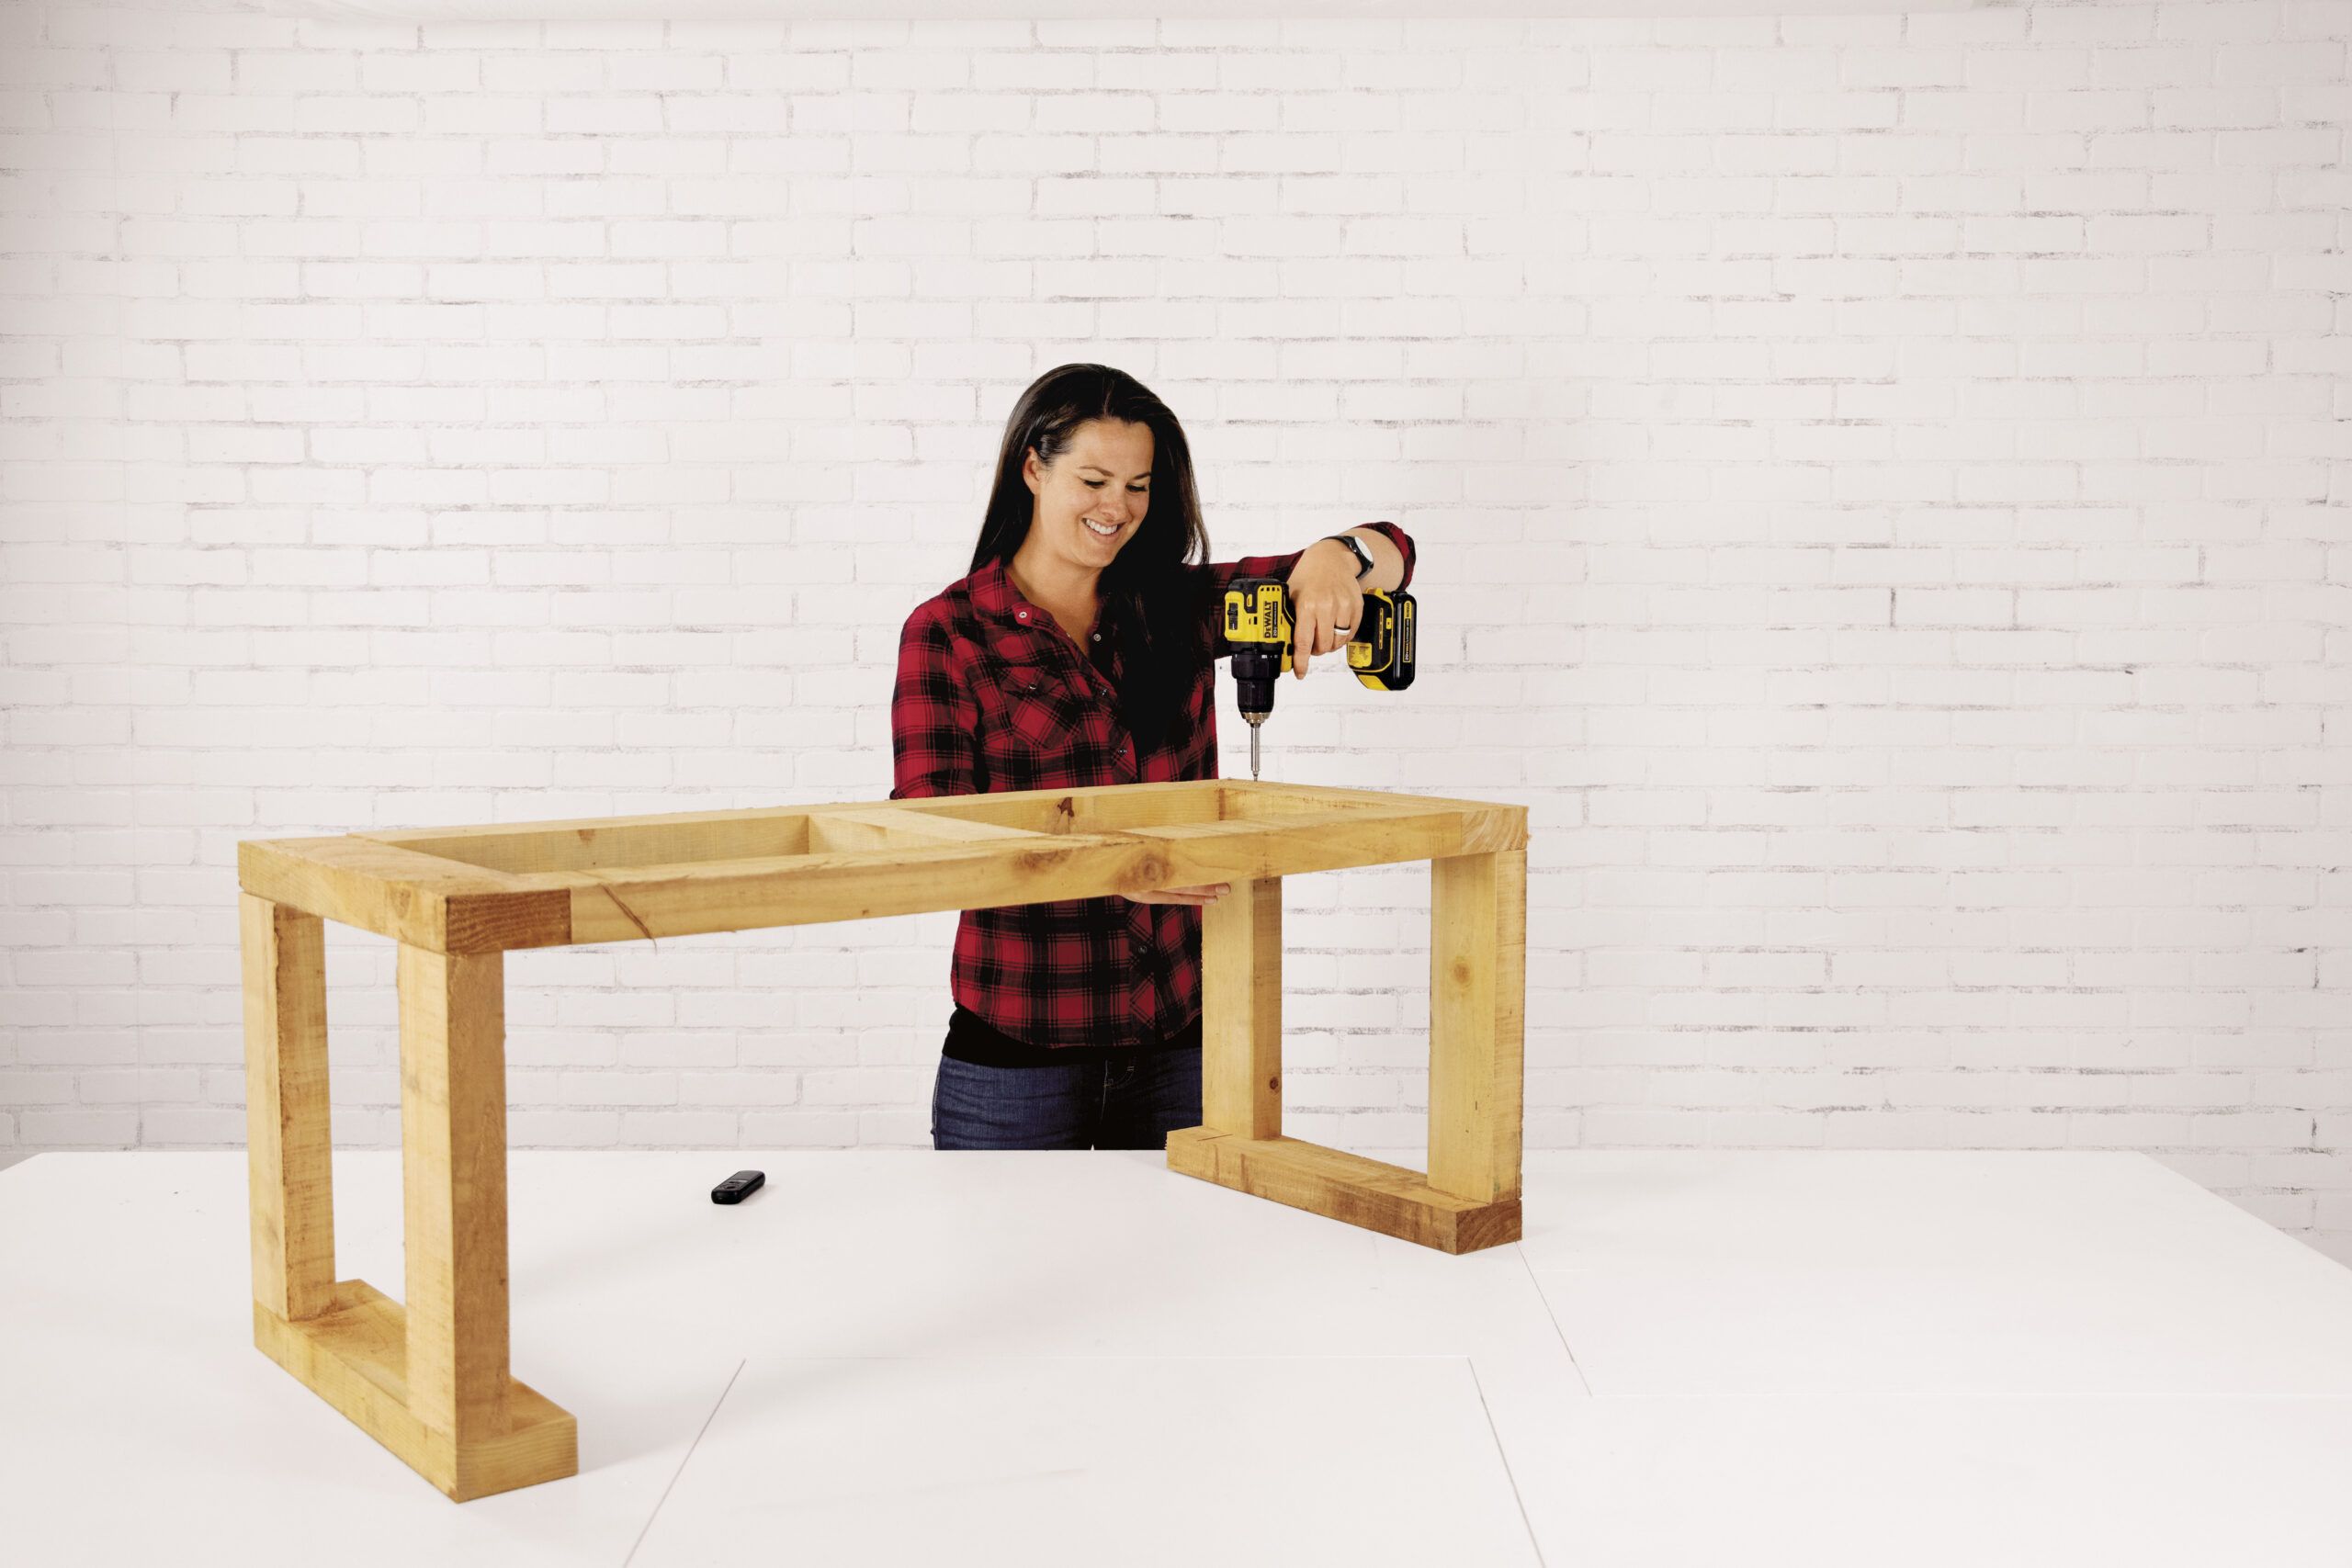
Connecting the Prime and Legs
- Stand the legs upright with the underside boards coping with inward.
- Apply glue to the tops of the legs and set the assembled seat physique on them, flush with their exterior edges.
- Drill two pilot holes by the seat physique and into the very best of each leg.
- Fasten the seat to the legs with deck screws pushed by each pilot hole.
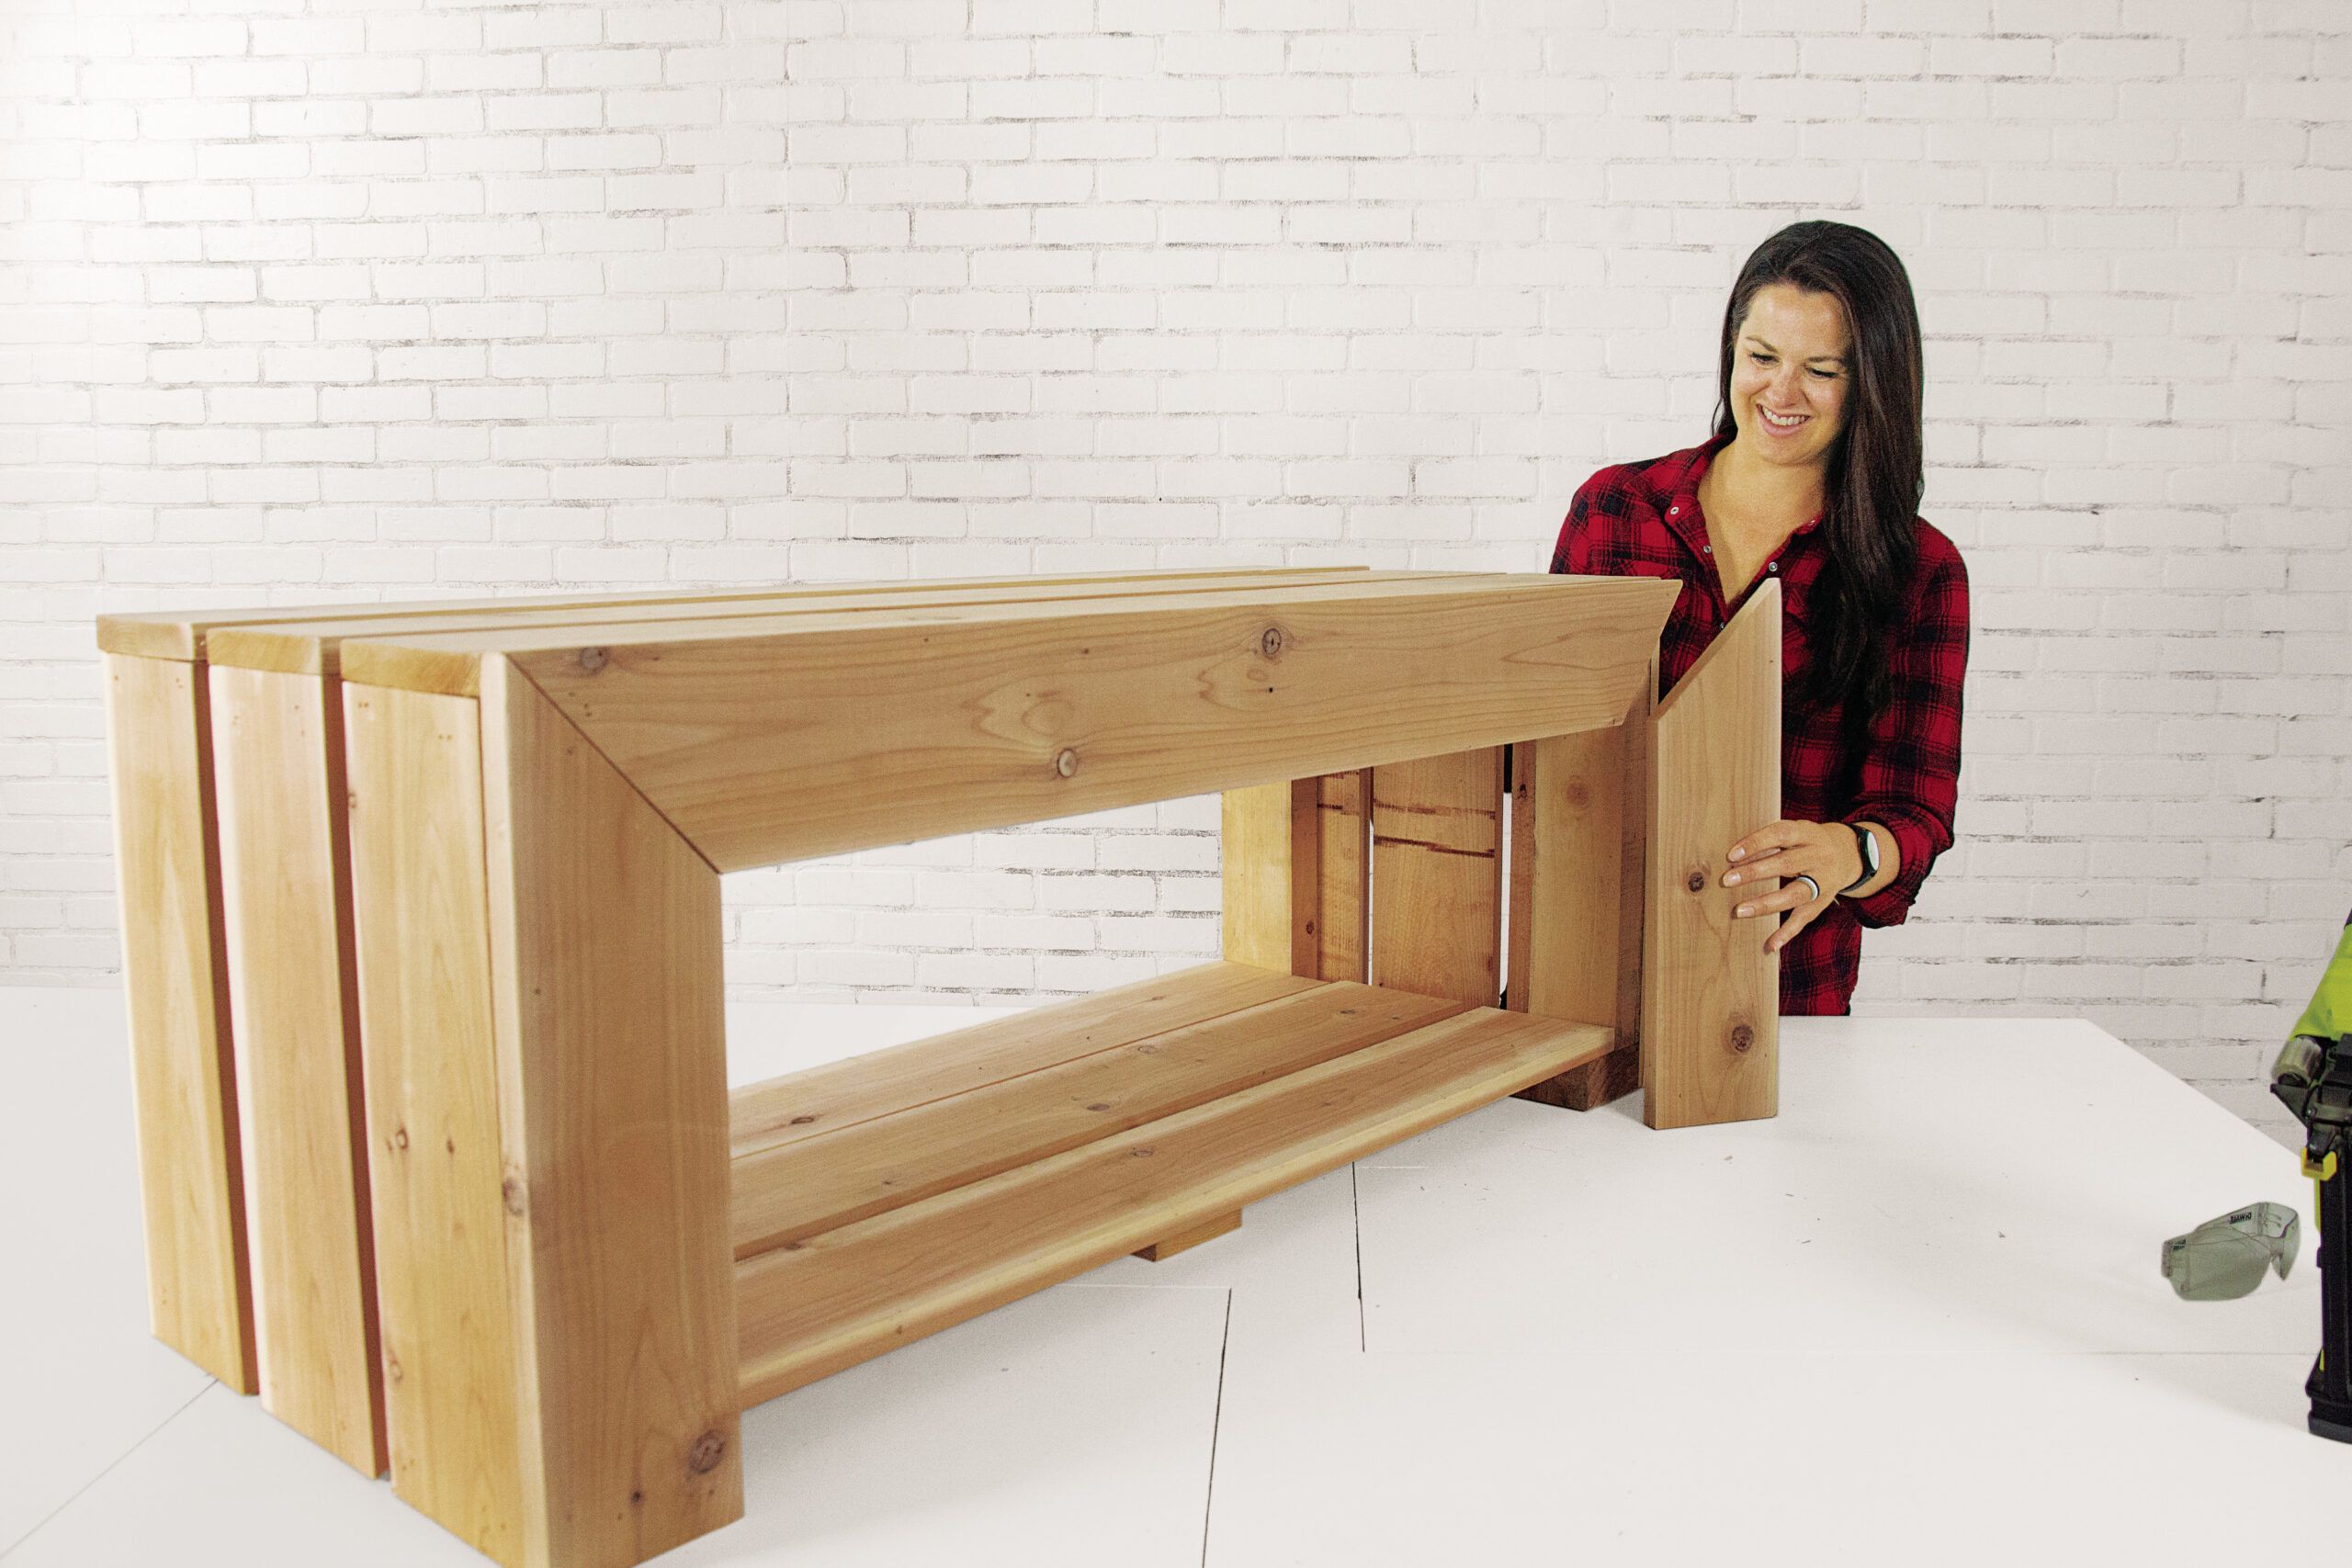
Together with the Cedar Cladding
The cedar cladding affords the bench its accomplished look and protects the physique from the climate. Proper right here’s learn how to attach it.
Cladding the Ends
- Apply glue to a minimum of one face at each end of the 1×6 cedar cladding.
- Place one vertically in opposition to the physique, flush with its once more edge, and secure it with 1 1/2-inch nails.
- Use a 3/4-inch-thick spacer to set a second 1×6 in opposition to the first one and nail it to the physique.
- Nail the third end piece flush with the doorway edge.
- Repeat on the bench’s totally different end.
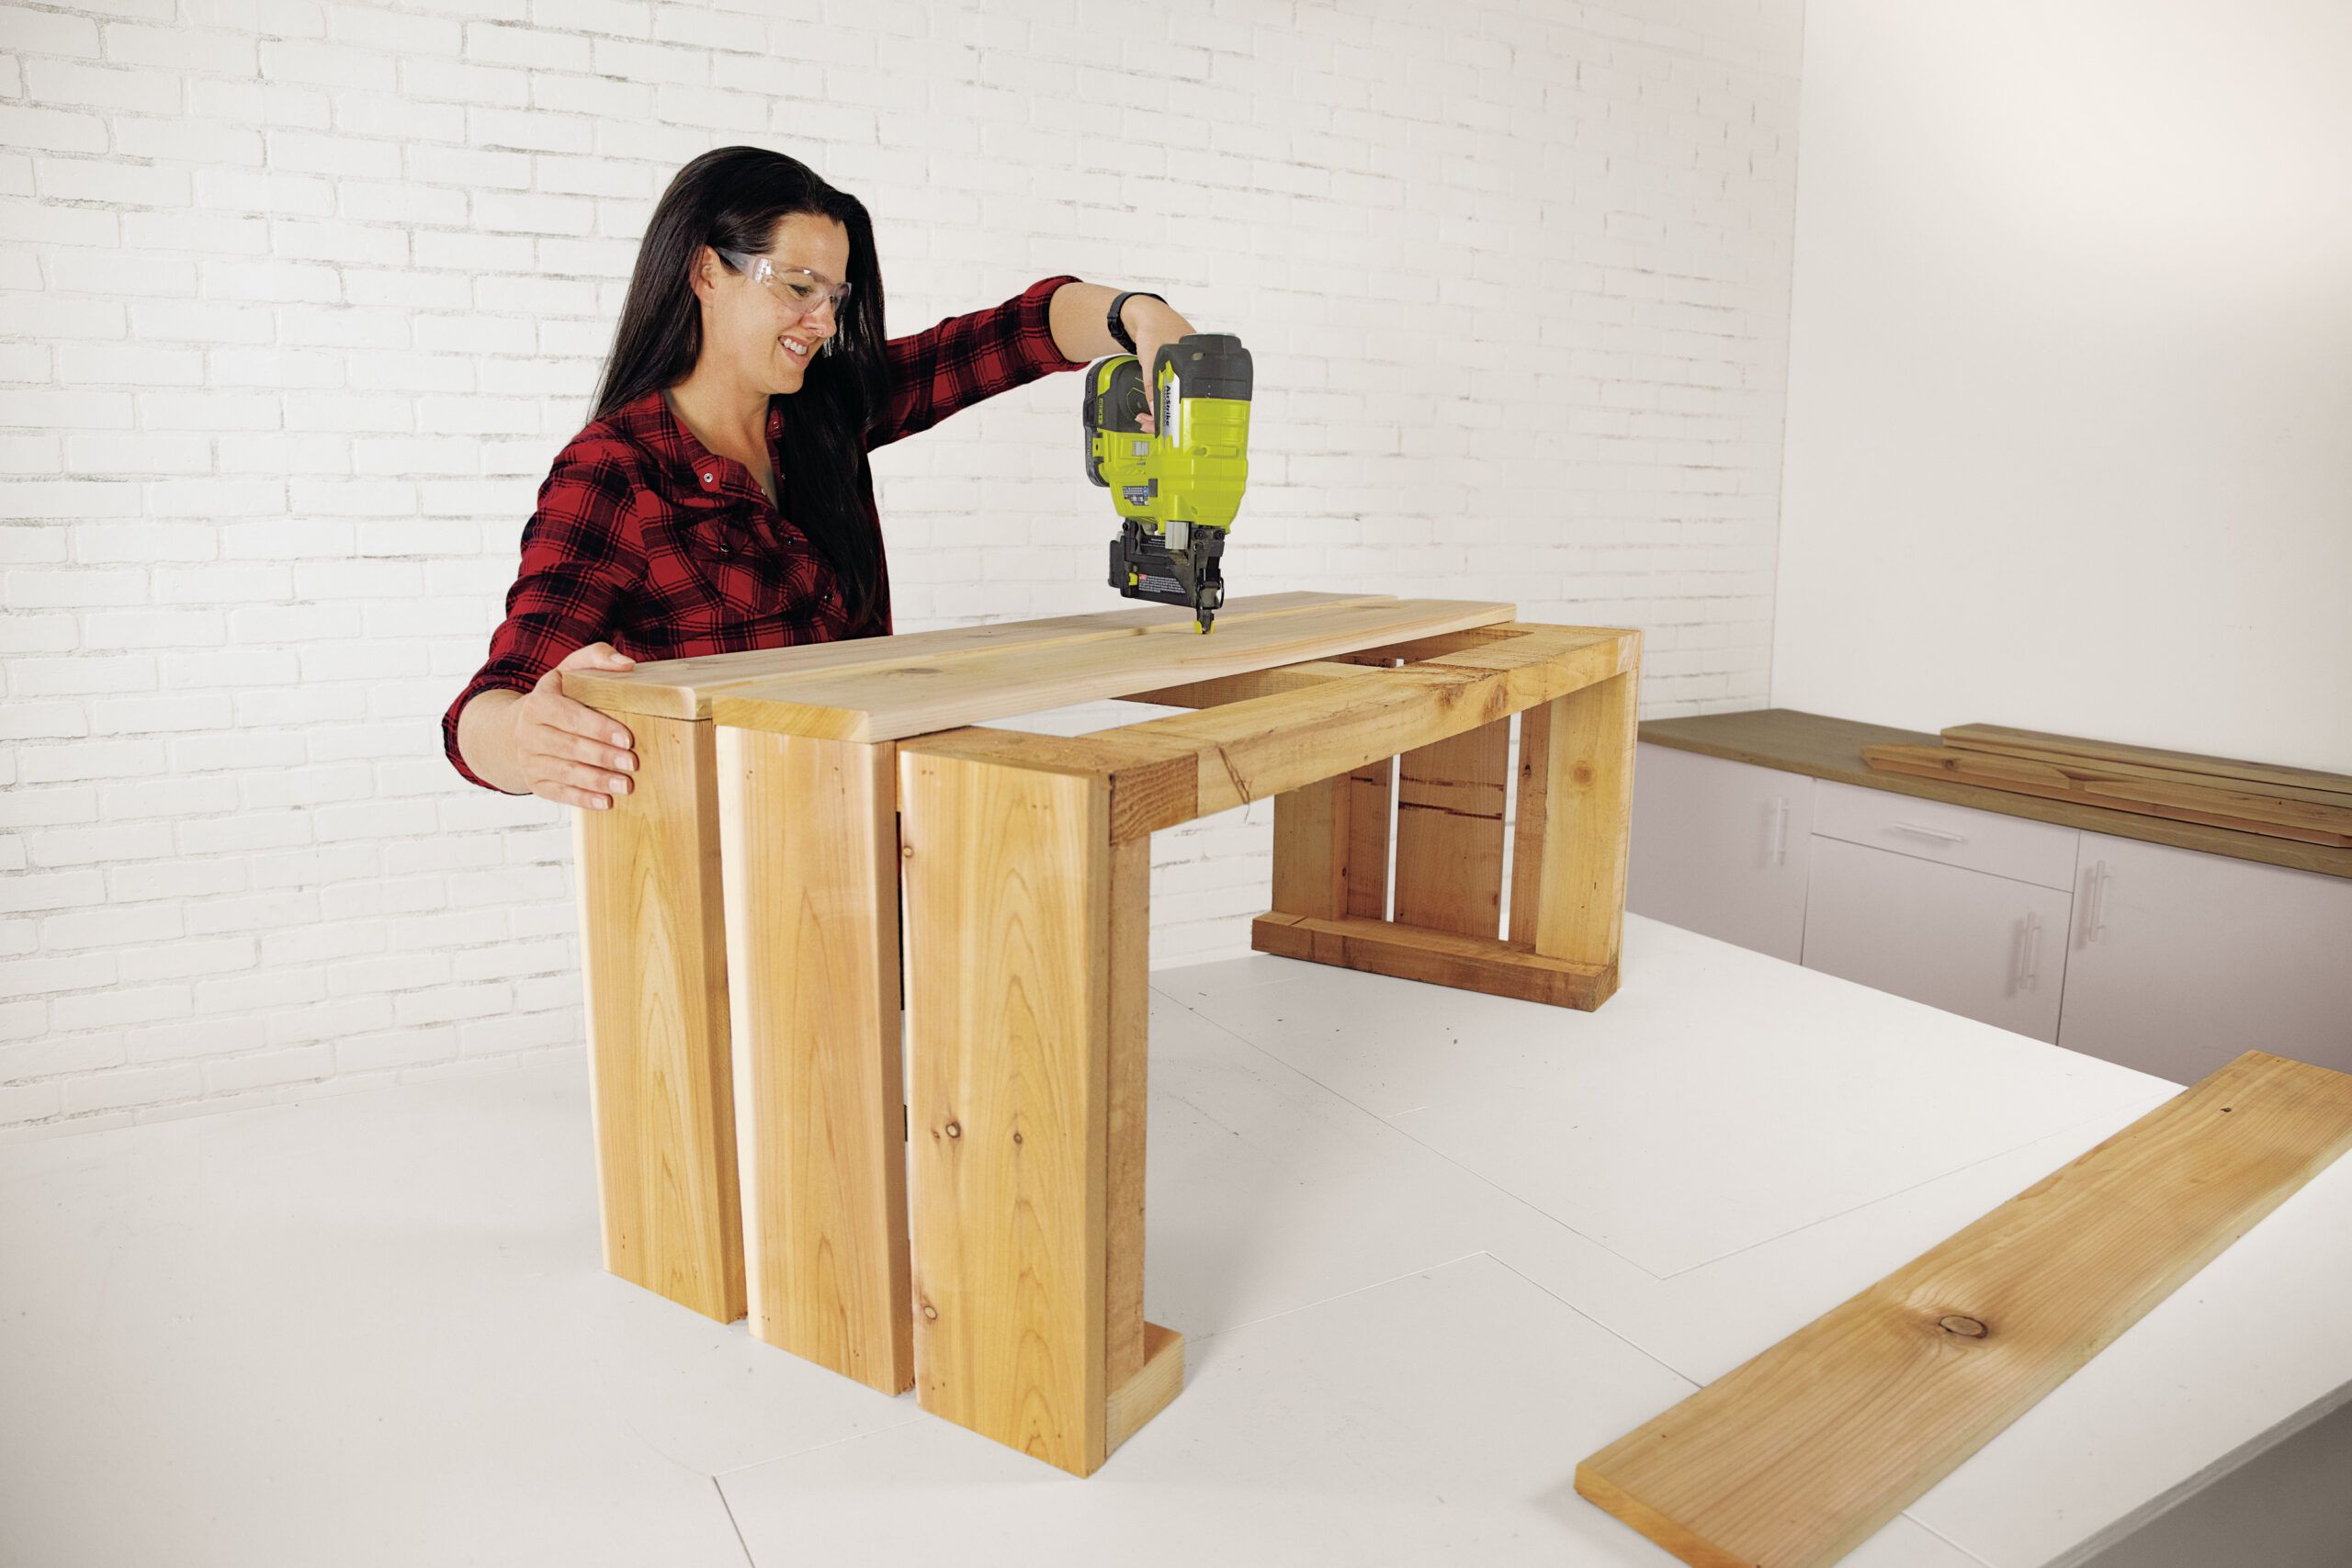
Creating the Seat
- Apply glue to the physique’s excessive and the highest cladding.
- Place the first cedar seat board flush with the doorway edge, overlaying the highest cladding.
- Drive nails by the seat board into the highest cladding and the physique.
- Use 3/4-inch spacers to nail the next seat board parallel to the first one.
- Nail the ultimate board flush with the physique’s once more edge.
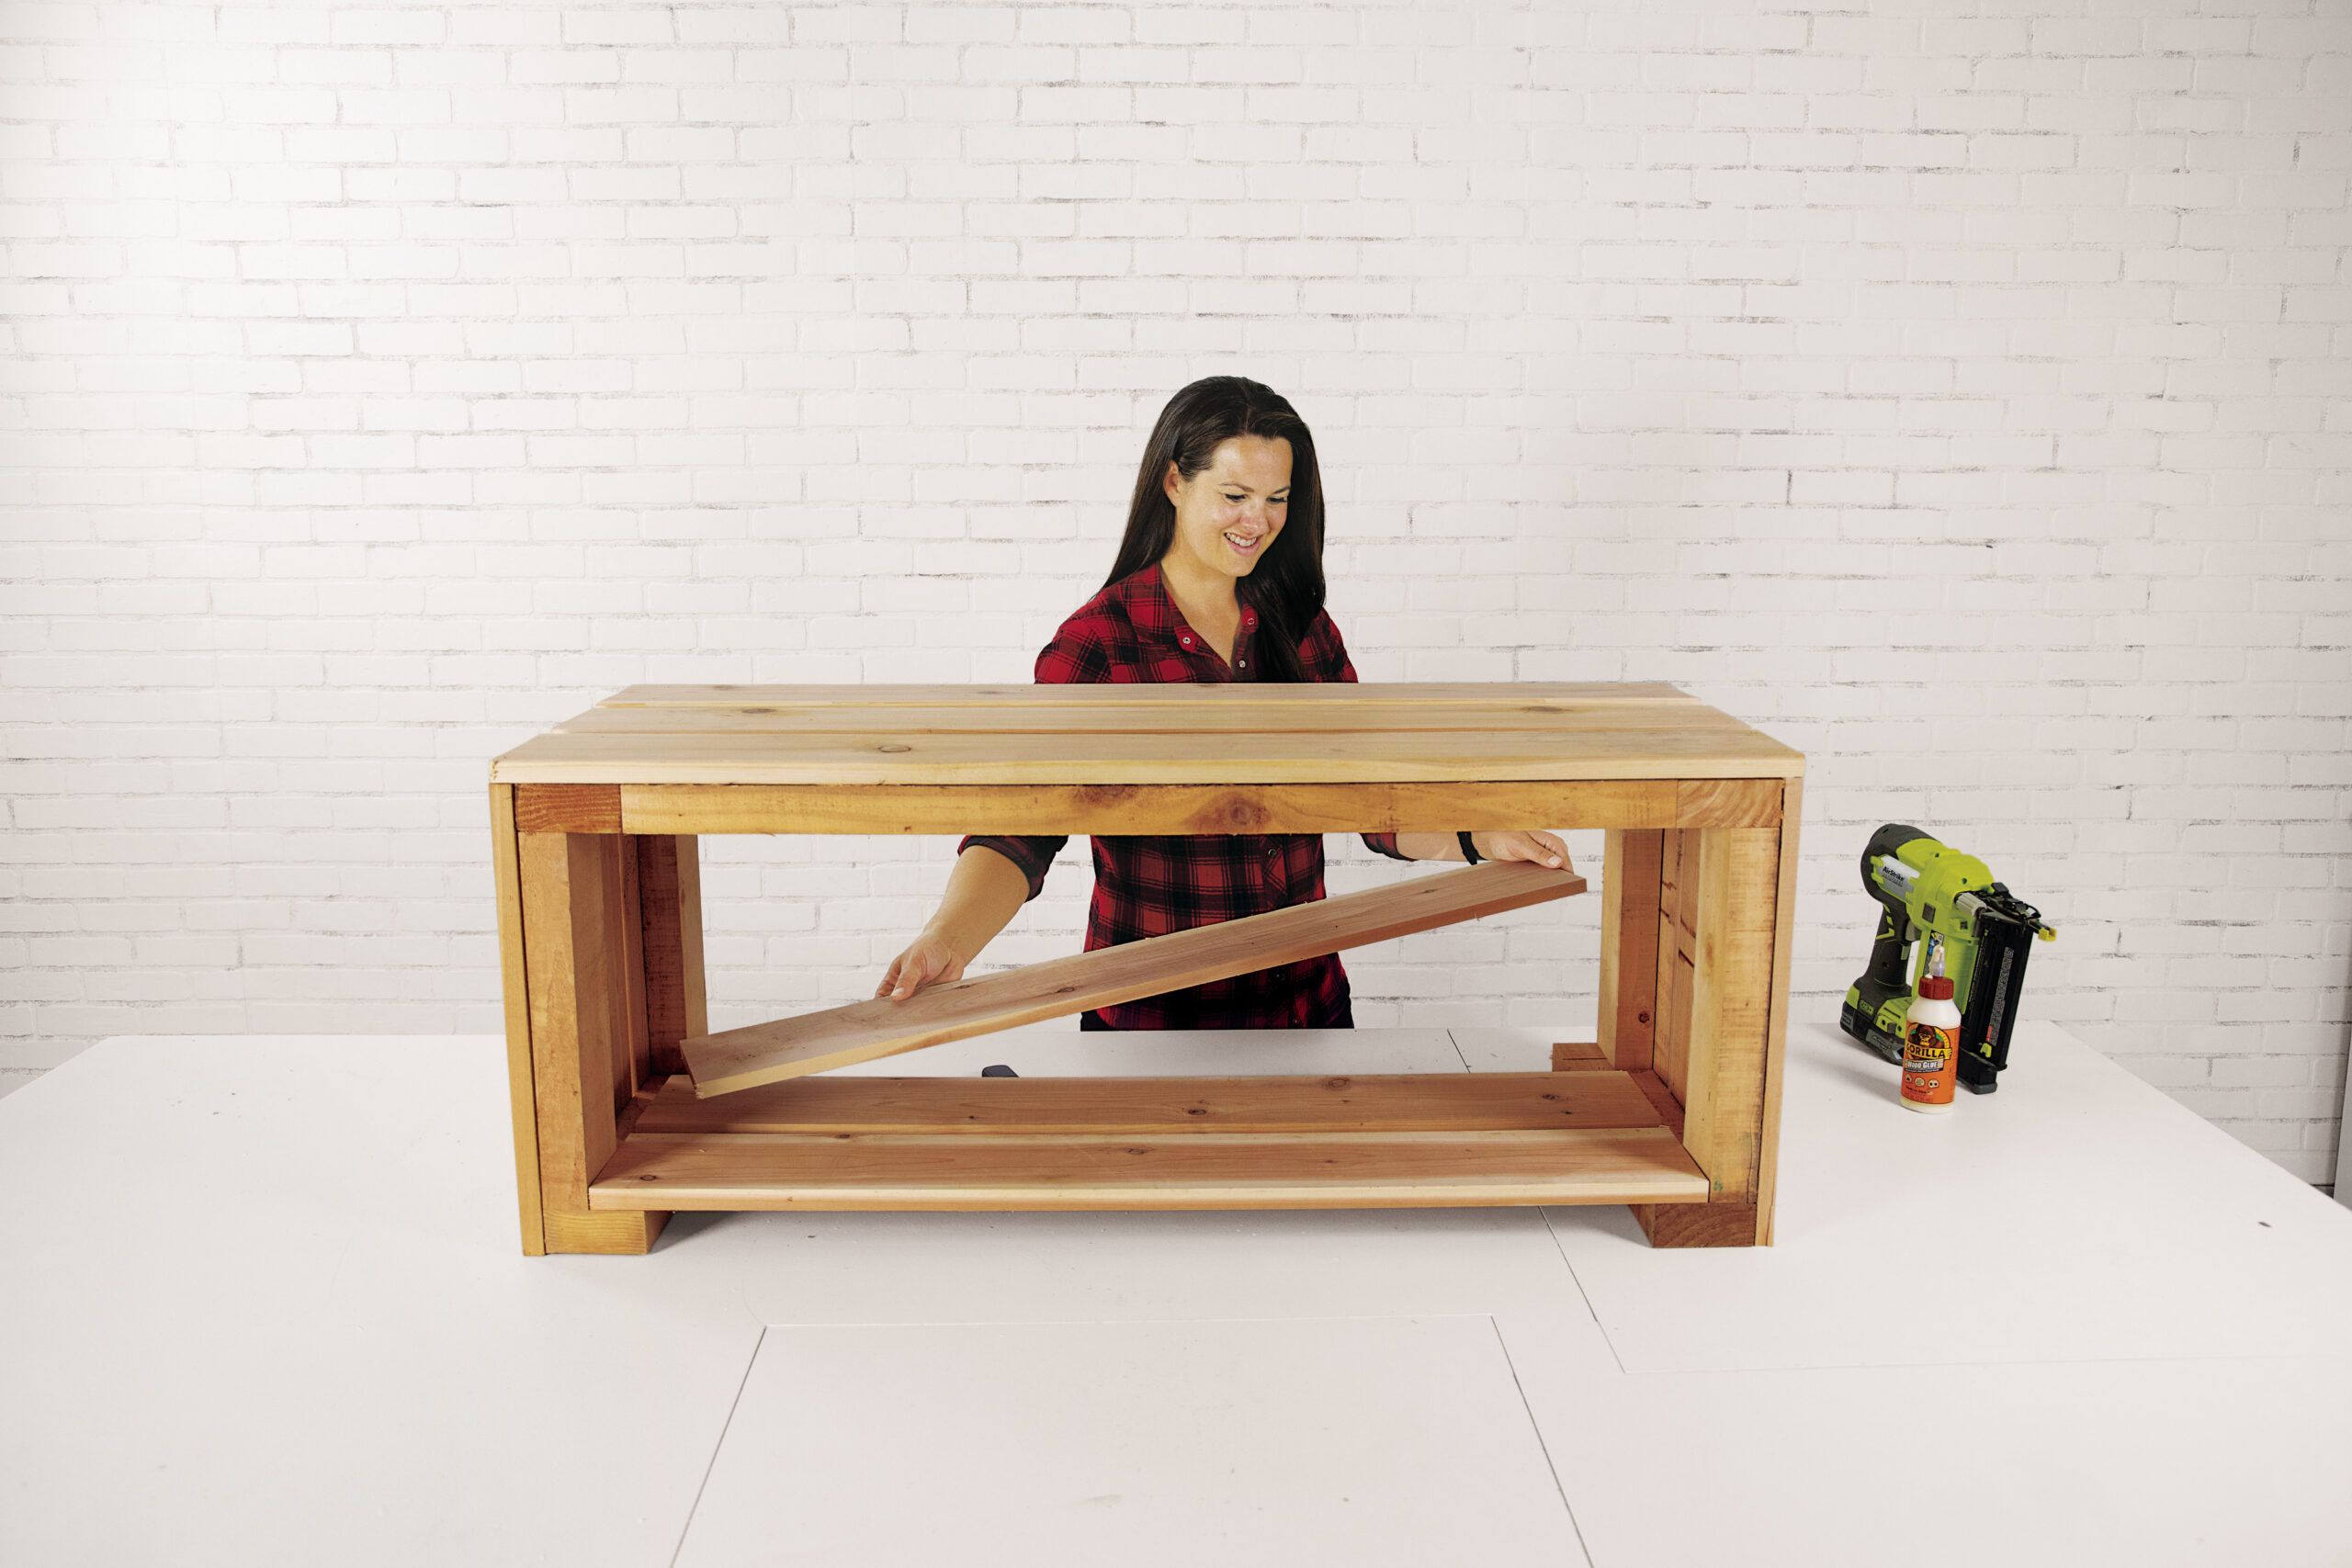
Placing within the Shelf and Help
- Apply glue to the baseboard’s face.
- Mattress the shelf ends throughout the glue, centering the middle board and positioning the front and back ones flush with their respective physique edges.
- Nail the shelf boards to the baseboard.
- Apply glue to the very best face of the 2×4 help.
- Center it and set its end flush with the physique’s once more edge, then nail the shelf boards to it.
Attaching the Face Physique
The face physique affords the bench a cultured, accomplished look. Proper right here’s learn how to attach it:
- Miter one end of each vertical 1×6 face-frame piece and every ends of the horizontal face-frame.
- Apply glue to the physique’s entrance edges, cedar seat board, and cladding.
- Nail the gadgets to the physique, flush with the seat’s excessive edge and the legs’ exterior ends.
Inside the video, Largesse mentions ripping the face physique boards barely narrower to create an even bigger opening for the firewood. That’s an elective step that you’ll be able to do with a desk seen if desired.
Ending Touches
To complete your firewood storage bench, take these steps:
- Sand any powerful edges or surfaces with an orbital sander.
- Apply a weather-resistant finish if desired to protect the picket extra.
- Let the bench dry totally.