
This DIY shoe dresser makes compact storage with tilt-out bins, and a helpful prime drawer for additional storage. Whereas the outer subject is constructed from 1×12 boards, the drawer, bins and faces area all constructed from plywood that could be merely cut back into strips with a spherical seen (or by an affiliate on the homecenter!). For the inside, we used a half sheet of ¾-inch birch plywood, whereas I upgraded to walnut-veneer plywood for the faces to create a midcentury-style mix contrasting with the white paint.
(Phrase: the {photograph} and mission depict bins barely shorter than the exact shoe cabinet plans. Title it a live-and-learn. The taller bins throughout the plans add merely enough peak to additional comfortably match heels and males’s sneakers.)
GET THE FREE PLANS AND CUT LIST“,”label”:”Acquire the Plans”,”url”:”https://cdn.vox-cdn.com/uploads/chorus_asset/file/19928482/DIY-Shoe-Dresser-by-House-One-Acquire.0.pdf”}’>
Steps for developing a shoe dresser:
Step 1: Prep the cabinet objects

Using the cut back file throughout the downloadable plans above and a miter seen or spherical seen, cut back two 1x12x6 boards (exact dimensions ¾” x 11 ¼”) into the cabinet’s two sides, prime and bottom. Using a spherical seen and miter seen, cut back the remaining objects from a half sheet of ¾-inch-thick plywood—Keep in mind, this may be cut back into manageable strips with a spherical seen or on the retailer. Using a pocket hole jig, drill three pocket holes in each end of the best, bottom, and shelf objects.
Step 2: Assemble the cabinet subject
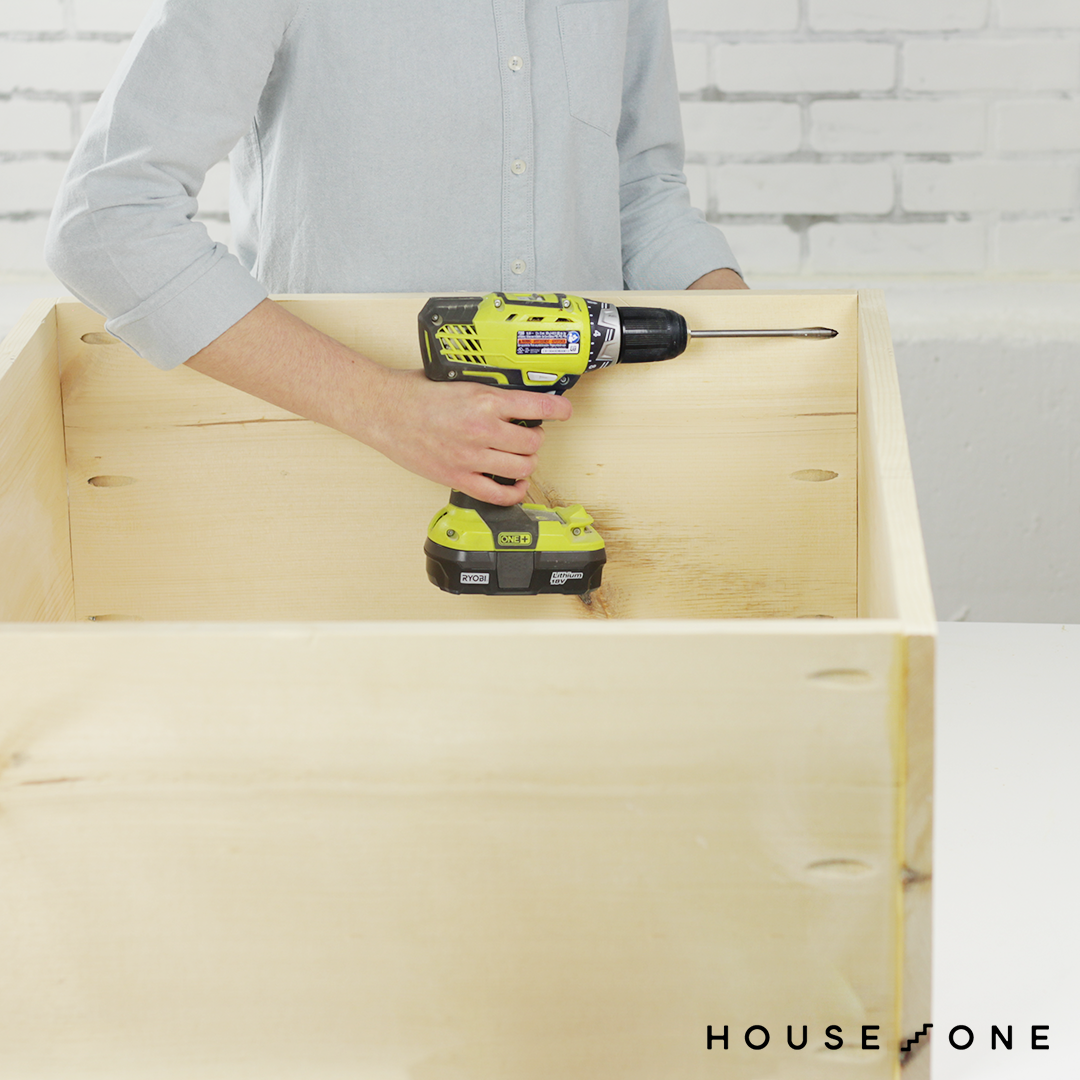
Coping with downward, apply picket glue to the edges of the best and bottom boards, after which clamp them into place using an prolonged bar clamp, nook clamp, or correct angle clamp. Secure the best and bottom boards flush with the ends of the perimeters using a drill/driver and 1¼-inch pocket hole screws. All via the assembly, use a velocity sq. or framing sq. to check the sphere for sq. and make modifications as wished.
Step 3: Mark the height of the cupboards
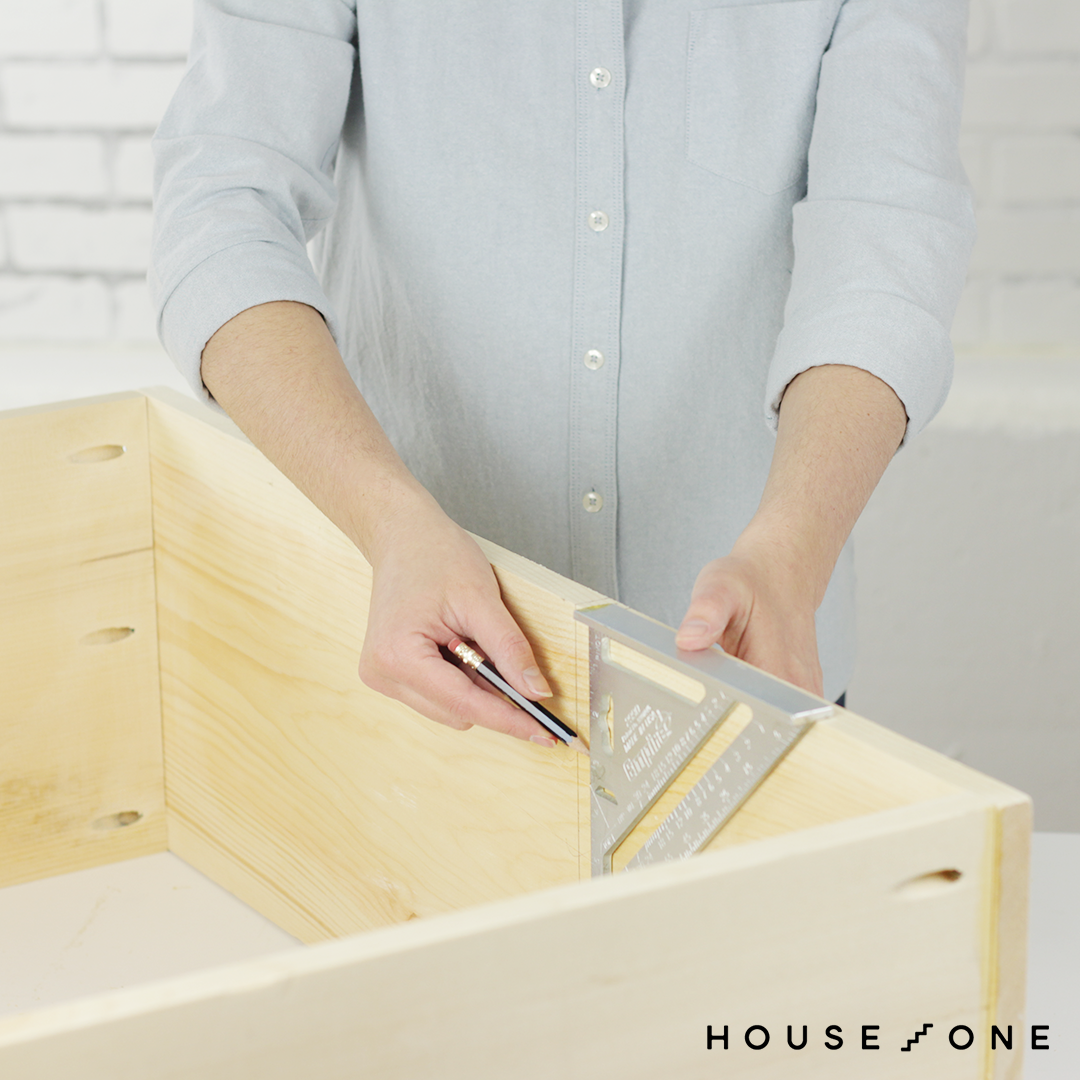
On the doorway edge and alongside the inside wall of the perimeters, mark the height of the cupboards at 15-inches and 30-inches from the underside fringe of the cabinet subject. The reference line on the doorway edge guides the place, whereas the street on the inside retains the shelf stage (from entrance to once more).
Step 4: Arrange the cupboards
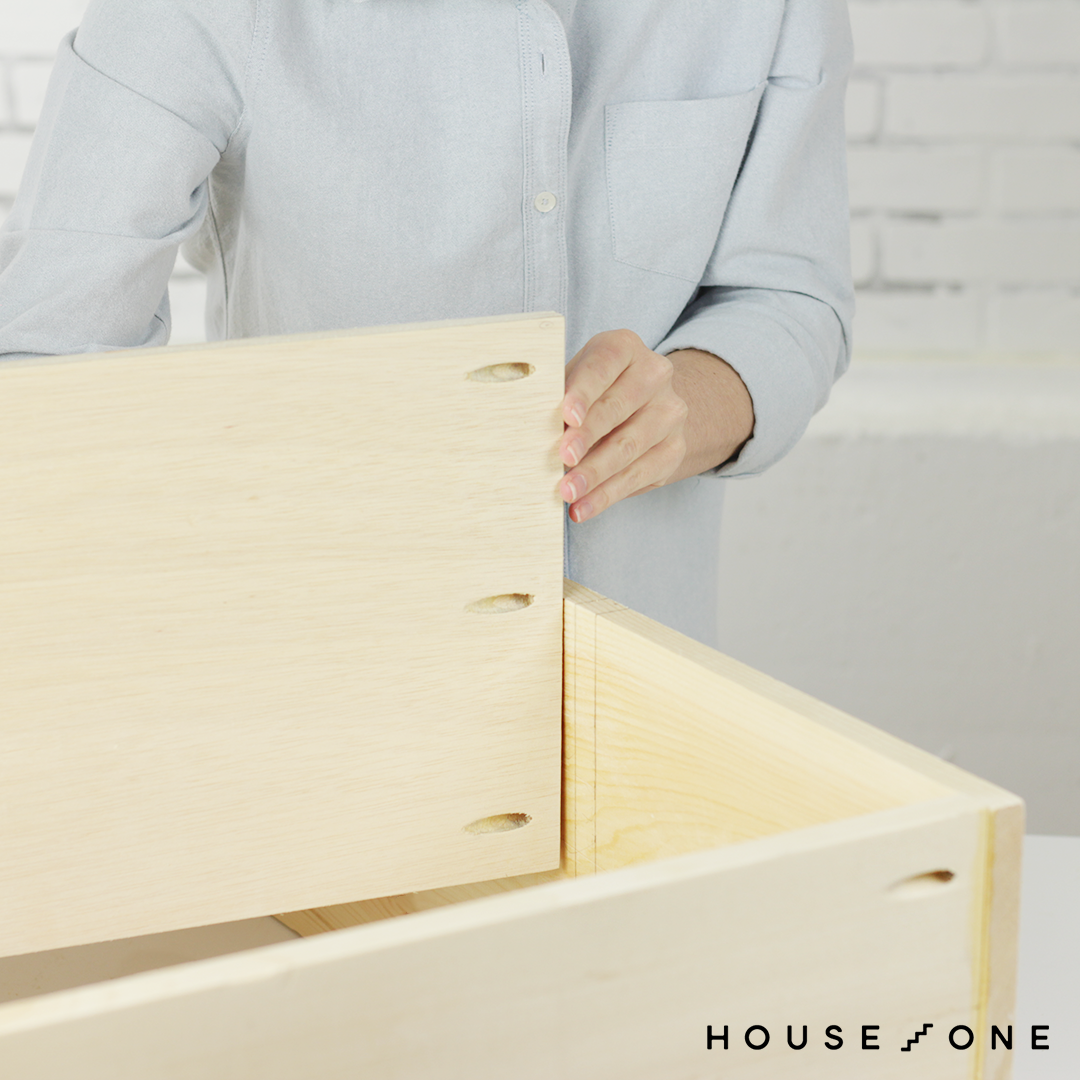
Apply picket glue to the ends of the cupboards, after which place them in place above the reference marks and options made in step three. Secure the cupboards using a drill/driver and 1¼-inch pocket hole screws.
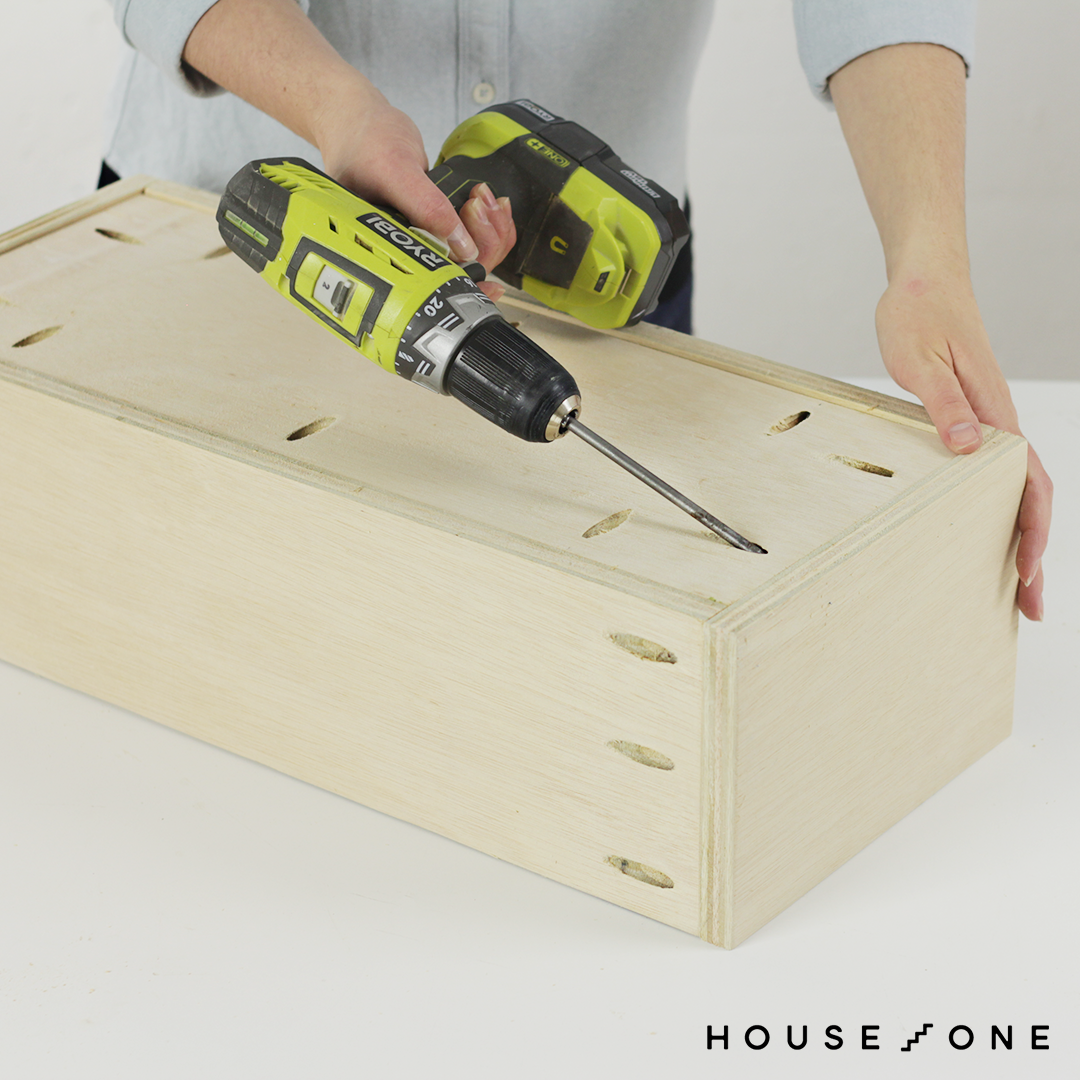
Step 5: Assemble the drawer subject
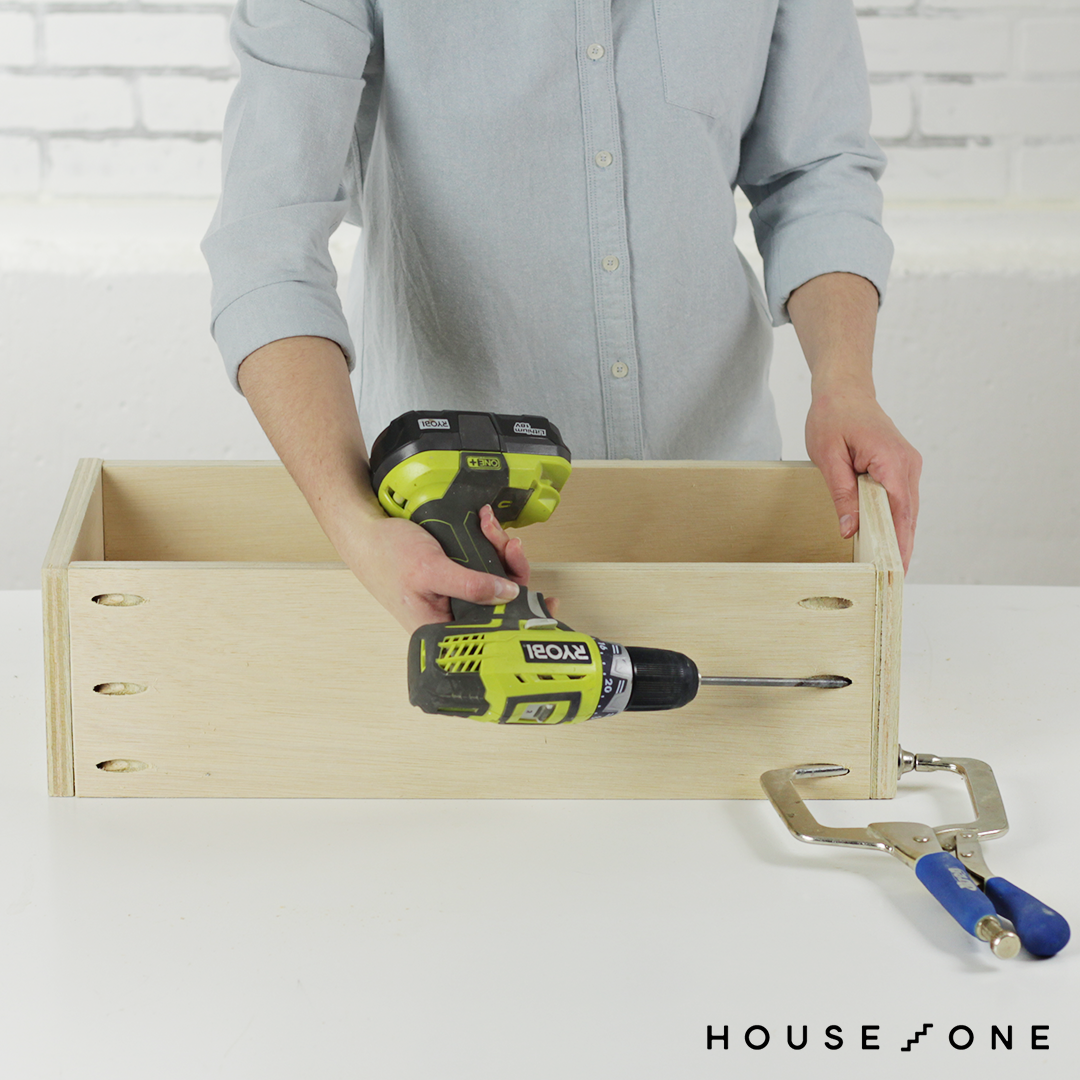
Place the drawer bottom on the work flooring, pocket holes coping with down. Check out the match of the drawers partitions by inserting them throughout the bottom, positioned so that the front and back match between the perimeters. Using a drill/driver and pocket hole jig, drill three pocket holes throughout the ends of the drawer front and back objects. Apply picket glue to the ends of the drawer’s front and back objects, after which place them on edge between the drawer sides. Drive 1¼-inch pocket hole screws by the use of the front and back objects and into the perimeters.
Step 6: Add the drawer bottom
Using a drill/driver and pocket hole jig, drill three pocket holes alongside front and back of the underside, and two alongside each end. Apply picket glue to the edges of the drawer bottom, after which protected it in place flush with the underside fringe of the drawers partitions with 1¼-inch pocket hole screws.
Step 7: Join the drawer slides
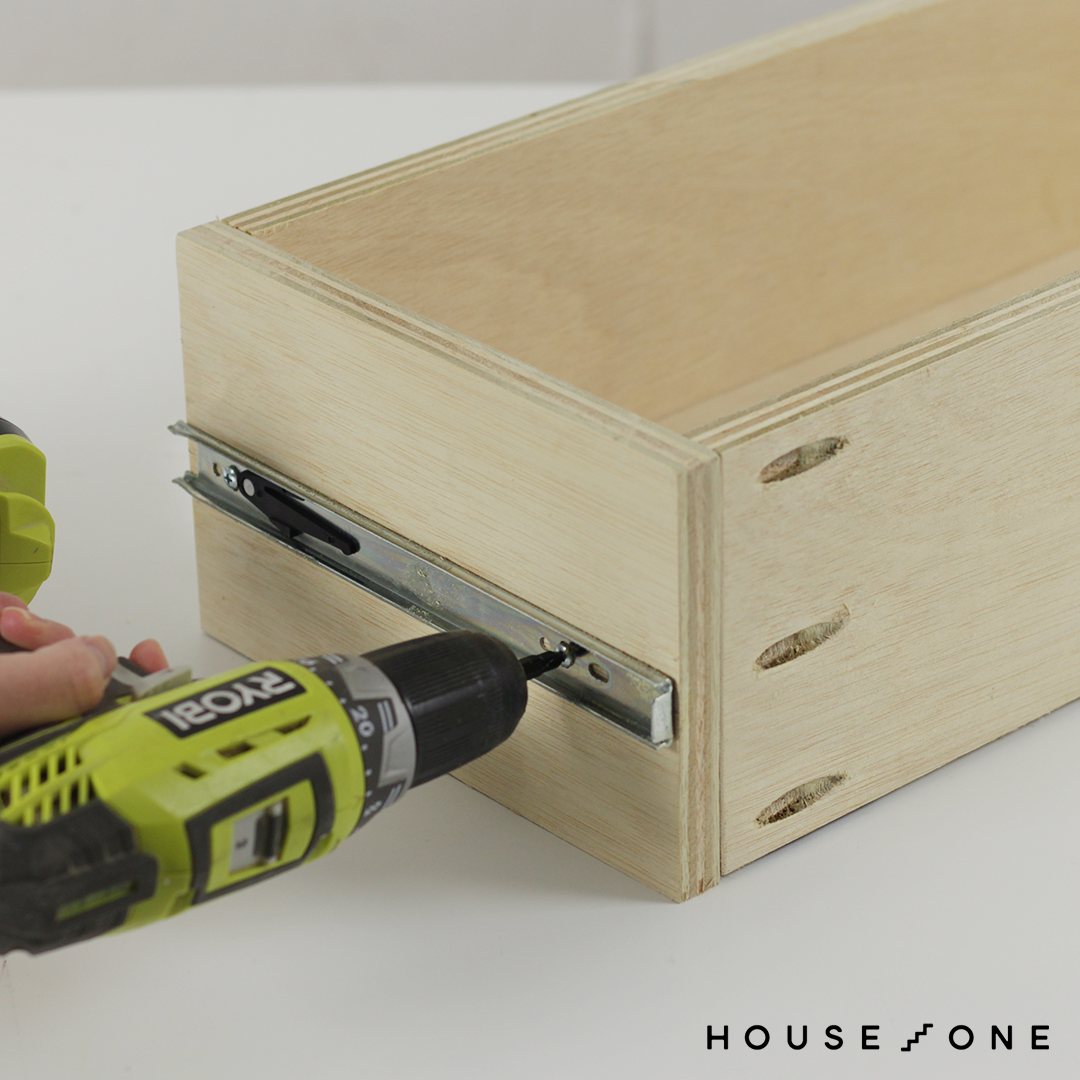
Center the drawer slides alongside the height of the drawer, flush with its entrance edge. Secure the slides with the screws provided throughout the packaging or 5/8-inch screws.
Step 8: Arrange the drawer
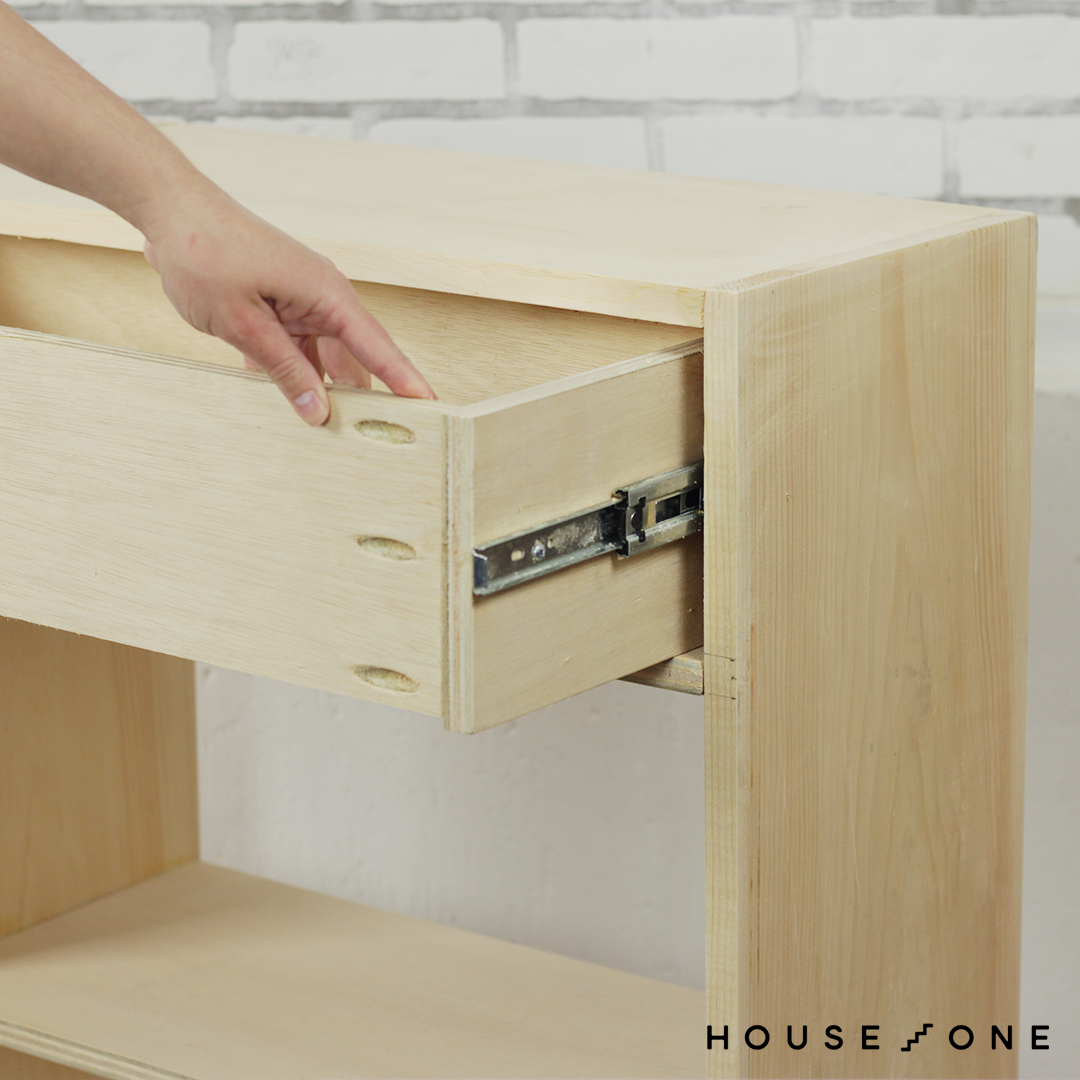
Arrange the remaining piece of each slide inside the cabinet, centered on the height of the best opening, and recessed ¾-inch from the doorway edge. Place the drawer into the opening. For soft-close ball-bearing slides like ours, the first arrange feels highly effective and requires an extra push on the end to seat the slide. As quickly because the slide is precisely inserted, the drawer must then slide freely and close to a spot that’s recessed ¾-inch into the cabinet to account for the thickness of the drawer face.
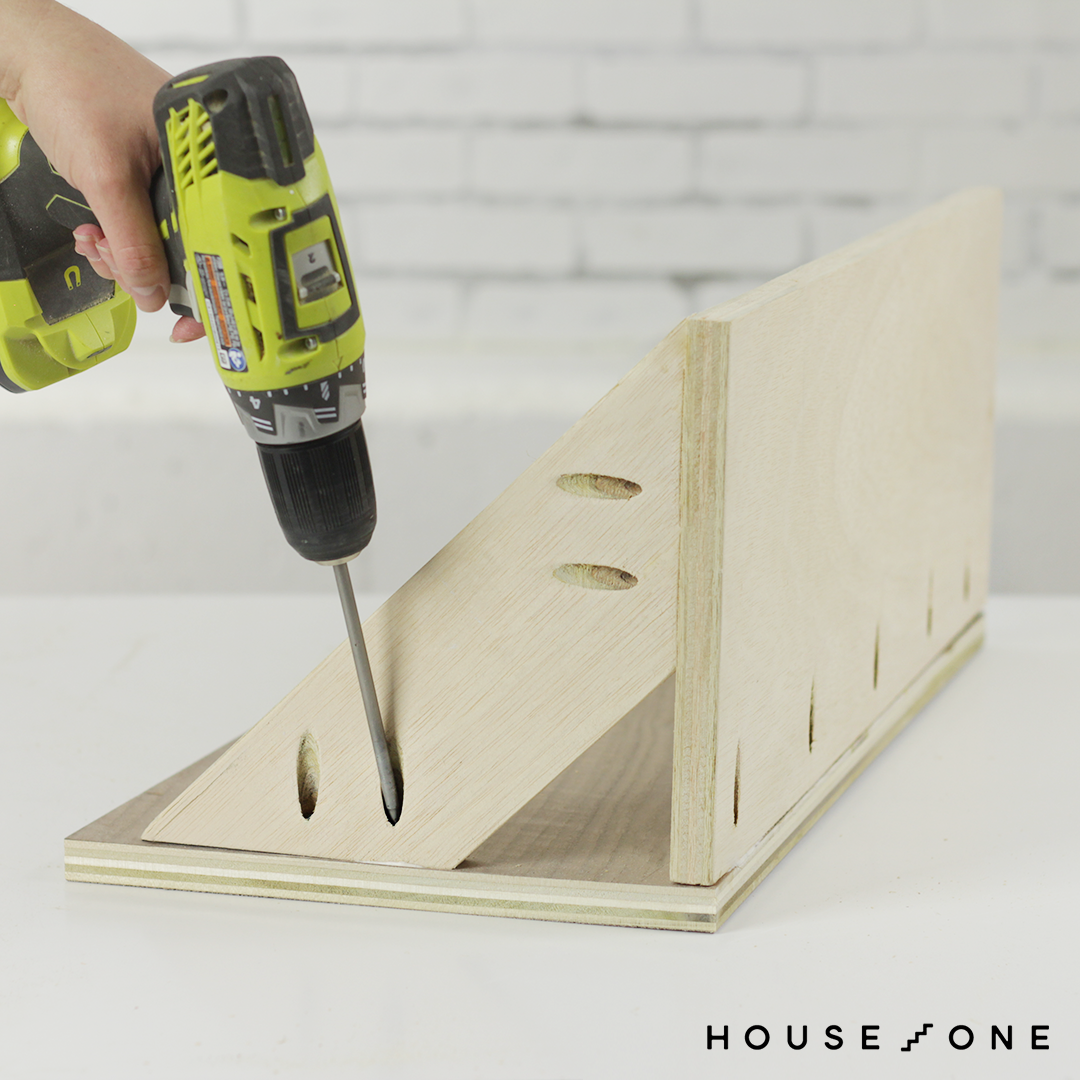
Step 9: Assemble the tilt-out bins
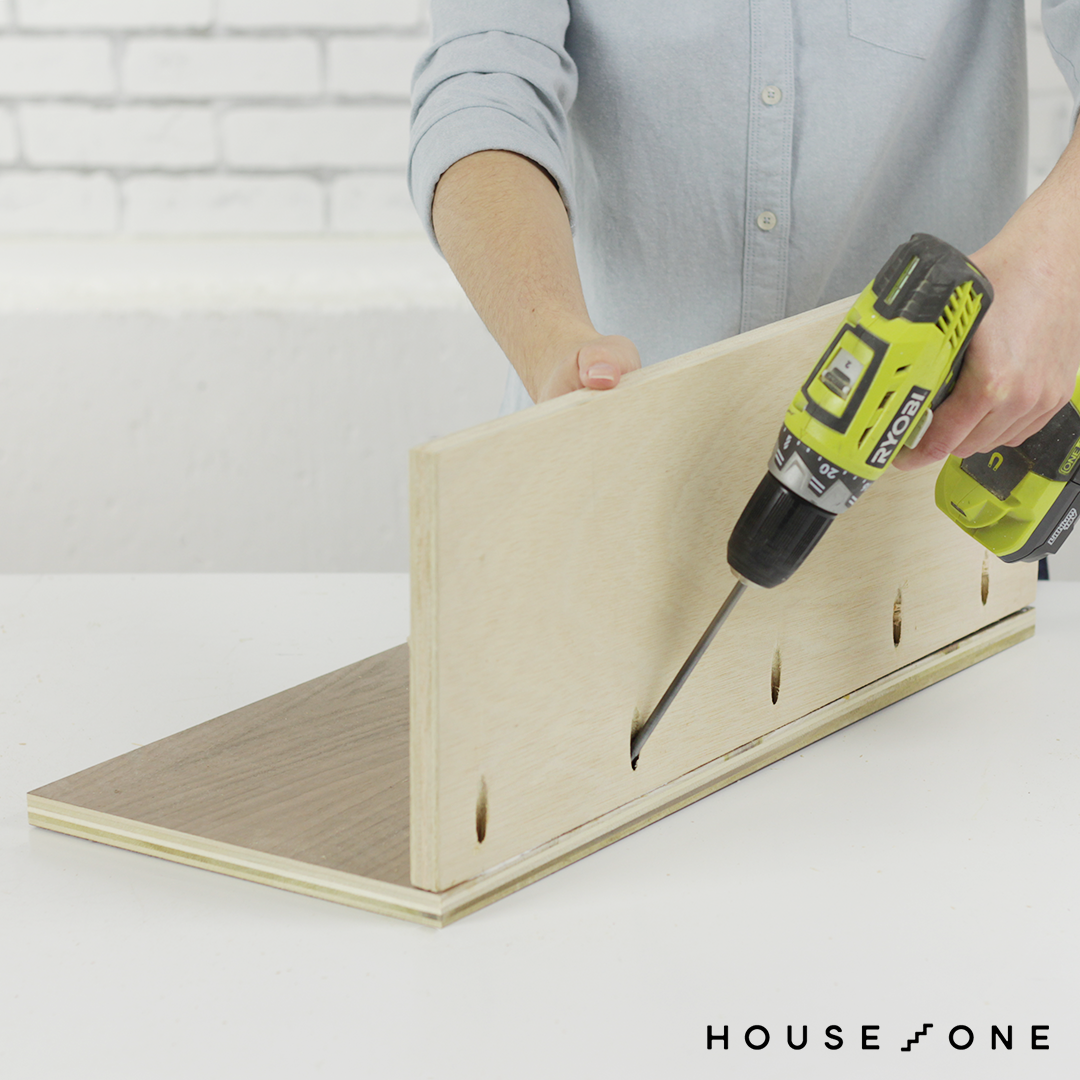
Drill pocket holes alongside one prolonged edge of each tilt-out bottom board. Using the cut back file throughout the downloadable plan above, cut back the faces of each tilt-out bin and the drawer face. (For this half, we used a ¾”x2’x4′ walnut-veneer mission panel.) Apply picket glue to the sting of the underside piece, after which protected it to the once more of the tilt-out face board with 1¼-inch pocket hole screws as confirmed. Repeat on the second bin.
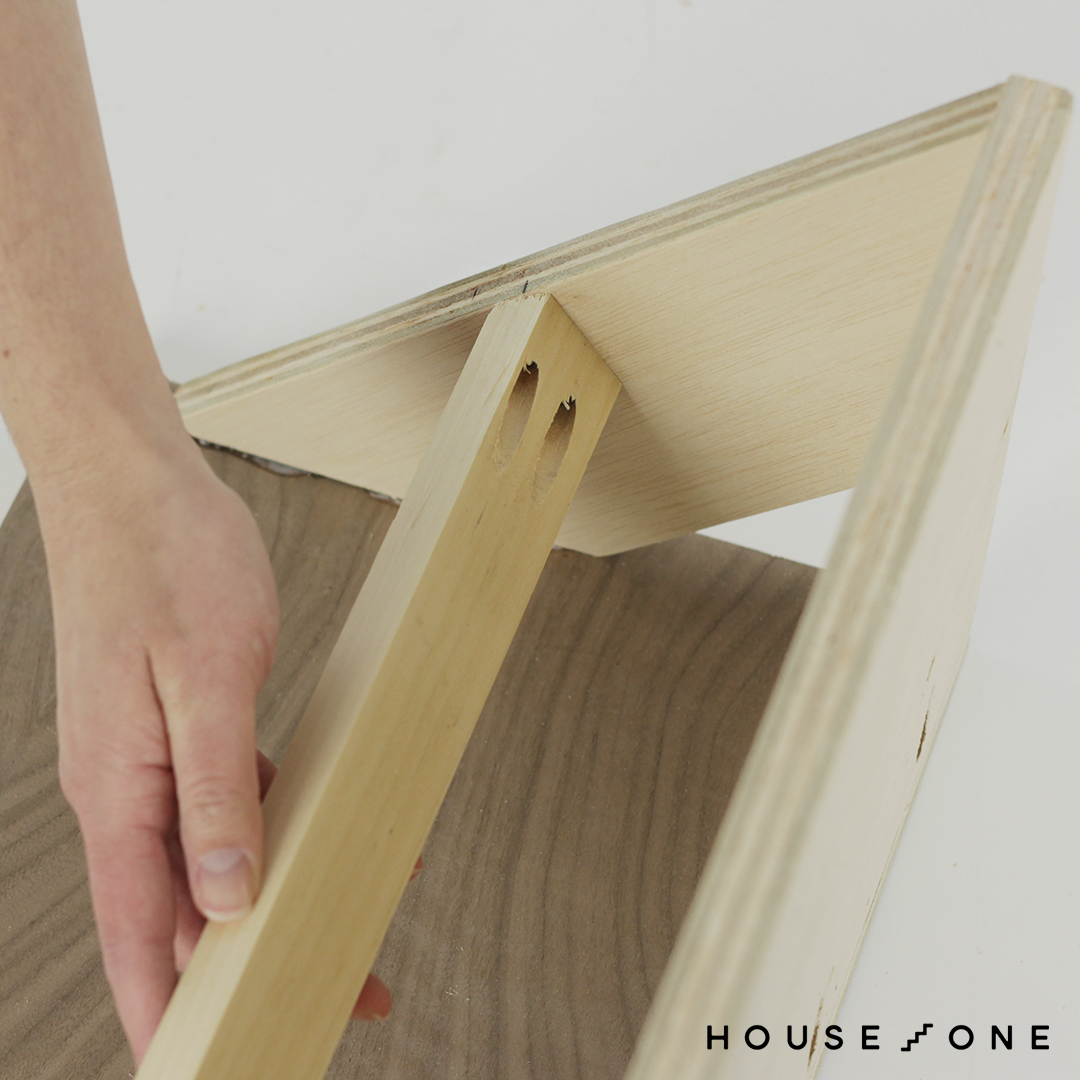
Step 10: Add the supportive sides
To strengthen the connection, protected the “sides” of the tilt-out bins using pocket holes, wood-glue and 1¼-inch pocket hole screws. The mitered end of each “facet” board must set flush with the best fringe of the bin’s bottom board, and fall in want of the height of the bin’s face.
Step 11: Insert the dividers
Drill two pocket holes throughout the ends of each plywood divider. Place the divider centered on the best fringe of the tilt-out sides with its pocket holes coping with the once more. Secure a divider inside each tilt-out bin with picket glue and 1¼-inch pocket hole screws.
Step 12: Arrange the hinges
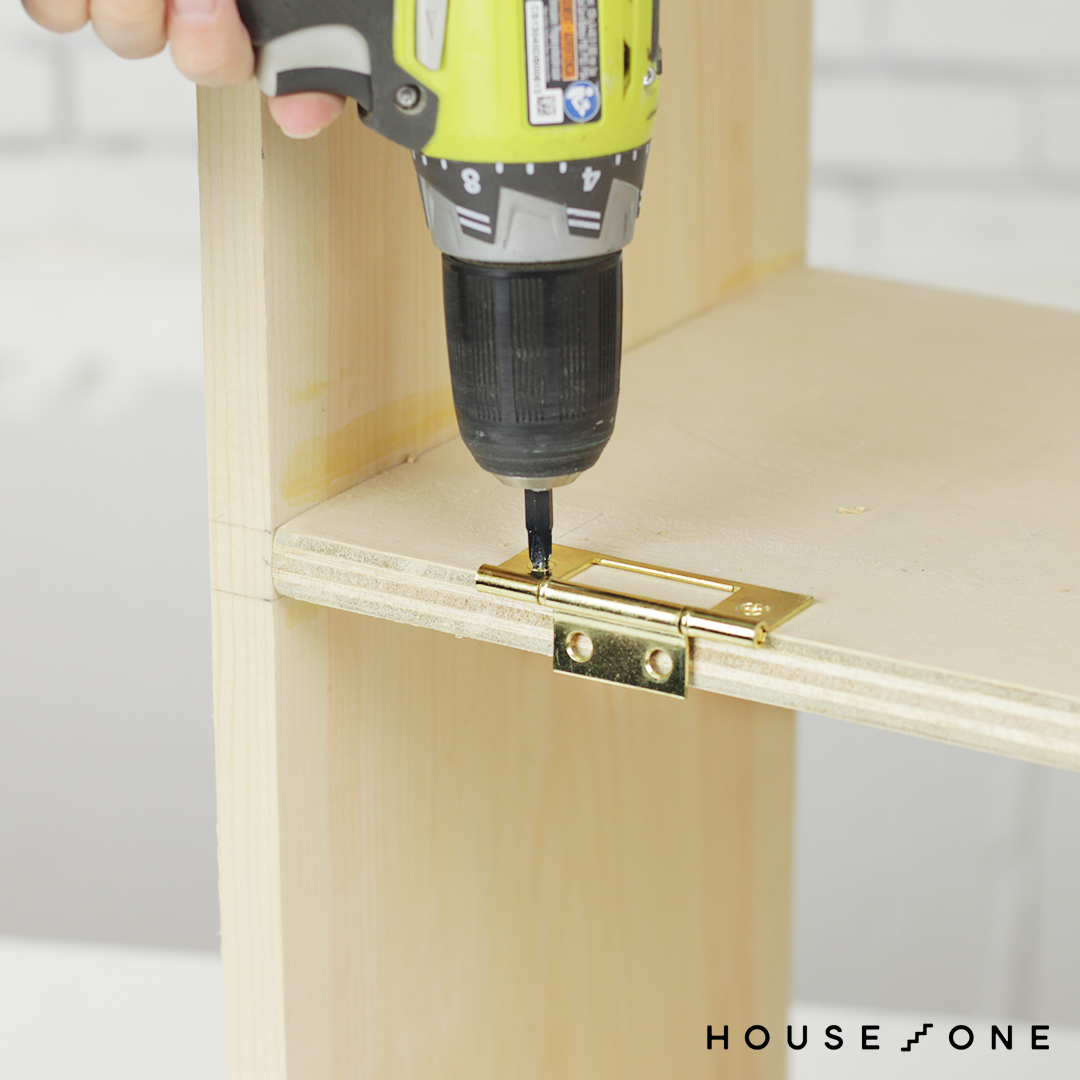
Using a drill/driver, protected a door hinge 1½-inches from the inside fringe of the lower shelf and bottom of the cabinet subject as confirmed.
Step 13: Mount the tilt-out bin
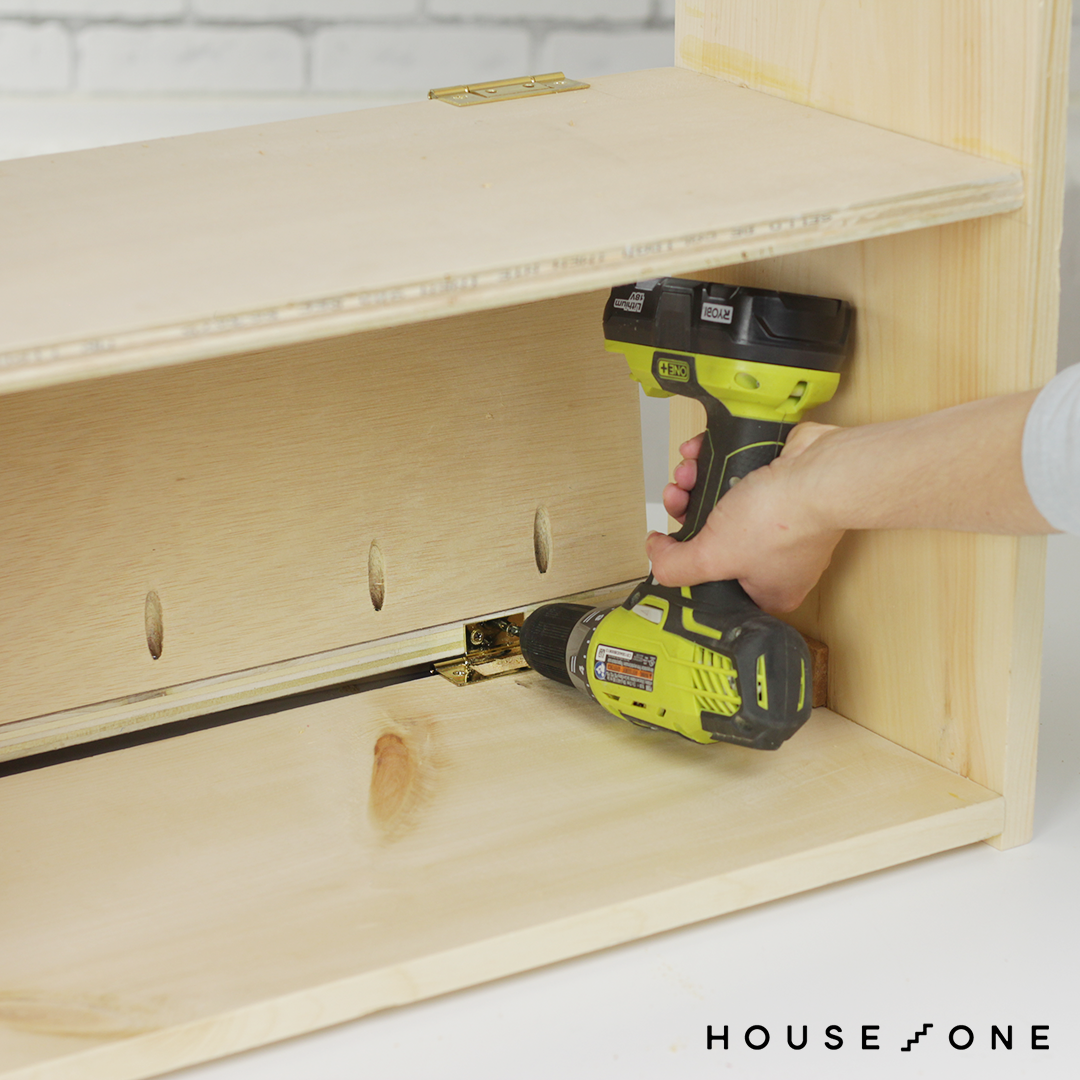
Place the tilt-out bin in place so that it’s centered throughout the opening and the face models flush with the knuckle of the hinge. Secure the hinge to the underside fringe of the tilt-out bin face as confirmed. (Tip: I used scrap blocks to hold the bin elevated and in place all through arrange.)
Step 14: Check out the match
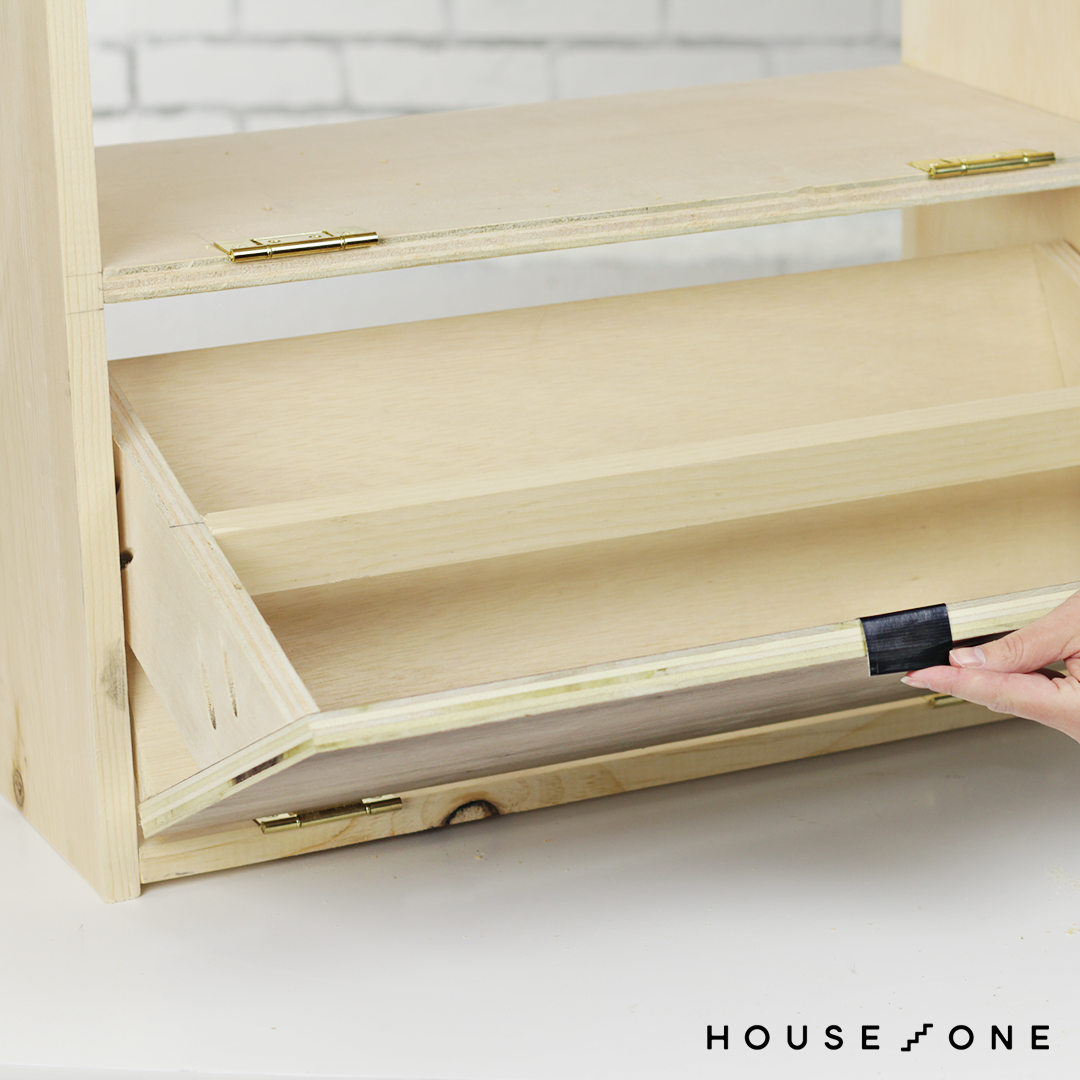
Press the tilt-out bin from the open once more (or apply a quick “cope with” constructed from tape). Tilt-the bin in and out of the opening to check its positioning. Repeat to place within the second bin.
Step 15: Mount the legs
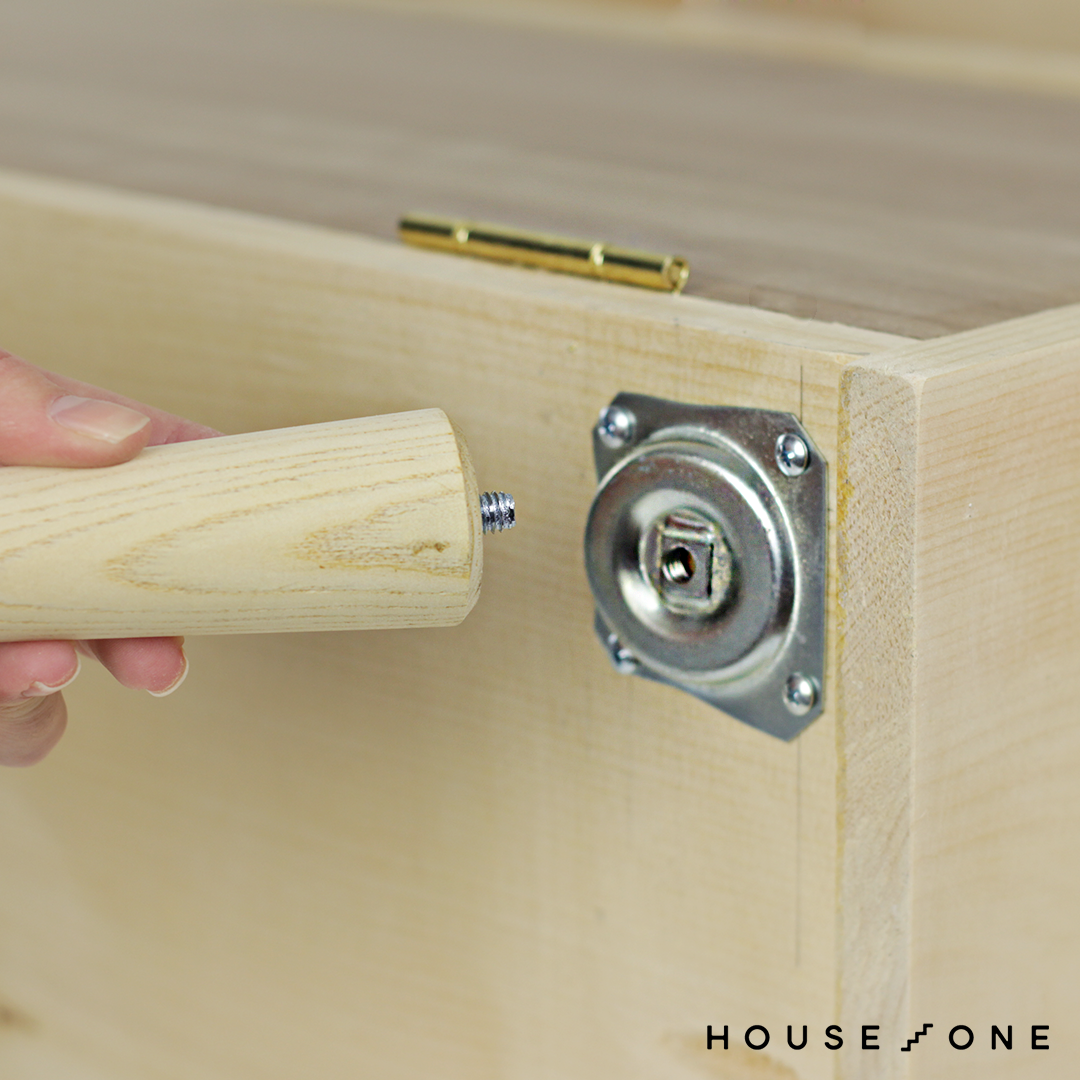
On the underside of the cabinet subject, place the angled leg brackets flush with the ends of the cabinet bottom, with their taper sloping outward. Recess the doorway two brackets once more ¾-inch, and place the once more two brackets flush with the once more fringe of the cabinet bottom. Arrange the brackets using a drill/driver and 5/8-inch screws. Thread the hanger bolt on the legs into the opening on each mounting bracket to protected the legs in place. (As well-known above, we cut back the metal foot off 7½” tapered legs with a hand seen to create a blunt look.)
Step 16: Join the drawer face
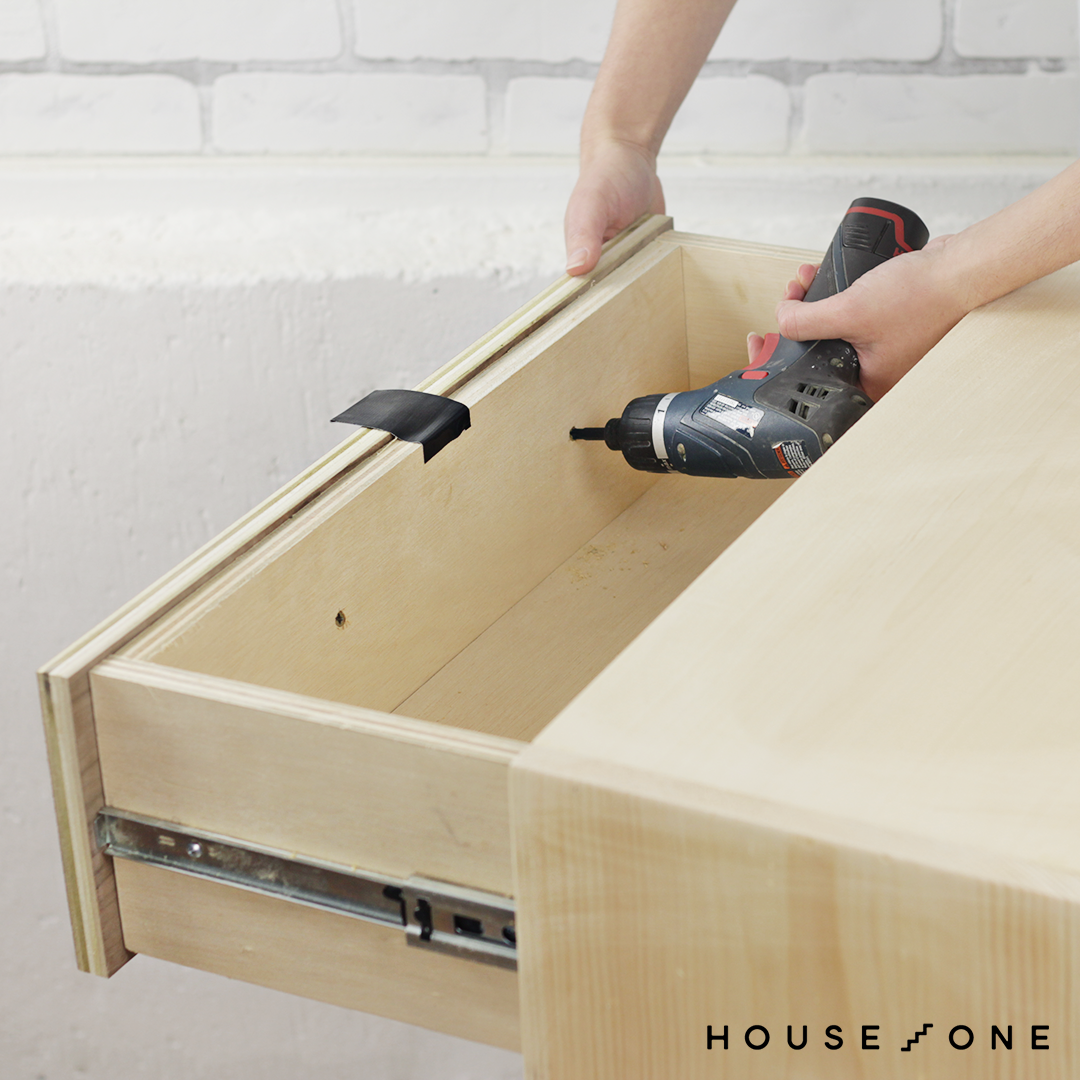
Place the drawer entrance in the direction of the drawer centered on the height and width of the opening, creating an excellent 1/16-inch gap on all sides. Push the once more of the drawer forward to entry the inside of the drawer. Clamp the drawer entrance in place. Secure the drawer face by driving 1-inch screws by the use of the inside of the drawer subject and into the underside of the drawer face. Mark and drill {{hardware}} holes throughout the entrance of the drawer face and tilt-out bins, after which mount the knobs or pulls as desired (not confirmed).
Step 17: Arrange the safety choices
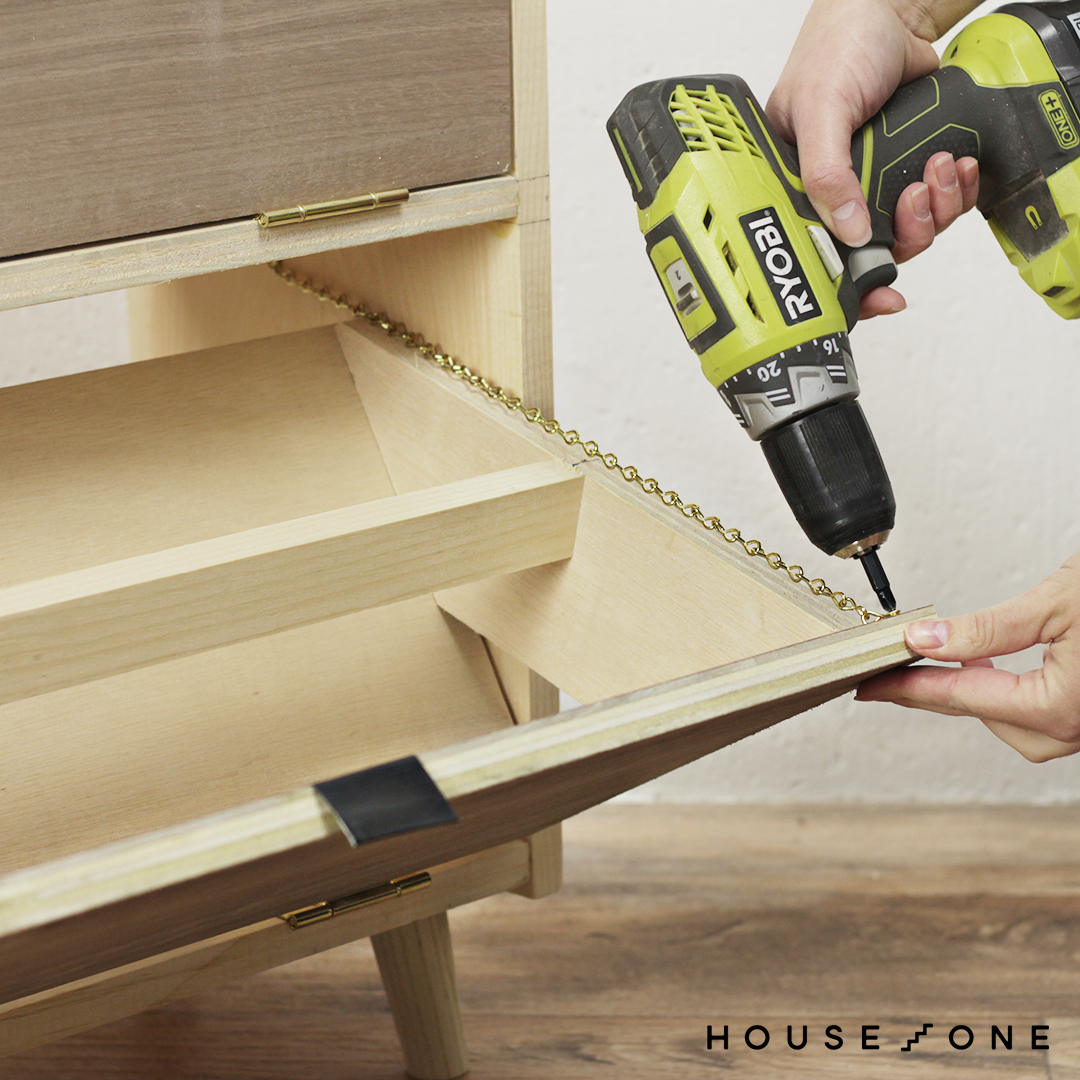
Using a drill and 5/8-inch screws, join a sequence to the inside of the facet wall of the cabinet, just below each shelf. Tilt each bin outward until the entire bin is accessible. Stretch the chain to the doorway face of each bin. Mark and shorten each chain. Secure the highest of each chain to the inside of the bin’s face, as confirmed. Lastly, finish the dresser with paint or stain and a defending finish. As quickly as in place, be sure you protected it to the wall with furnishings safety straps, as the huge tilt-out bins might make the shallow piece front-heavy.
Provides:
• (2) 1 x 12 x 6′ Boards
• (1) ¾” x 4 x 4 Plywood Panel
• (1) ¾” x 2 x 4 (Walnut) Plywood Panel
• (4) Tapered Legs (We cut back the metal foot off 7.5″ tapered legs)
• (4) Angled Leg Brackets
• Picket Glue
• Picket Filler
• Sandpaper
• 1¼-inch Pocket Hole Screws
• 5/8-inch Picket Screws
• Pair of 10-inch Drawer Slides
• Chain
• Finish (Paint, Stain, and/or Polyurethane)
• (4) 3-inch Flush Hinges
• Drawer Pulls