
Enterprise particulars
Estimated Time
6-7 hours (Two people)
Establishing a reclaimed wine rack is an efficient strategy to showcase your woodworking experience whereas making a helpful and stylish piece in your home. You’ll create storage in your wine assortment whereas bringing new life to outdated wood, together with character and historic previous to your home.
On this data, we’ll stroll you through the tactic of constructing a ravishing wine rack using reclaimed provides, glorious for every novice and expert woodworkers. Chances are you’ll as effectively watch This Earlier House fundamental contractor Tom Silva assemble the equivalent one inside the video above.
Devices and Provides You’ll Need To Assemble a Reclaimed Wine Rack
For this wine rack mission, you’ll need the following provides:
- 5/4×4 stock, 12 linear ft
- 5/4×4 stock, 8 linear ft
- 1/2-inch plywood panel, 19 1⁄2 by 8 1⁄2 inches
- 1×1 stock, 9 linear ft
- 8/4×8/4 stock, 14 linear ft
- 5x30mm free tenons
- 2-inch brad nails
- 150-grit sandpaper
- Black polyurethane stain
- Gloss polyurethane
- Two 1-inch panels, 12 1⁄2 by 28 1⁄2 inches
- Wipe-on polyurethane
- Picket glue
Devices
Listed under are the devices you’ll need:
Scale back guidelines
Proper right here’s an entire decrease guidelines for the wine rack mission:
- Once more panel: 1 @ 1/2 by 19 1/4 by 28 1/2 inches
- Bottle-rack cupboards: 8 @ 3/4 by 3/4 by 18 3/4 inches and 24 @ 3/4 by 3/4 by 12 1/4 inches
- Entrance rails: 1 @ 1 by 3 by 18 3/4 inches
- Legs: 4 @ 2 by 2 by 37 1/2 inches
- Side panels: 2 @ 1 by 12 1/2 by 28 1/2 inches
- Side rails: 4 @ 1 by 2 by 12 inches
- Stemware holders: 4 @ 1 by 3 by 13 3/4 inches
- Stemware holder spacers: 4 @ 3/4 by 2 by 13 3/4 inches
- Stemware holder helps: 2 @ 2 by 18 3/4 by 1 inch
- Excessive: 2 @ 2 by 17 1/2 by 12 3/8 inches

Assemble a Wine Rack: Step-By-Step
The wine rack is constructed using a mixture of reclaimed wood gadgets and cautious joinery methods. The design incorporates legs, aspect rails, panels, and cupboards to create a sturdy and attractive development.
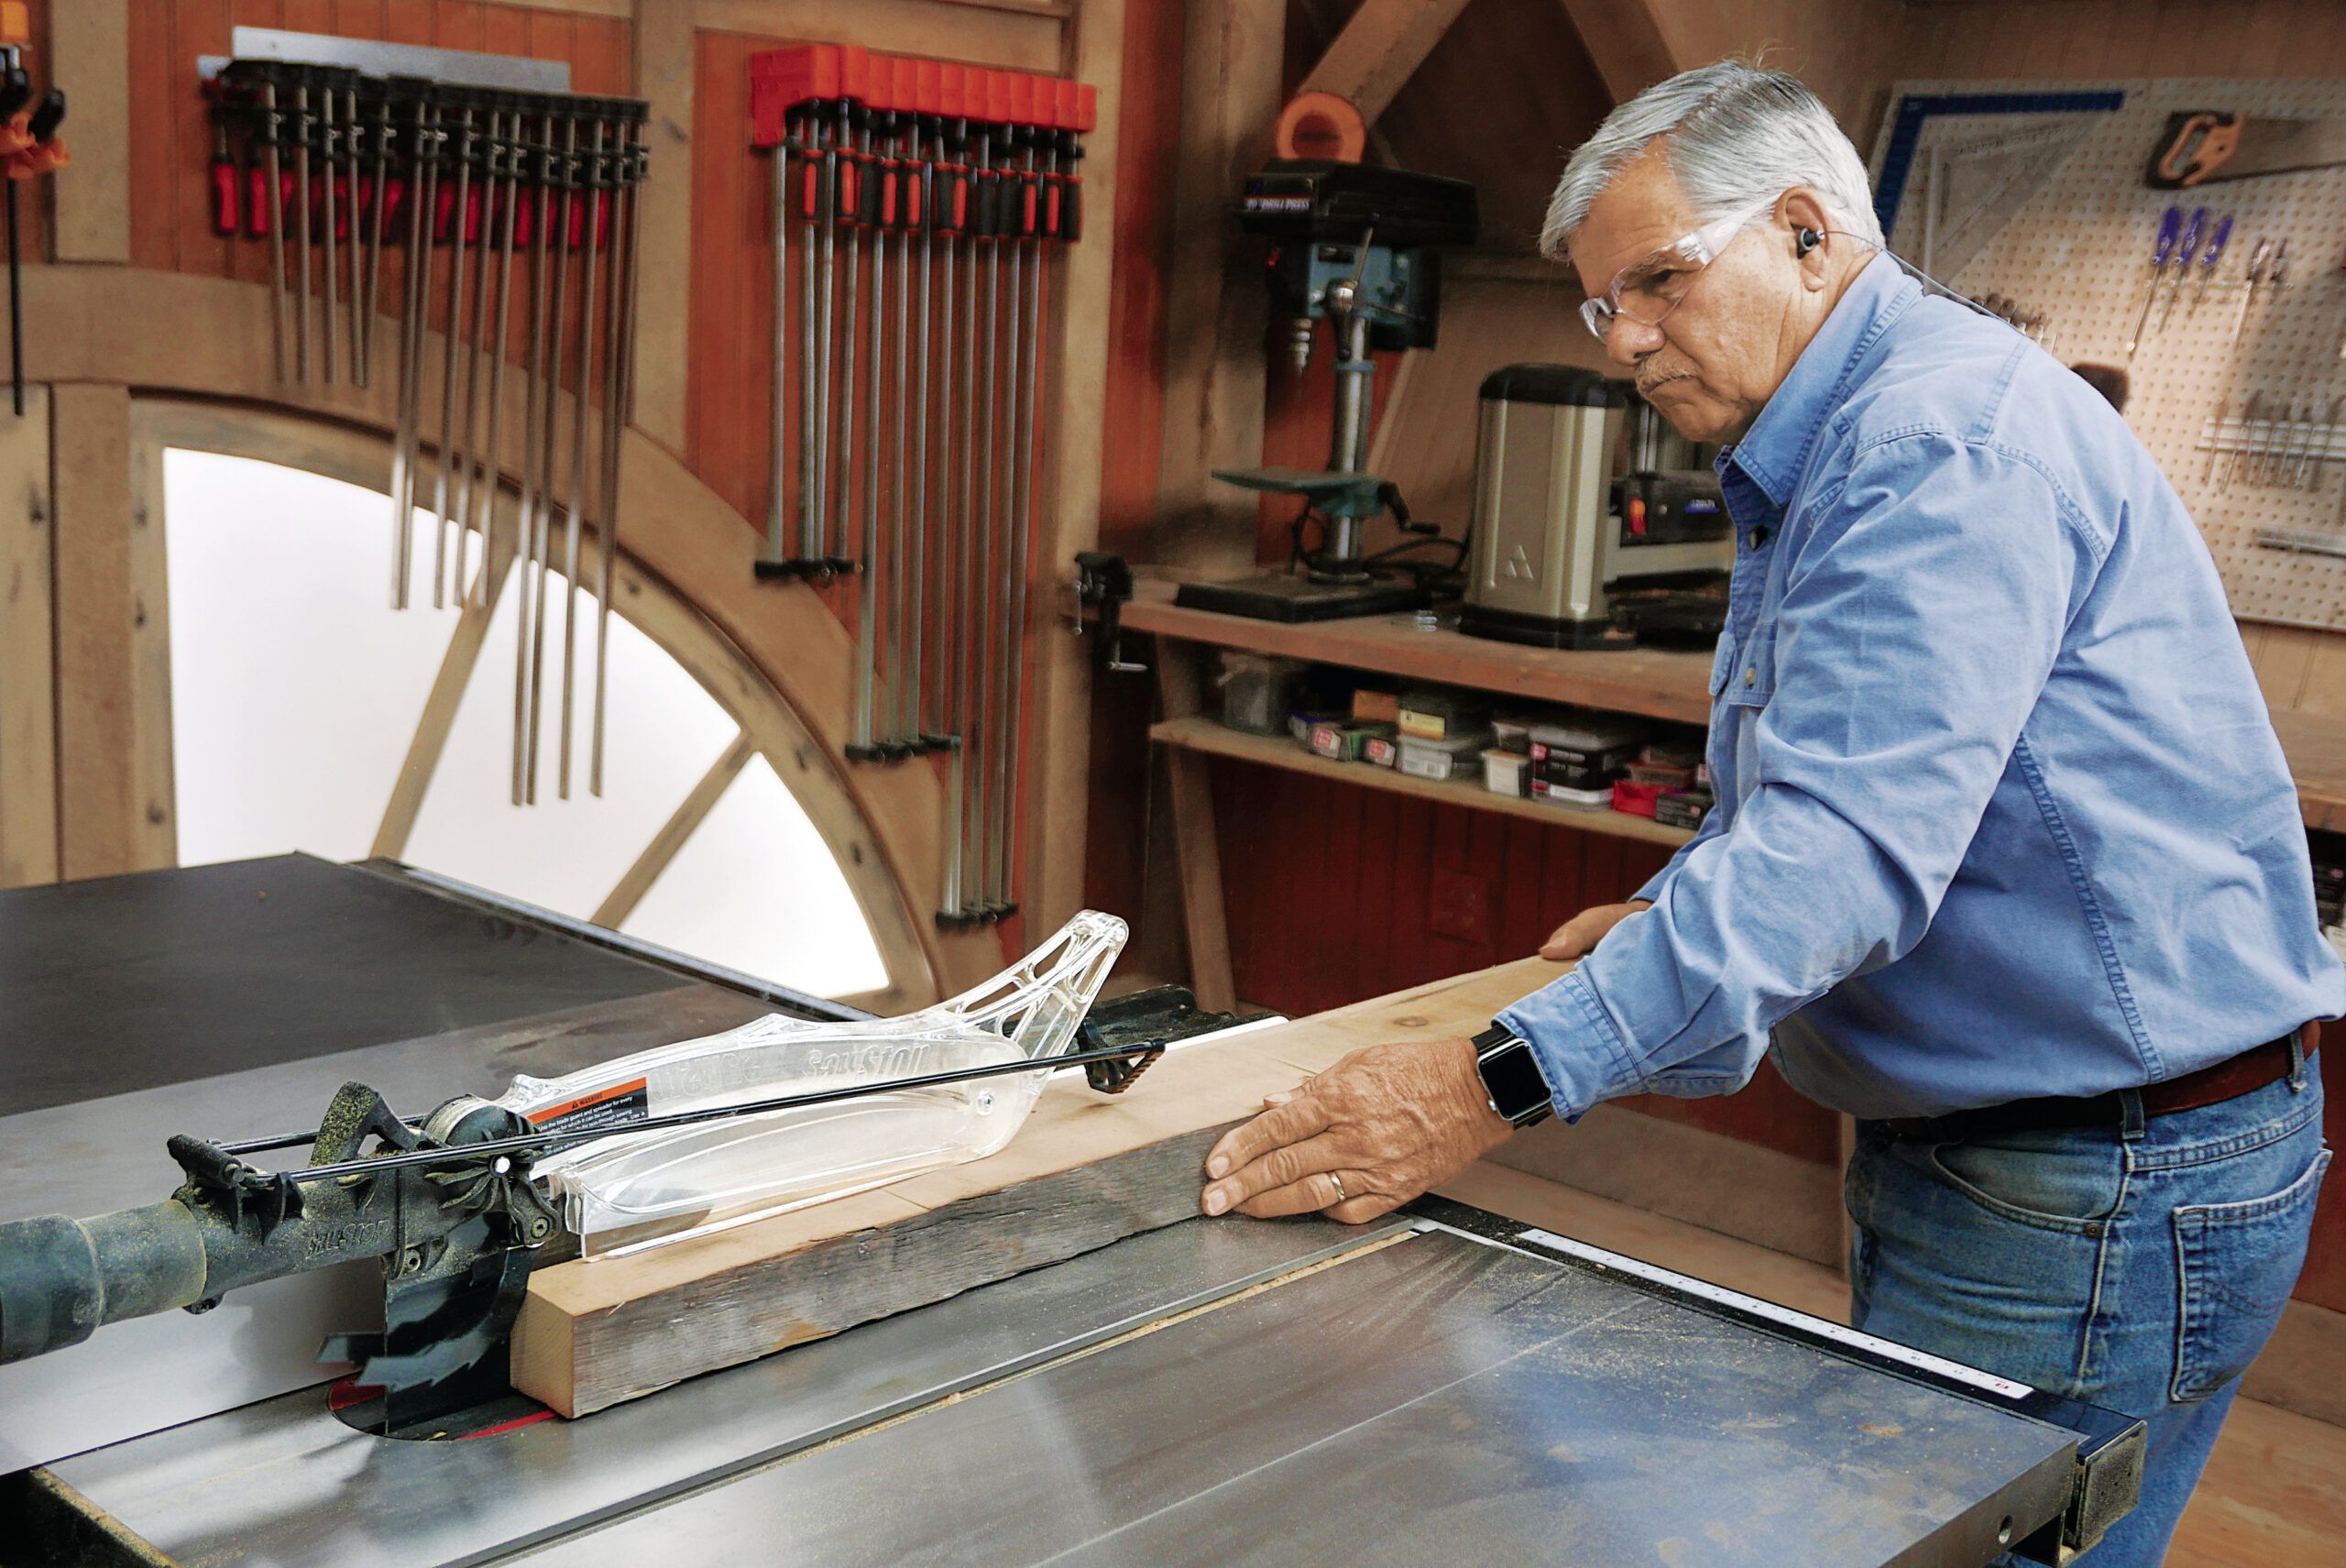
Step 1: Scale back the Objects to Dimension
Begin by chopping all the gadgets in accordance with the decrease guidelines. Use a desk seen to tear the gadgets to width and a miter seen to cut them to dimension. For the cabinet once more, decrease the 1/2-inch panel on the desk seen. For those who occur to’re working with salvaged wood, run it by means of a thickness planer for fixed dimensions. This will help to create clear, uniform gadgets that are less complicated to work with.
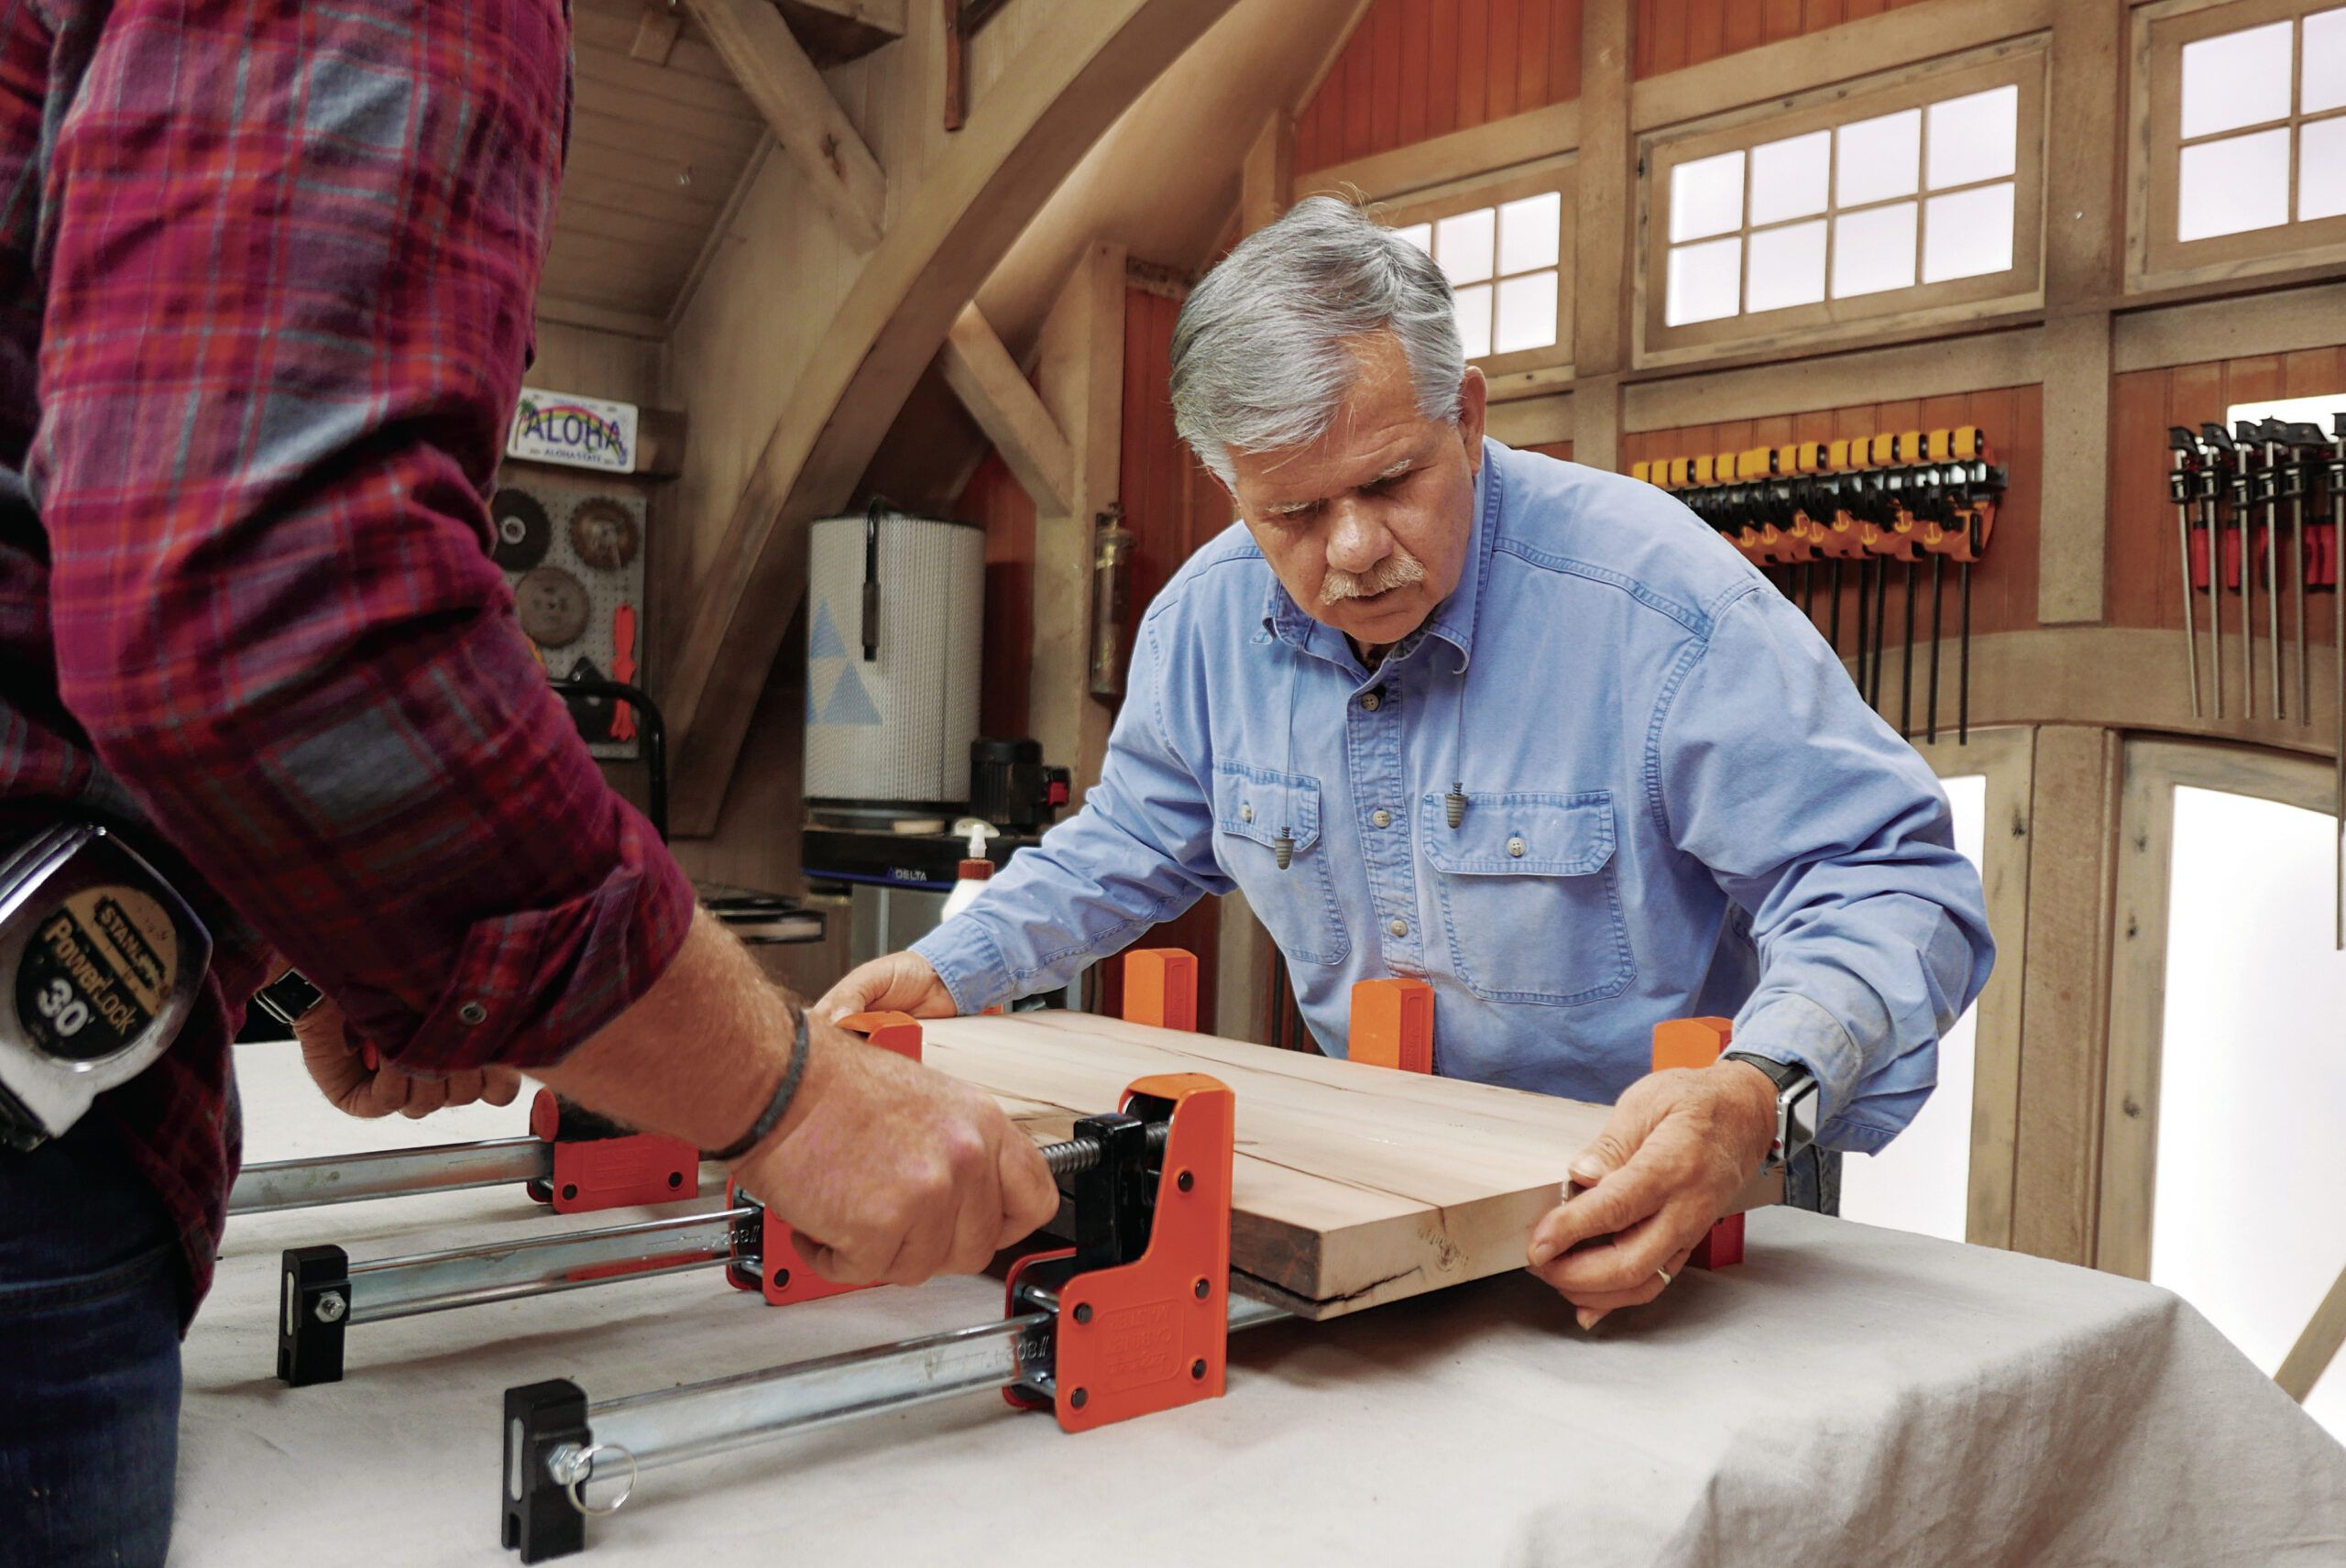
Step 2: Make the Excessive
Edge-glue and clamp the two gadgets for the best collectively. If using salvaged lumber, glue the sawn edges. After making use of glue, use a moist rag to wipe away any further. Allow the glue to set for not lower than half-hour sooner than eradicating the clamps. Chances are you’ll should sand the glued flooring flippantly and take away any leftover adhesive.
Step 3: Dado the Legs and Rails
Prepare your router desk with a 1/2-inch router bit. Alter the depth to 1/2 inch and offset the fence 1/8 inch to the floor. Use a featherboard to stabilize the workpiece as you create 28-inch-long stopped dadoes in each leg and a gradual dado in a single edge of each rail.
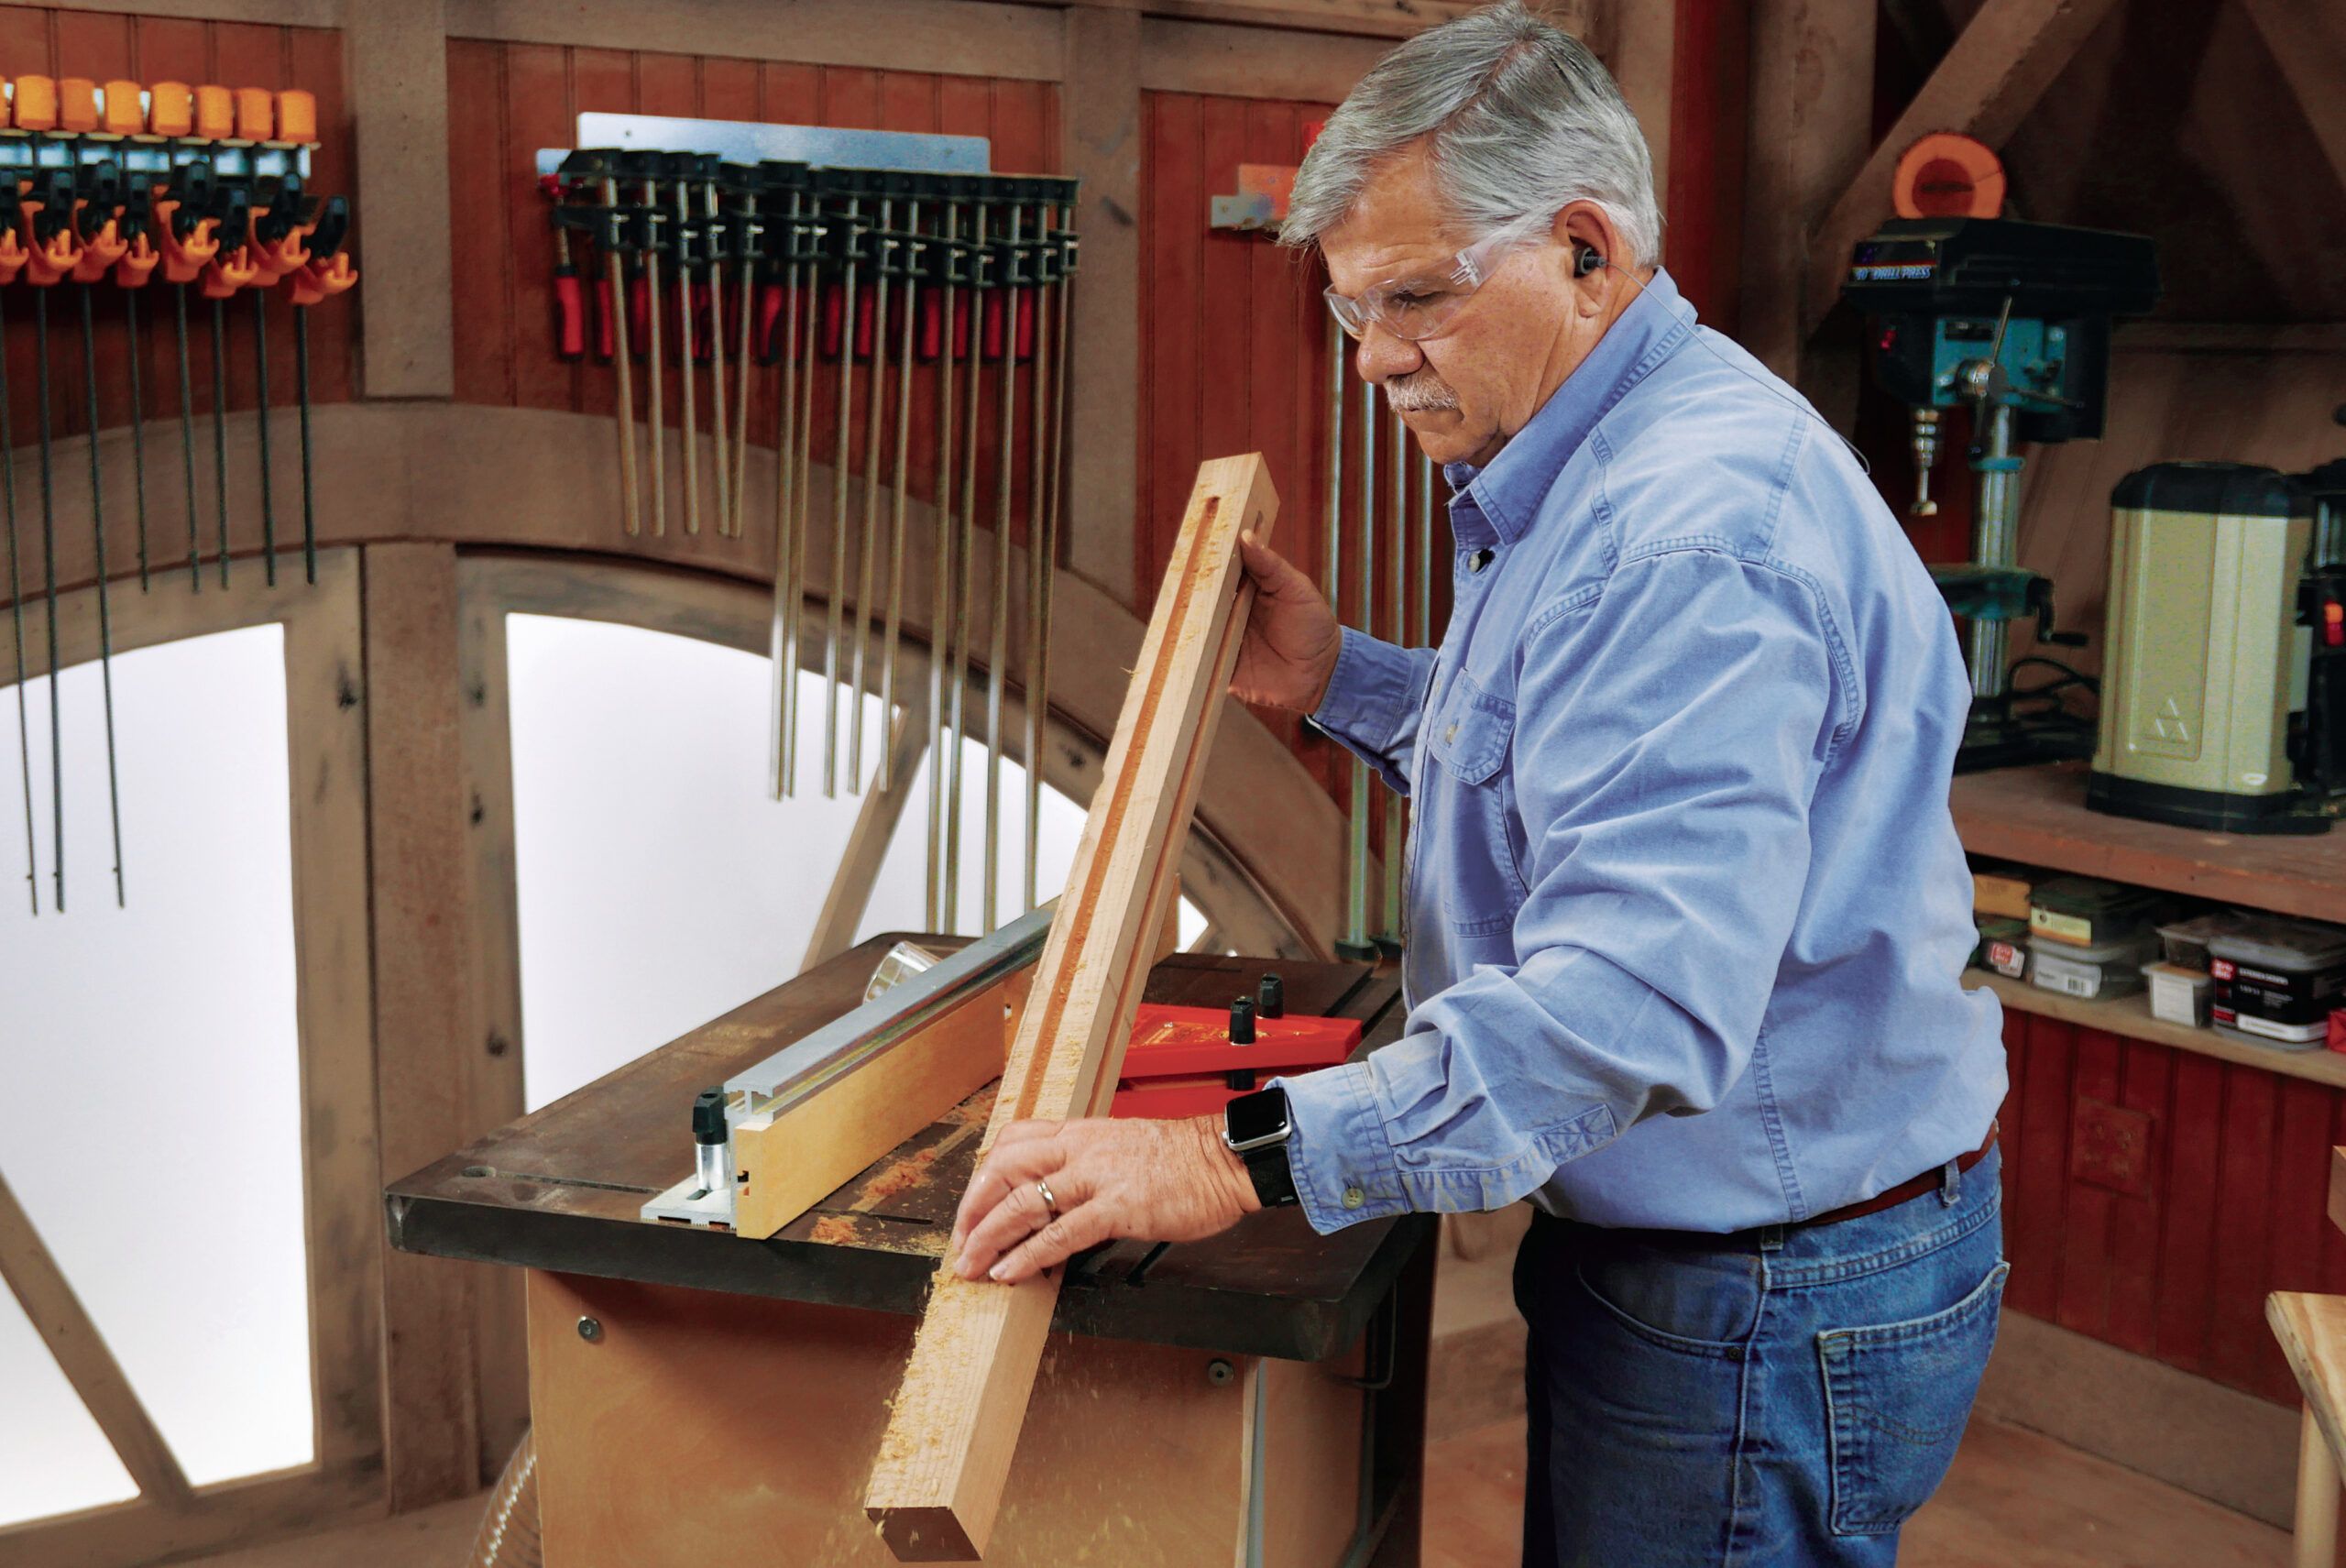
Step 4: Rabbet the Sides
Alter your router fence to cut a 1/2-inch-by-1/2-inch rabbet into all edges of each aspect piece. After rabbeting, sand and spherical over all the edges. When working with salvaged wood panels, sand gently to guard the wood’s pure patina and character. This gives a contact of authenticity to your wine rack, making it far more fascinating.

Step 5: Prep for Pocket Screws
Use a pocket-hole jig to drill two pocket holes into the ends of each rail. Place a leg in your workbench with the dadoes positioned as confirmed. Preserve a rail piece vertically on the leg, aligning the dadoes and checking that the rail sits flush with the best ends of the leg. Secure the rail to the leg using two pocket screws. This step creates sturdy, sturdy connections between the physique parts.

Step 6: Assemble the Sides
Match the side-panel rabbets into the dadoes of the leg-and-rail assembly. Slide a aspect rail onto the panel’s rabbet and tap it snugly into place. Secure the highest of the rail to the leg using pocket screws, as in Step 5. Repeat this course of to assemble a second aspect piece. For the once more panel help, place the second aspect piece facedown and pocket-screw two vertical rails to one among its legs. This will form the rear physique for the wine rack, providing extra stability.
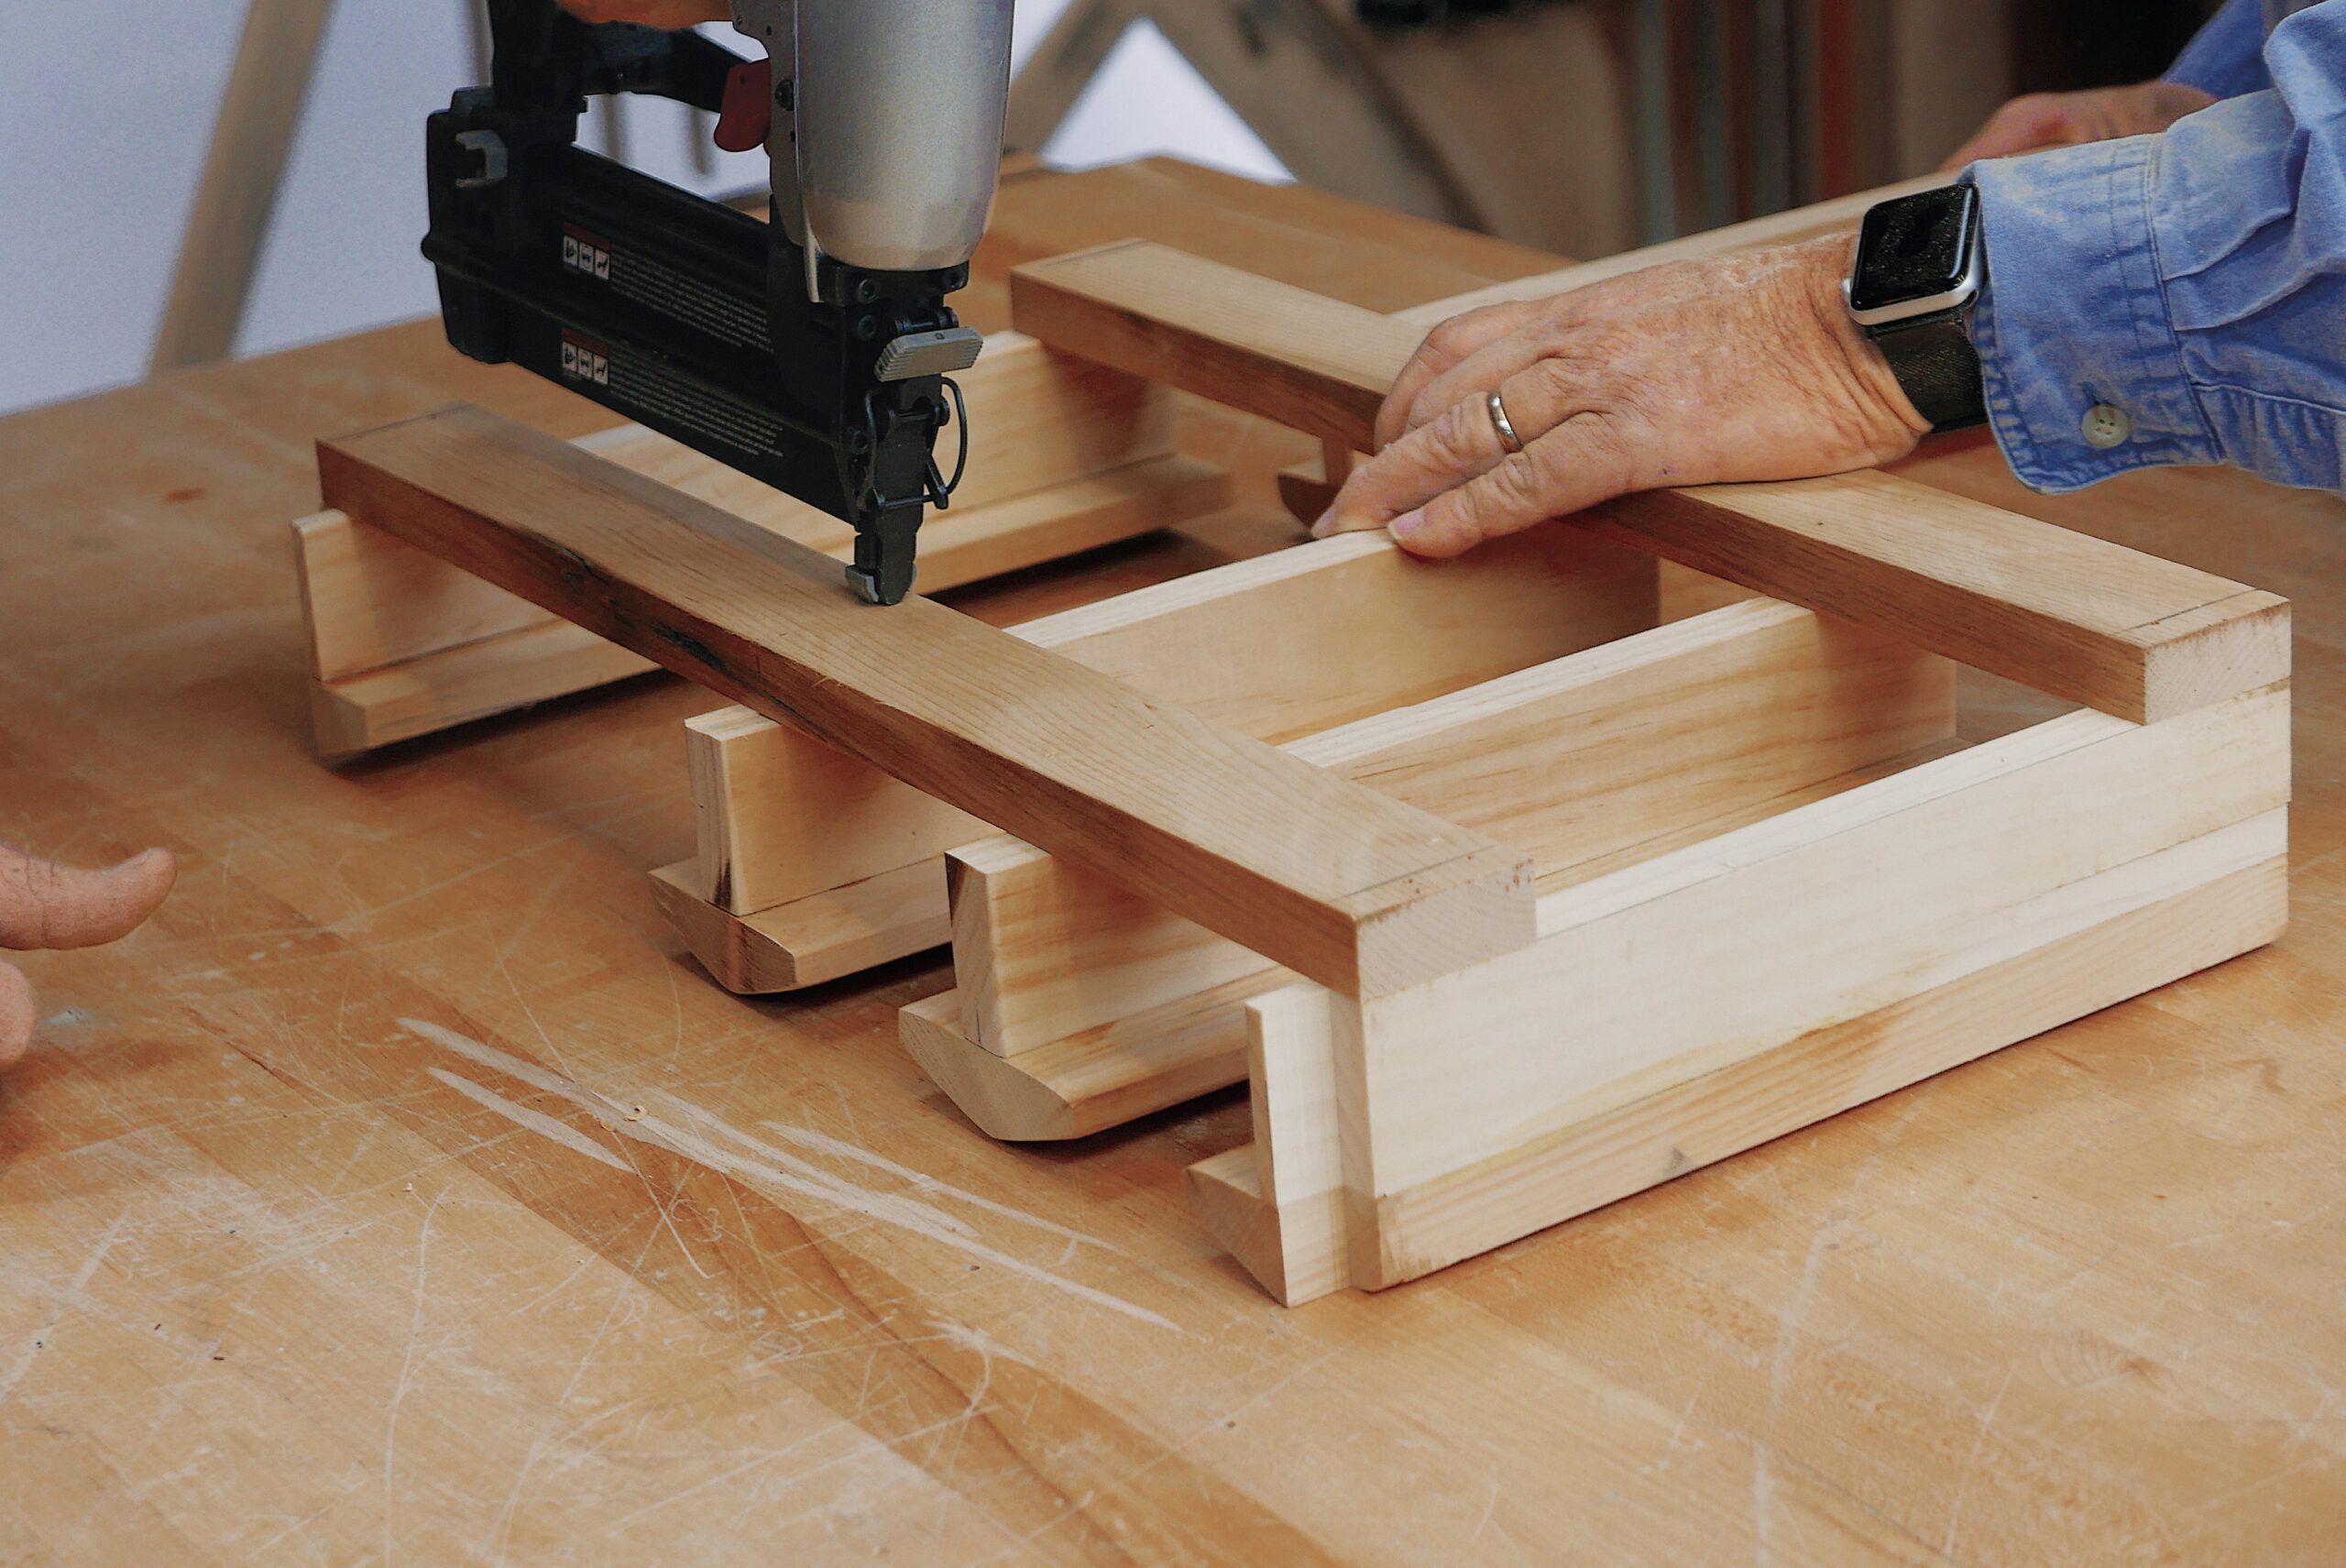
Step 7: Make the Bottle Racks
Using a loose-tenon joiner, decrease mortises into the ends and sides of the rack gadgets. Apply glue to each mortise, insert tenons into the highest gadgets, and tap the aspect piece mortises onto them. Wipe away any further glue. Repeat this course of to create three further racks. Make sure each rack is sq. and safe sooner than shifting to the next step. Properly-constructed racks will securely preserve your wine bottles.

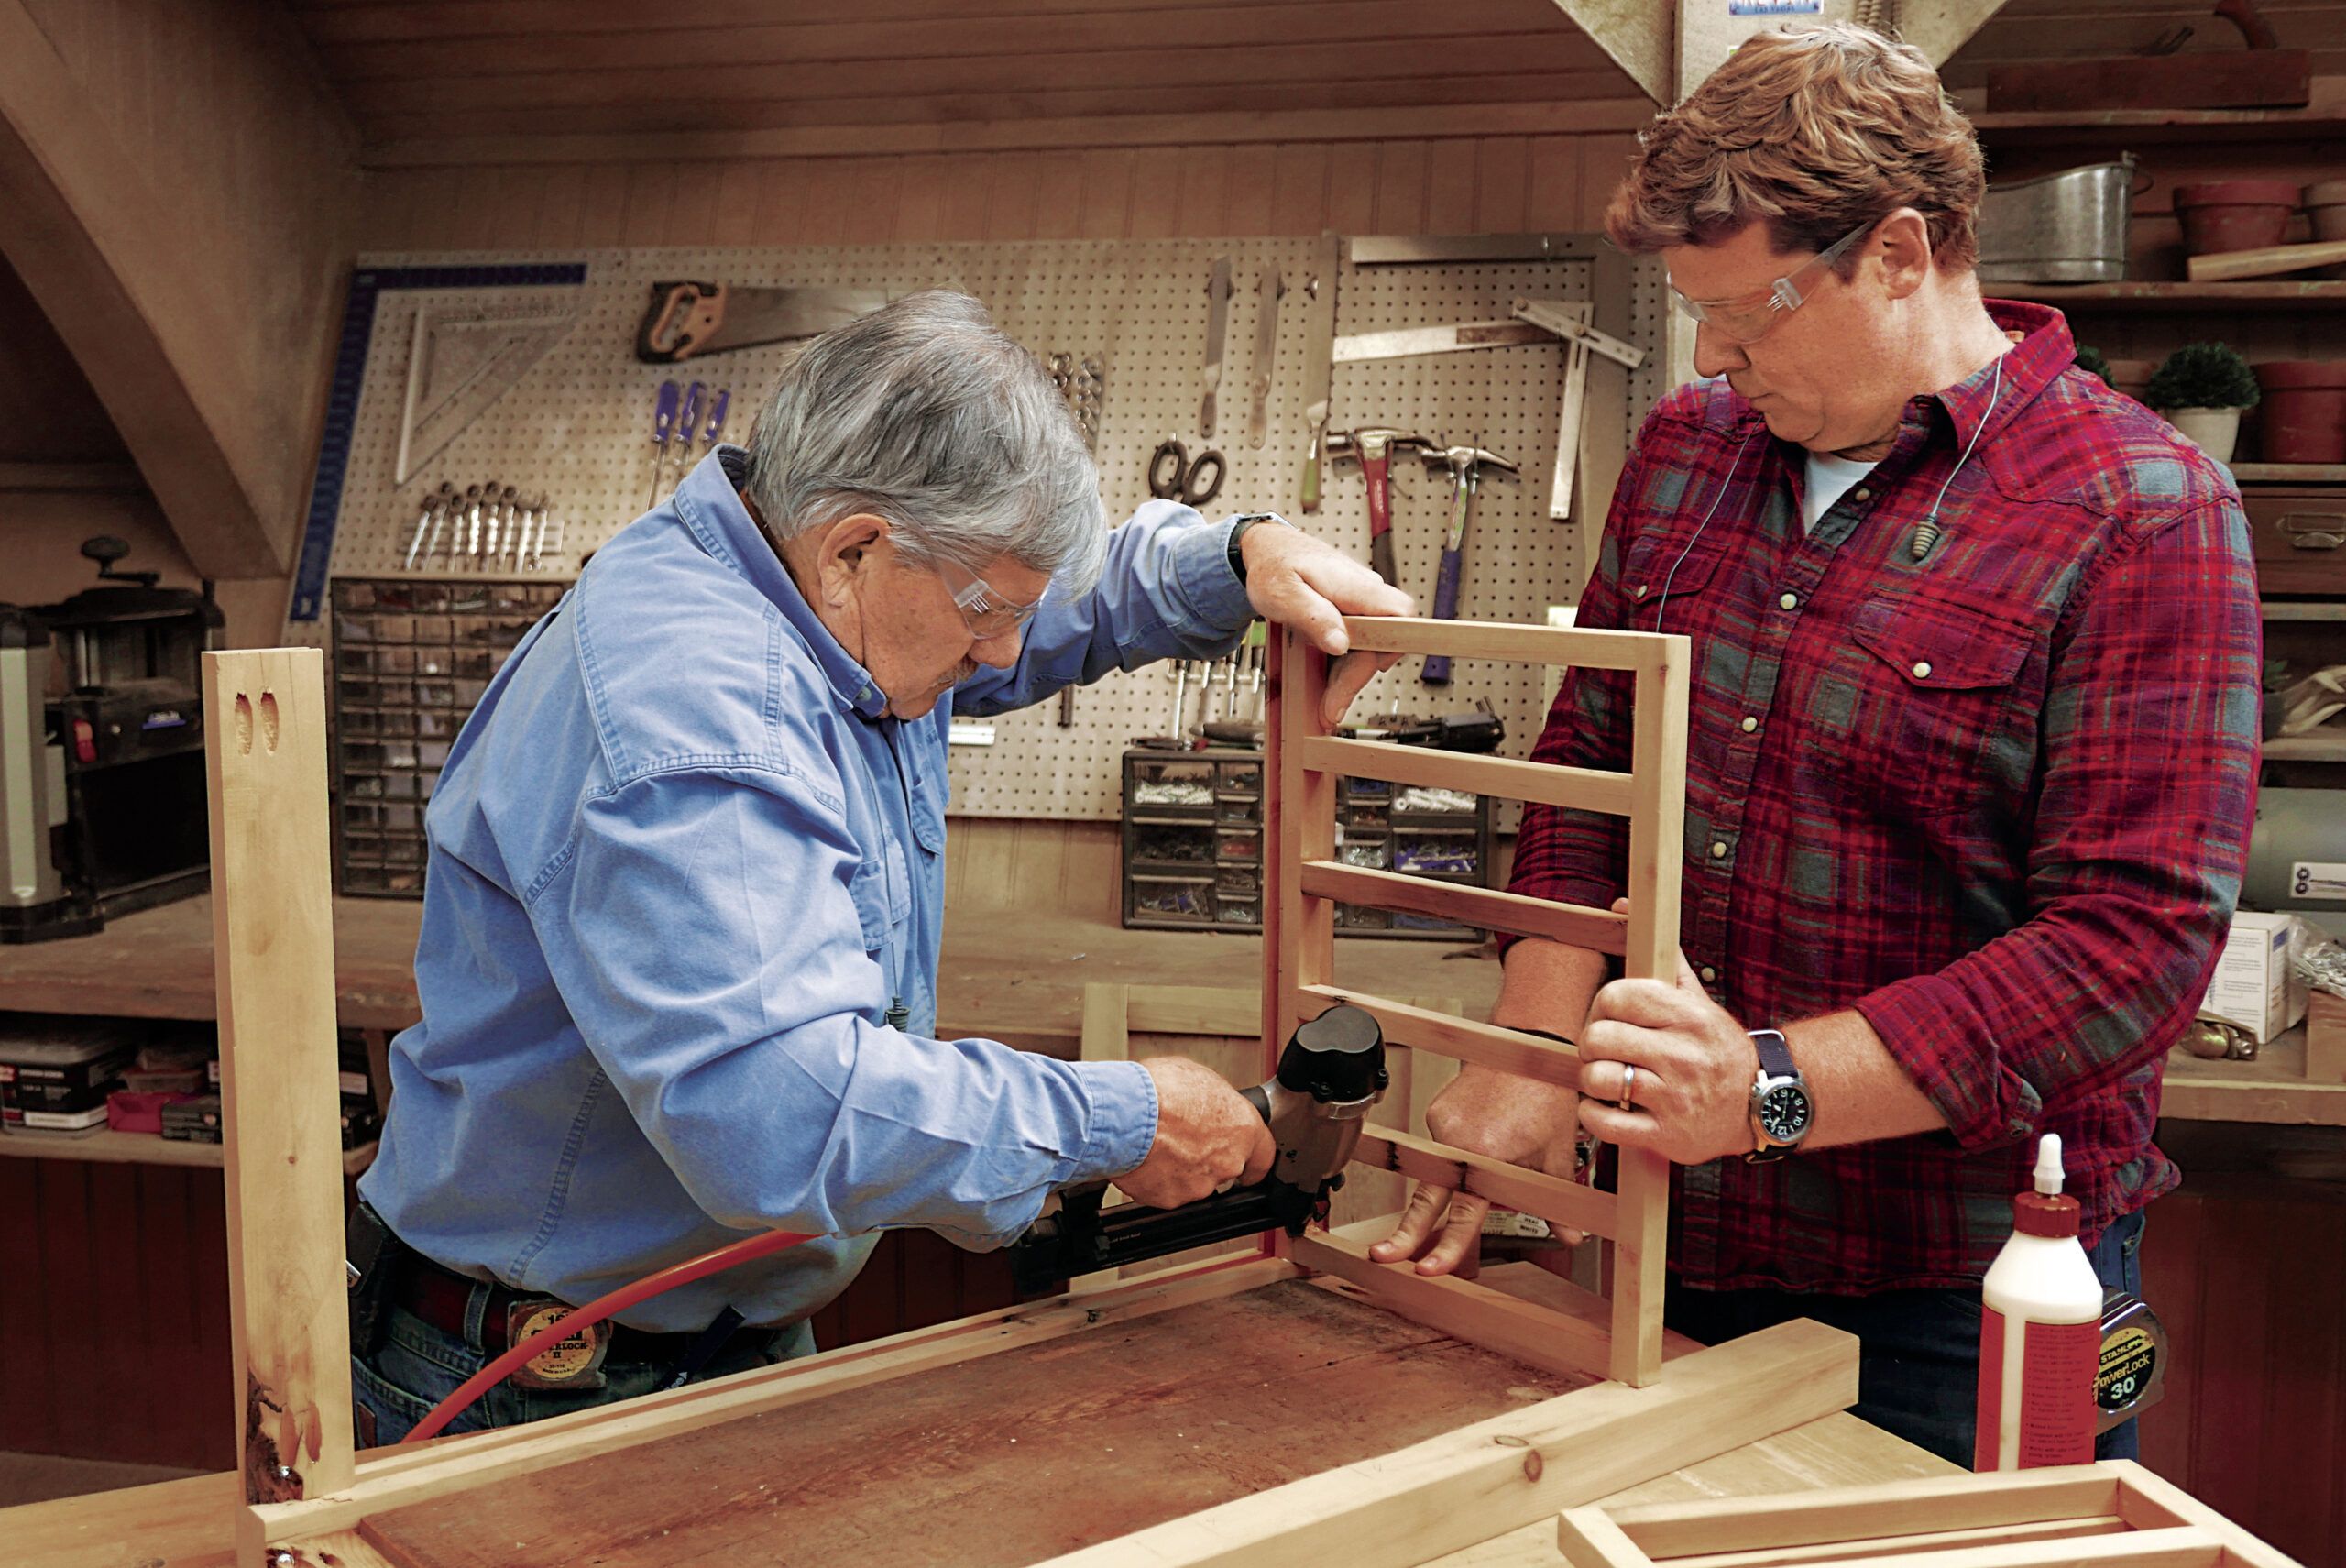
Step 8: Join the Bottle Racks
Lay one aspect piece facedown in your workbench. Use a framing sq. to mark the legs the place each rack shall be positioned. Apply glue to the marks closest to the cabinet’s bottom, set an assembled rack on the glue, and secure it to the leg using brad nails. Repeat this course of for the remaining racks.
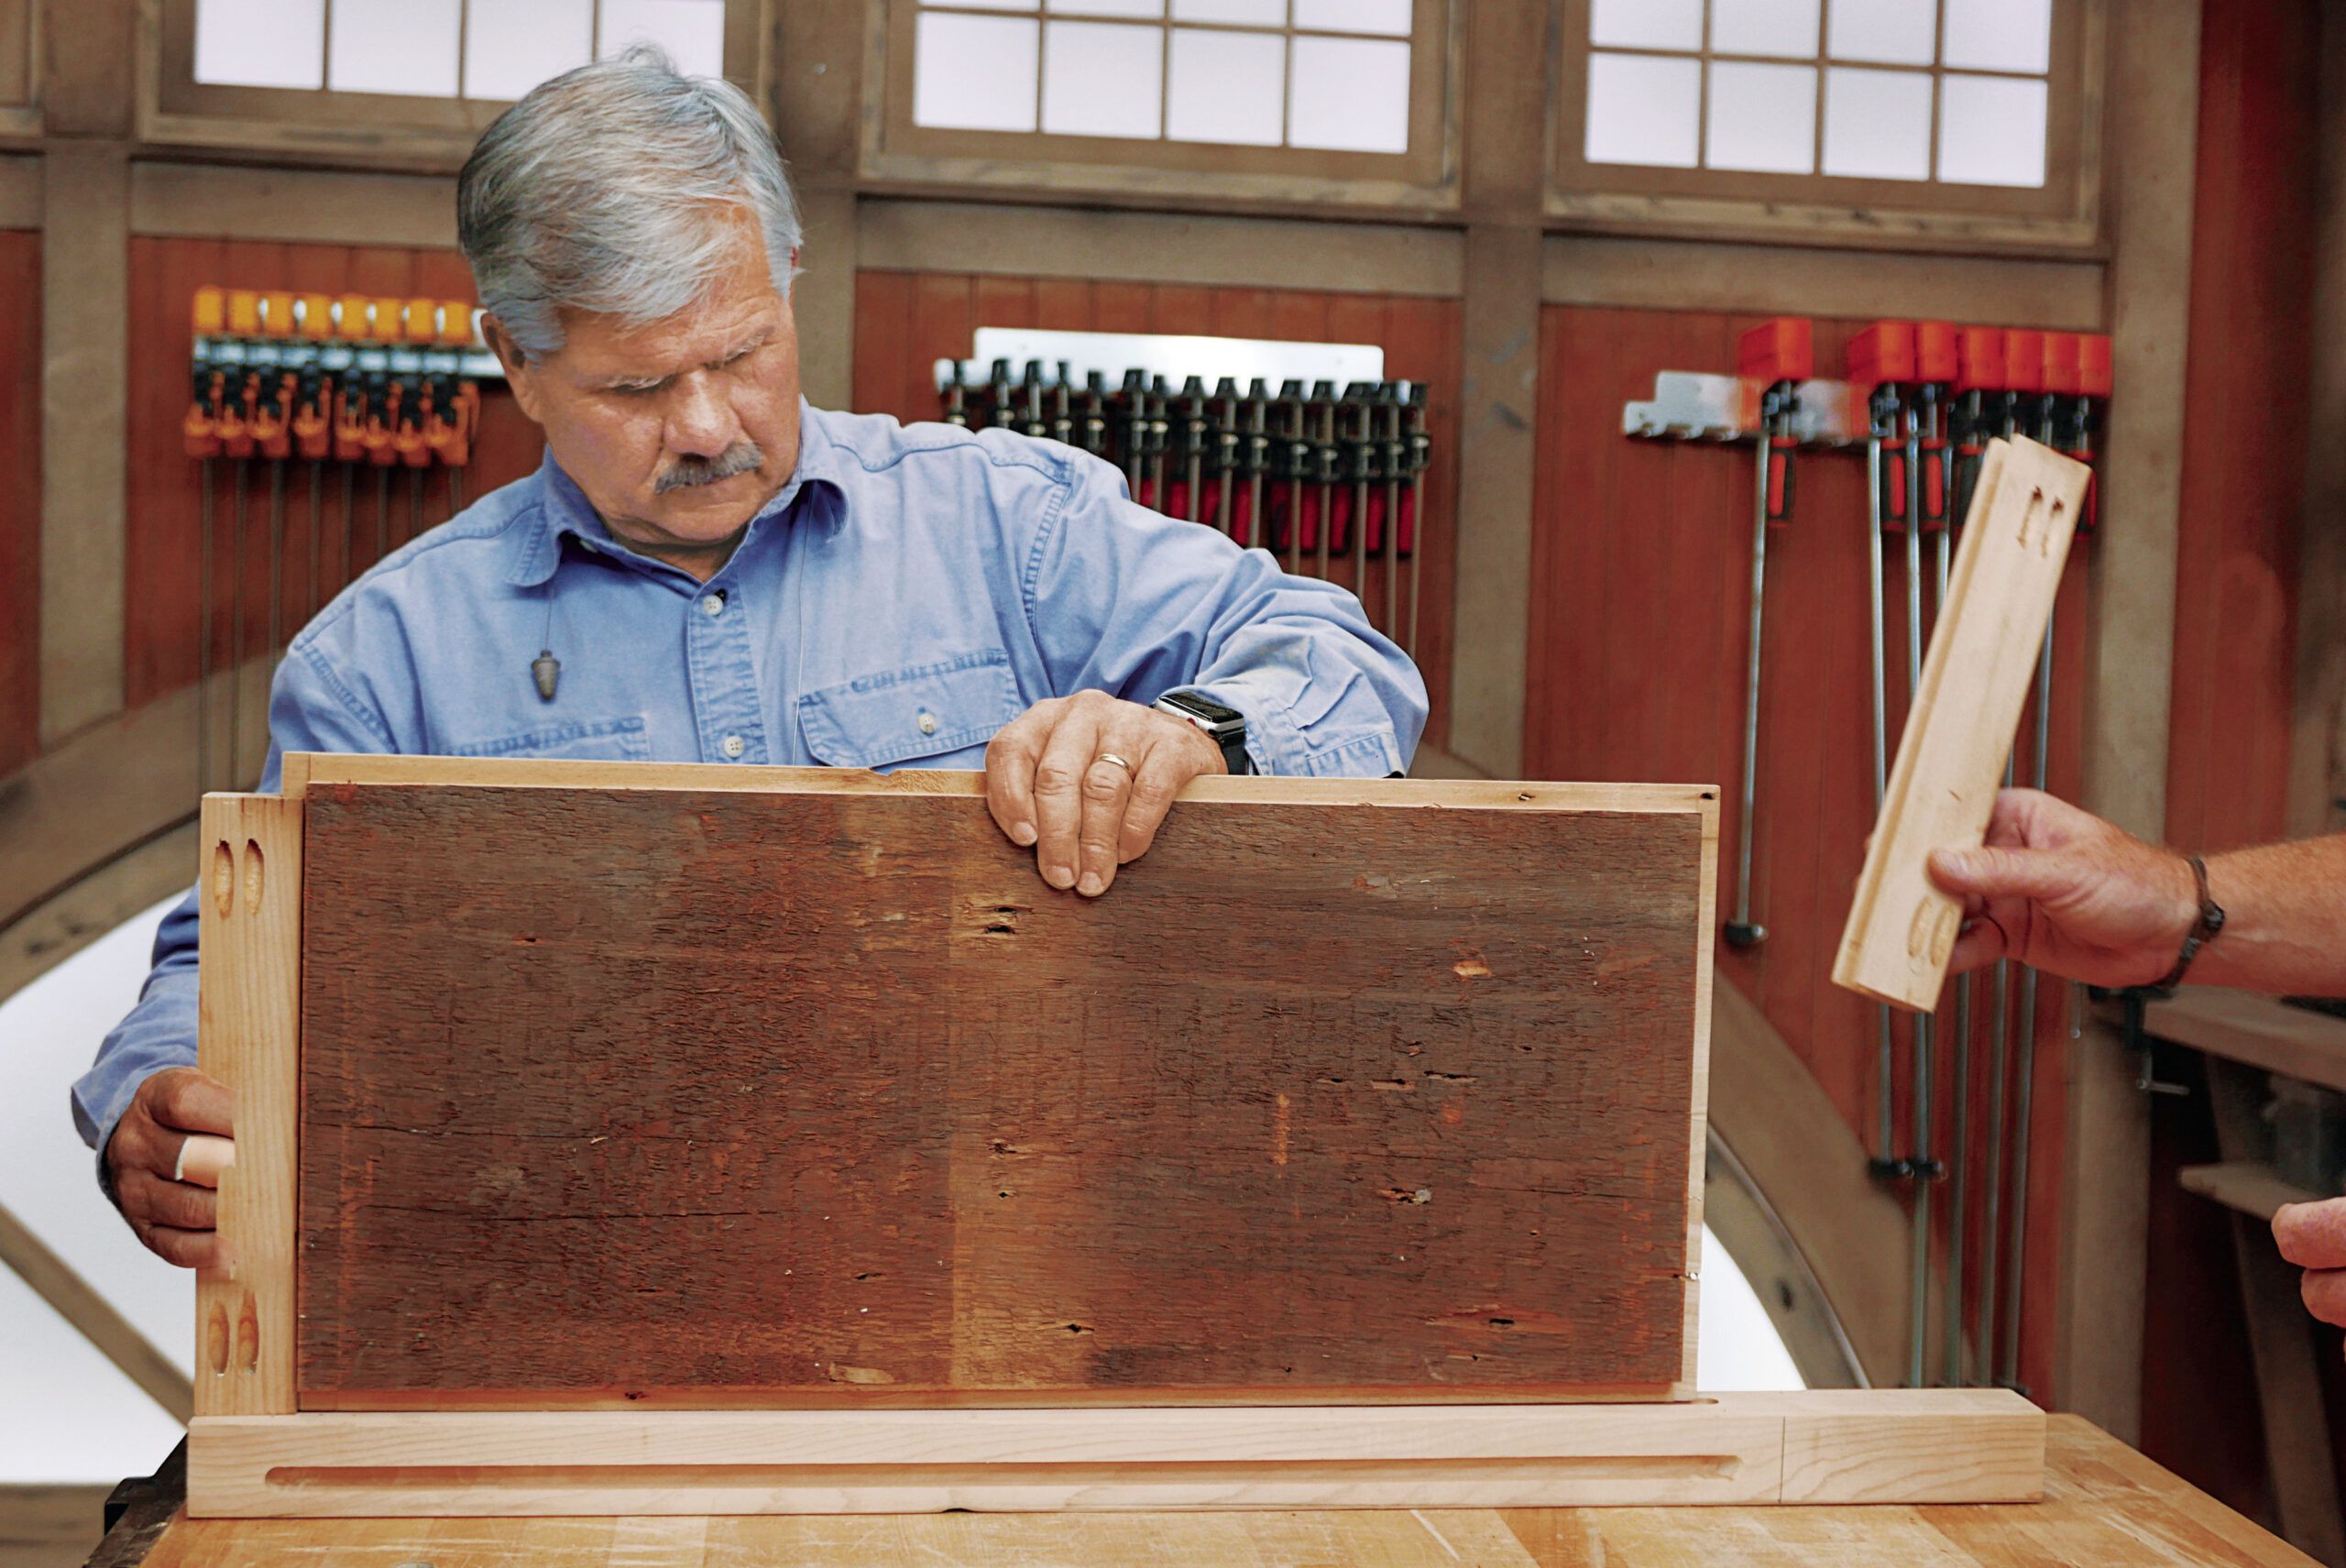
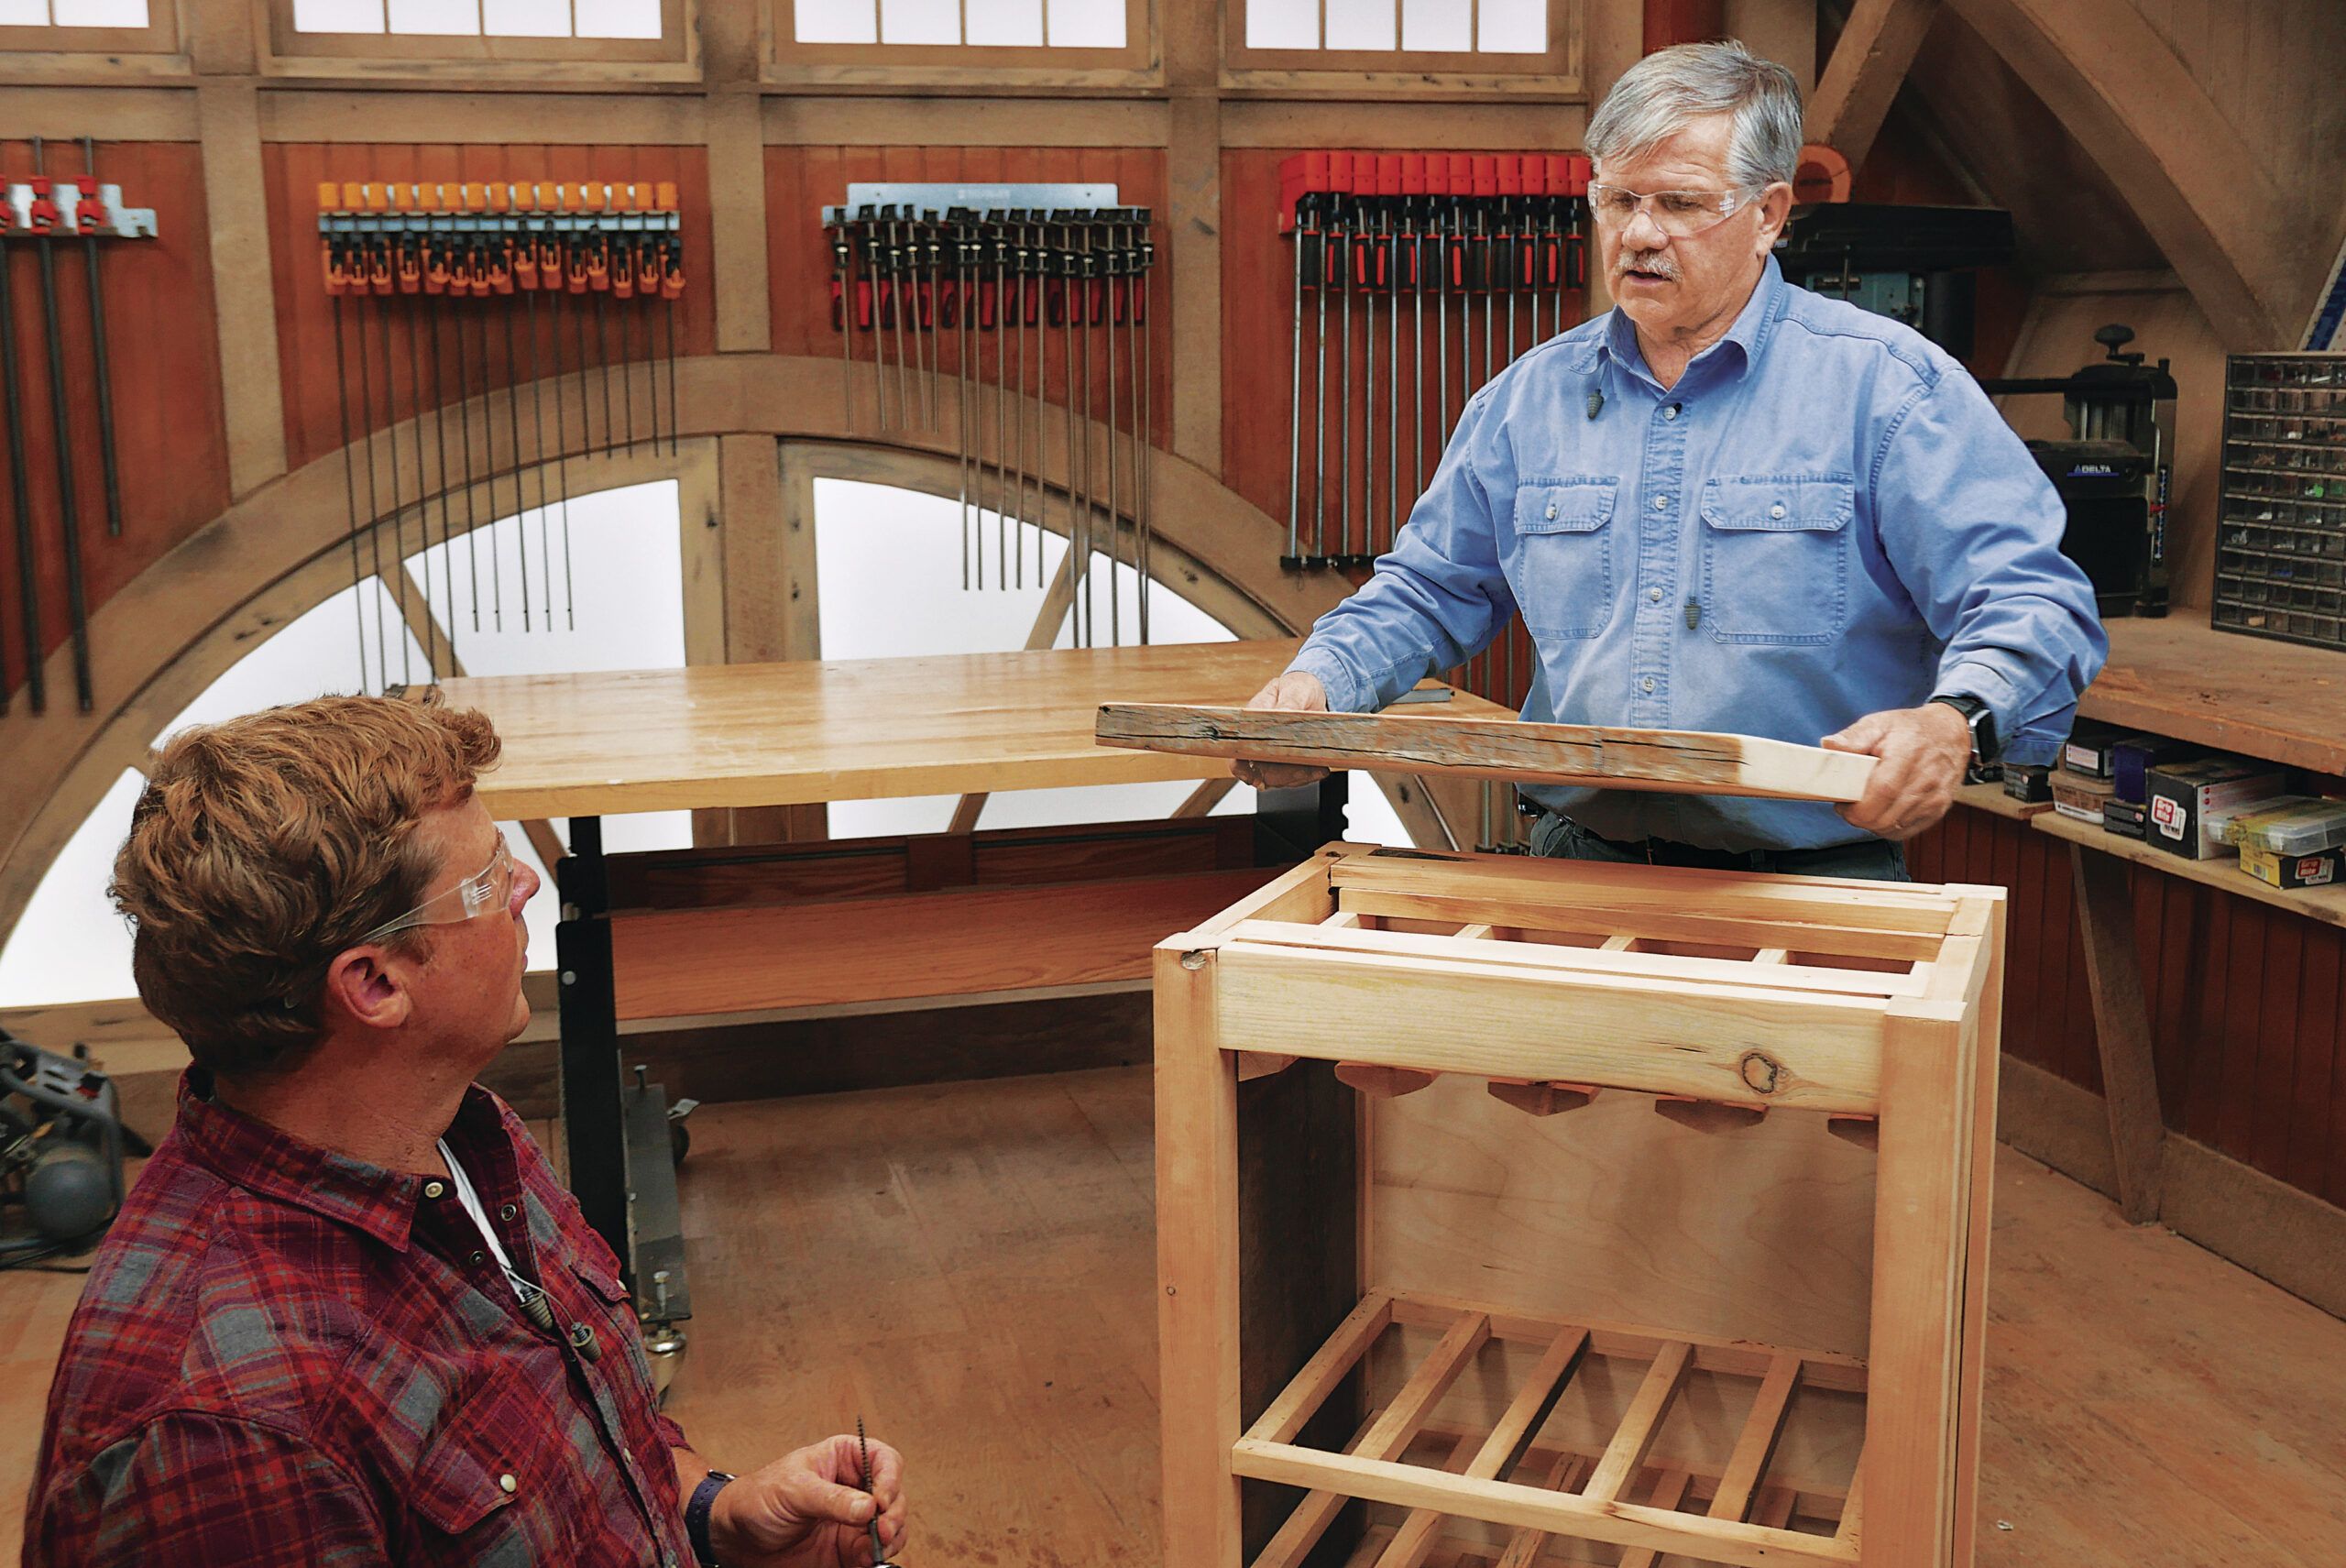
Step 9: Finish the Cabinet Assembly
Slide the plywood once more panel into the dadoes of the vertical rails assembled in Step 6. Use a framing sq. to seek out the amenities of the racks on the panel’s once more aspect, then brad-nail the panel to them. Place the remaining aspect piece subsequent to the once more panel assembly.
Apply glue to the aspect piece legs, then fastidiously flip all the cabinet assembly onto the glued areas, turning into the once more panel into the leg dado. Secure the cupboards to the legs with brad nails on the glue components. Full the aspect connection by driving pocket hole screws into the front and back legs. This remaining assembly step integrates all of the individual parts proper right into a sturdy unit.

Step 10: Make the Stemware Holders
In your desk seen, create side-by-side, 15-degree bevels inside the 5/4×4 stock. Scale back the gadgets to dimension and use a block airplane to spherical over the edges. Glue a 1×2 to the unbeveled aspect of each piece. As quickly because the glue has dried, decrease one piece in half lengthwise to create two narrower holders. These will form the slots by means of which the underside of your stemware will slide.

Step 11: Add the Stemware Holders
Set up the stemware holders parallel to 1 one different, inserting the half-width gadgets on each aspect. Secure them by brad-nailing two crosspieces on excessive. Insert the assembled holders into the cabinet above the best shelf, positioning them in opposition to the horizontal 1x gadgets inside the cabinet’s excessive, entrance, and once more. Glue and nail the crosspieces to secure the assembly in place. This perform gives a helpful and fascinating facet to your wine rack.
Step 12: Secure the Excessive
Join the best to the cabinet by driving screws from beneath. To finish the piece, apply 5 coats of wipe-on polyurethane to the legs and sides. For the best, use a black polyurethane stain adopted by three coats of gloss polyurethane for a putting distinction and durable finish. Give the best a remaining mild sanding after the coats have dried for a simple, elegant look.
Sourcing Salvaged Picket
Start by searching native suppliers, along with architectural salvage yards and on-line marketplaces like Craigslist. Some Etsy sellers moreover provide reclaimed wood applicable for small duties. To avoid wasting numerous time and effort, steer clear of painted wood or gadgets that require in depth denailing.
When deciding on wood, seek for gadgets with safe knots and tight grain patterns, as these traits usually take stain fantastically. For those who occur to don’t have entry to salvaged wood, don’t worry—it’s essential use lumberyard stock or mix in reclaimed gadgets from specialised sellers. Make sure the wood is free from rot and bugs, and clear it appropriately sooner than use. This gives a singular contact to your wine rack, making it actually one among a kind.
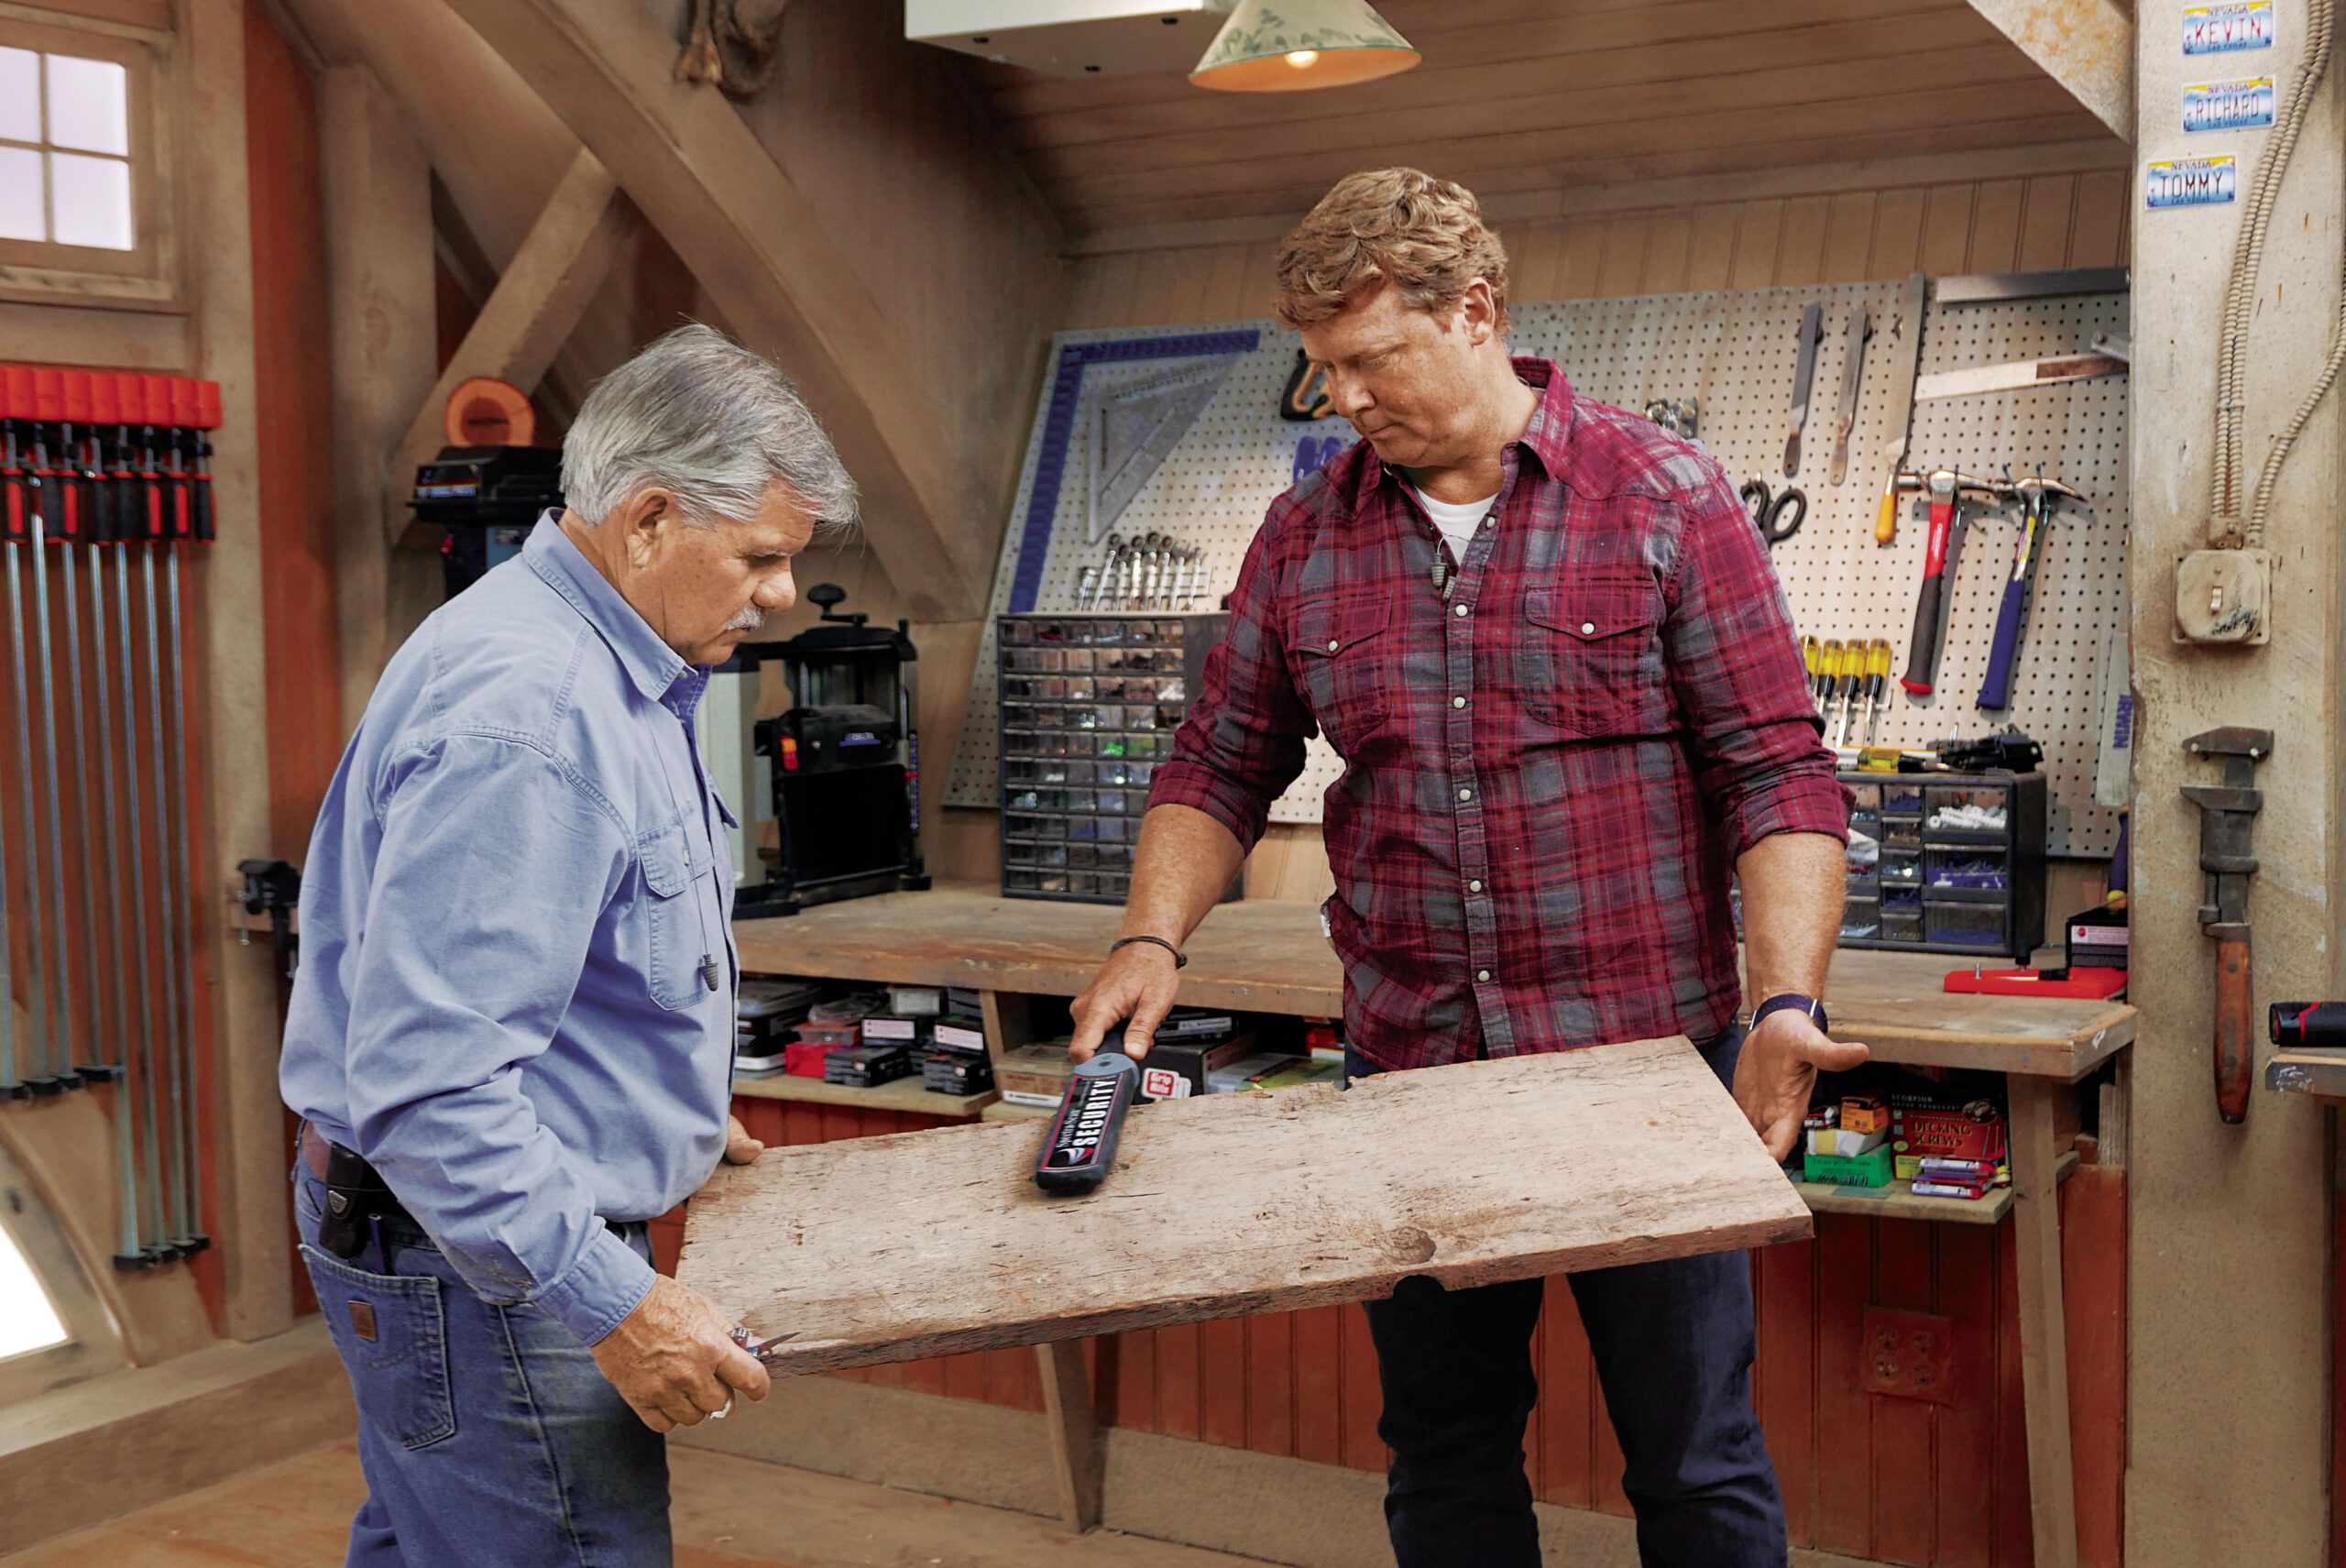
When working with reclaimed wood, use a handheld metal detector to seek out any hidden nails or metal gadgets. These can hurt your devices and compromise the integrity of your mission. Scan the wood utterly, and while you detect any metal, fastidiously take away it sooner than persevering with. This helps your devices keep in pristine scenario and your mission progress simply.
Additional Concepts
When deciding on wood for this mission, use reclaimed white pine or totally different salvaged lumber with tight grain patterns. For those who occur to don’t have entry to reclaimed wood, quite a few types of lumber from home amenities and lumber yards might be applicable alternate choices. Search for prime quality wood that’s free from important defects.
For assembly, use a high-quality wood glue resembling Gorilla Glue. To realize the required finish on the best, apply a black wood stain, then sand it flippantly to reveal various the wood grain sooner than coating it with wipe-on polyurethane. These ending provides, along with totally different gives needed for the mission, might be found at most home amenities. On a regular basis adjust to the producer’s ideas for utility and safety.